Finalising Rig
Before starting the simulation I like to add a little extra functionality before publishing the rig. I’m a visual person so the first port of call is colour. When building the rigs groups I didn’t explicitly mention the outliner colours but I will explain the rational behind that now.
The colour convention can be anything really but I chose red as this is the Input and the first connection point. Yellow is used to match Maya’s dynamics system colours. The finalling is a shade of blue, clearly different to the input. Green means go. I stay with primary colours and if an area becomes difficult to see switch to Use Default Material. You can also use textures such as a checker, helpful to show stretching.
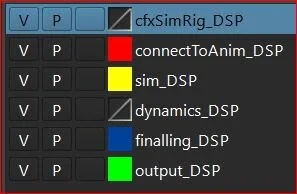
The display layers really help to keep the rig clean and improves the visual organisation. The geometry in the rig also follow the same colour convention.
Any sim rig needs to be tuned to get the correct look, certain settings can be changed before the initial publish. First the nucleus, from my experience the standard settings are a little light and need some adjustment.
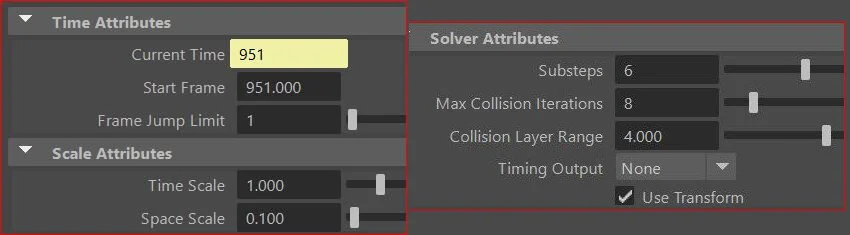
I always have at least 50 frames of pre roll for when simulating and set my animation to start at 1001. This is ample time for the cloth to initialise and settle before launching into the simulation. Setting the nucleus start frame here can save you having to do it everytime you load in the rig. The standard Substeps and Max Collision Iterations are a little low at 3 and 4. A good rule of thumb is to double the numbers each time you increase the quality, 3,6,12,24 etc.
The creation of sets will help you to quickly select and manipulate values. You can separate the rig into as many or a few sets as you like.
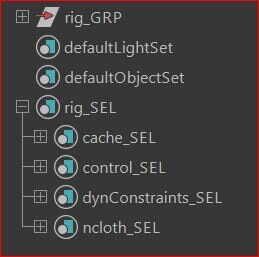
cache_SEL holds the output render geometry
control_SEL holds the main cfx control
dynConstraints_SEL holds the constraints
nCloth_SEL holds the cloth objects
Make sure to add the shape node for the constraints this will help when you come to use presets. A normal drag into the set will only give you the transform node, you’ll want the shape as that contains all the relevant data you’ll be needing.
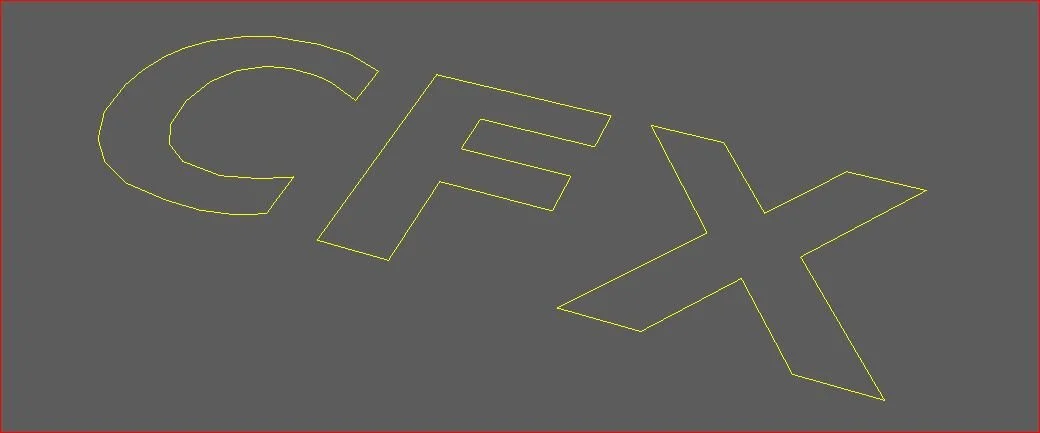
Once we have everything all connected up, initial constraints made, layers and colours added we can make our main control for the rig. This works like a global control in a standard animation rig. This will enable the sim rig to be moved into position. The control can be anything, I made my default one to spell out CFX. This control can also be used to add custom attributes, I often add the nucleus settings to it.
The control will use the transforms from the locator we added to the animation rig to get the sim rig into position so make sure the transformations are clean.