Rig Connections
Blendshapes are used to connect the geometry in the rig both internally and for the external connection when connecting to the animation. Blendshapes have two main settings, Local and World, we will use the later for the rig. For the rig you want each connected geometry to be exactly the same as it’s parent. It might not be entirely obvious when building using the bind poses.

We have several internal connections and one main external connection. The cached animation is the driver for our rig and gives it the starting position in the world and tells the solver where the cloth is at any given time in the animation. The initial connection blendshape is made in the normal way, Driver - Driven.

There are 3 main connections we need to make for our rig to function.
Animation cache drives the CtA geometry.
CtA drives the simIN geometry.
Both CtA and simIN drive the FnL geometry.
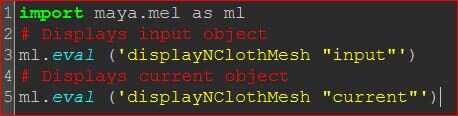
Creating the connections to the cloth geometry works differently. Maya displays only the current mesh so we need to switch the display, connect the input and switch it back. This is a very tedious procedure, once you do it once and understand the principles you’ll never want to do this again. I’ve added a little code that you can use to quickly switch the display.
I like to setup up in built finalling for all of my sim rigs, it can really speed up the process and having the ability to quickly blend back to the animation can be a huge life saver. To get this to work we have to create mulitple blendshapes, We want the finalling geometry to be connected to both the CtA and SimIN_OUTPUT. This will give us the option of being 100% simulation, 100% animation or any kind of blend between the two.
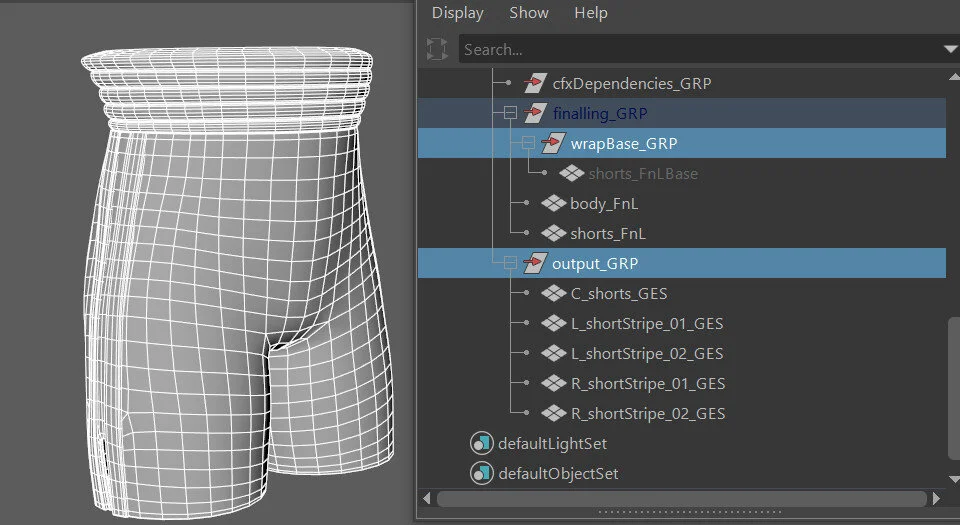
The final part of setting up the connections is how the render geometry will function in the rig. All we want to do is export out the the high resolution mesh and have it deformed like our sim geometry. Wrapping the high res to the low res finalling geometry works incredibly well. The shorts consist of 5 parts where our sim mesh is only one much more simple mesh. Here we use Maya’s standard Wrap deformer, we can select all 5 meshes and perform the wrap. You’ll notice that Maya has only created 1 Base mesh, this helps keep the rig light. You can wrap each part separately also but you’ll generate 5 Base meshes, extra geometry means heavier rig, sometimes this is unavoidable.