Table Top
A father reads his son a passage about a famous General and later that night a miniature skirmish begins.
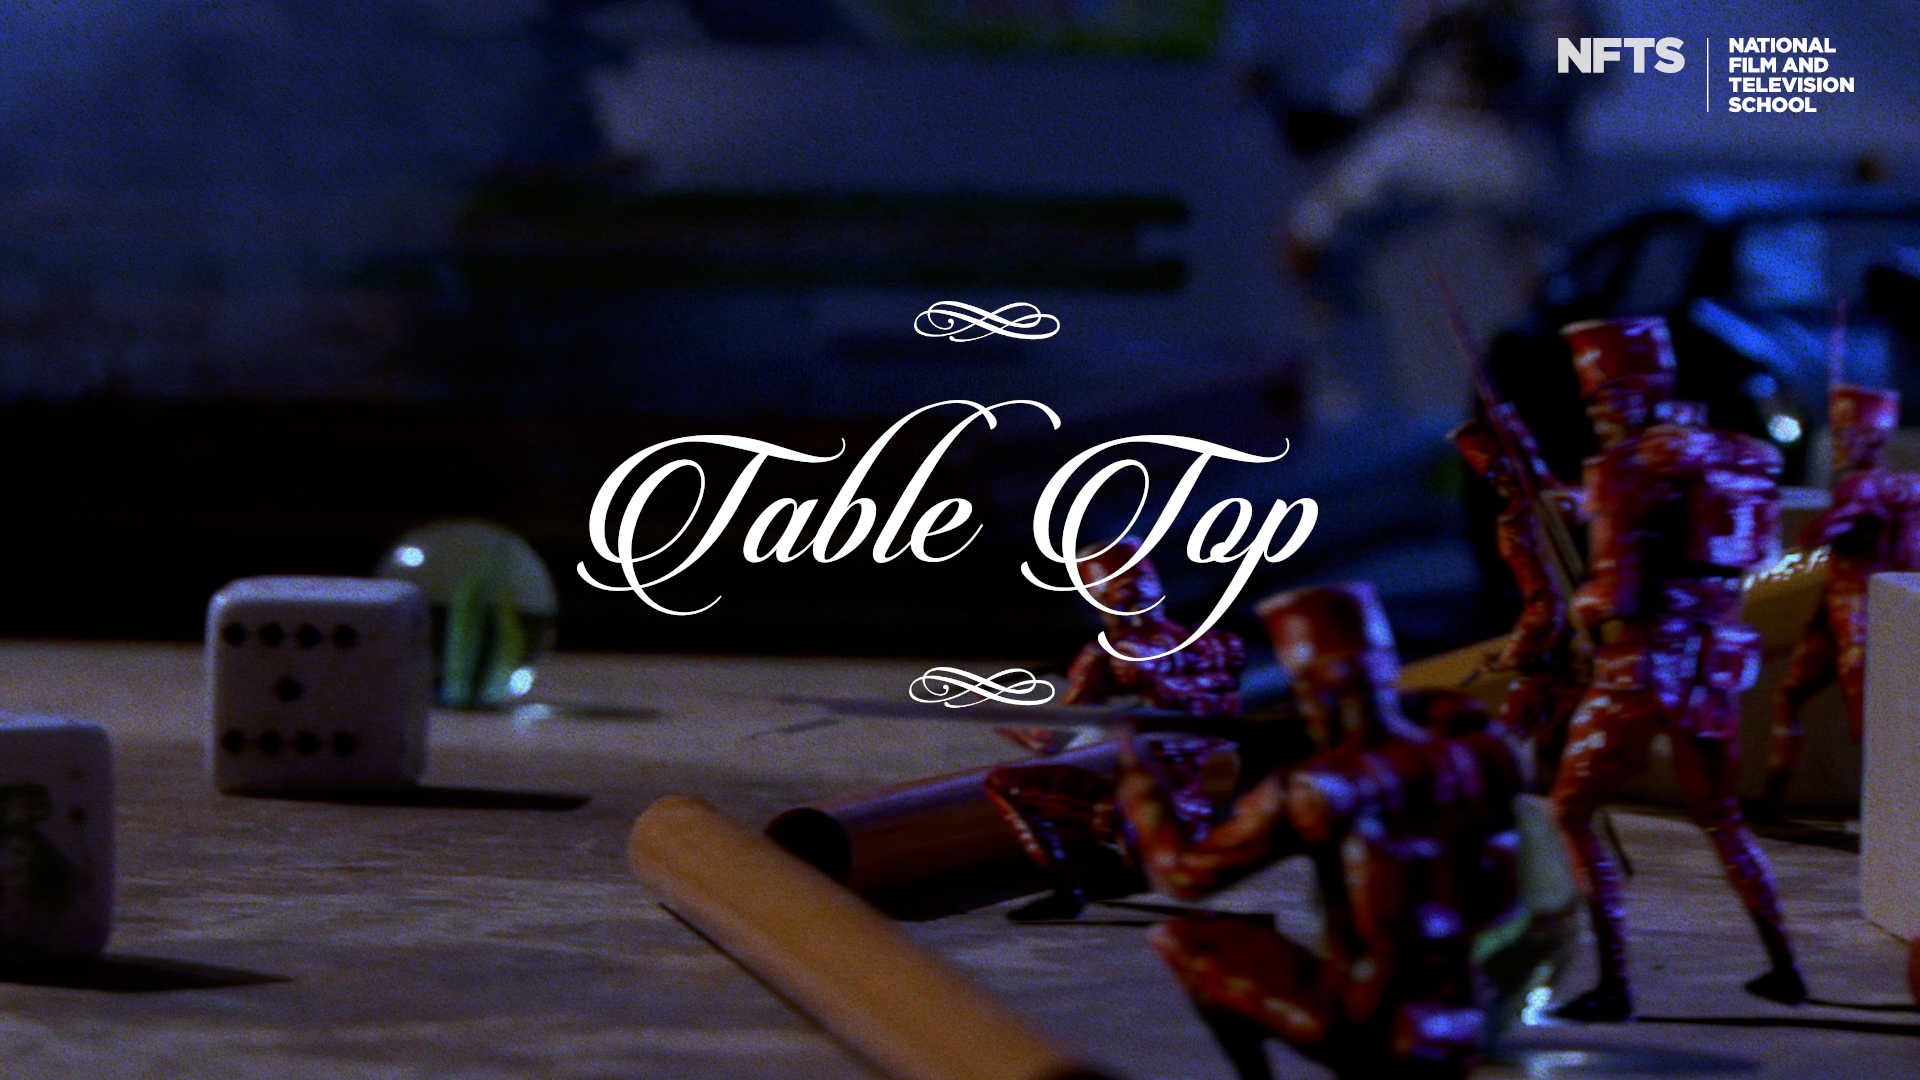
Table Top started life as part of the motion capture module at the NFTS. I wanted to make a short film, surrounded by filmmakers - it was the logical decision but also nerve-racking to step up and direct.
Planning
The storyboard was crude but was enough to get the class on board with the idea of telling this story and piggybacking the motion capture module.

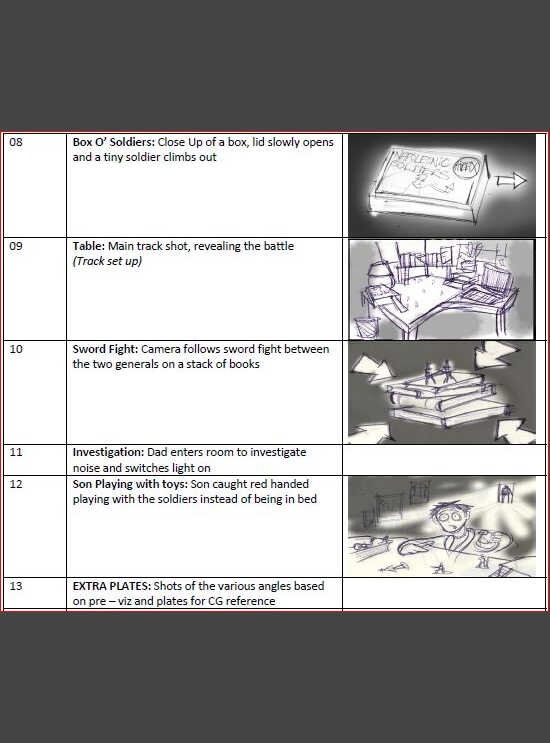
The boards were drawn up in order to organise the motion capture, the shoot itself would take place at Centroid3D at Pinewood studios in England.
Research


I’ve always been interested in the Napoleonic era, probably from watching the television series, Sharpe as a little lad. The technology of the time played into my idea of capturing a variety of motions during motion capture — Both ranged and hand to hand combat.


To alleviate some of the stress during the 3D build I decided that the soldiers would be either blue or red, this removed any unnecessary texture work. I wanted to concentrate our efforts on the story and the motion capture performance and clean up. Having a solid colour would be far less complex to match to it’s real counterpart.


I’m hugely influenced by the films I watch and I used these to build the look of the film and the ideas for certain actions.


The bedroom from Princess Bride is perhaps one of the best 80’s movie bedrooms so I wanted to capture that. The trailer for Two Towers had a miniature shot with CG combatants, I wanted to try and mimic that also.
Motion Capture, Centroid3D and Pinewood Studios

Before we ventured over to visit Centroid3D for the shoot, we had to prep a skeleton and basic soldier model for use during the mocap shoot. The model was very basic but helped visualise the motions much better.
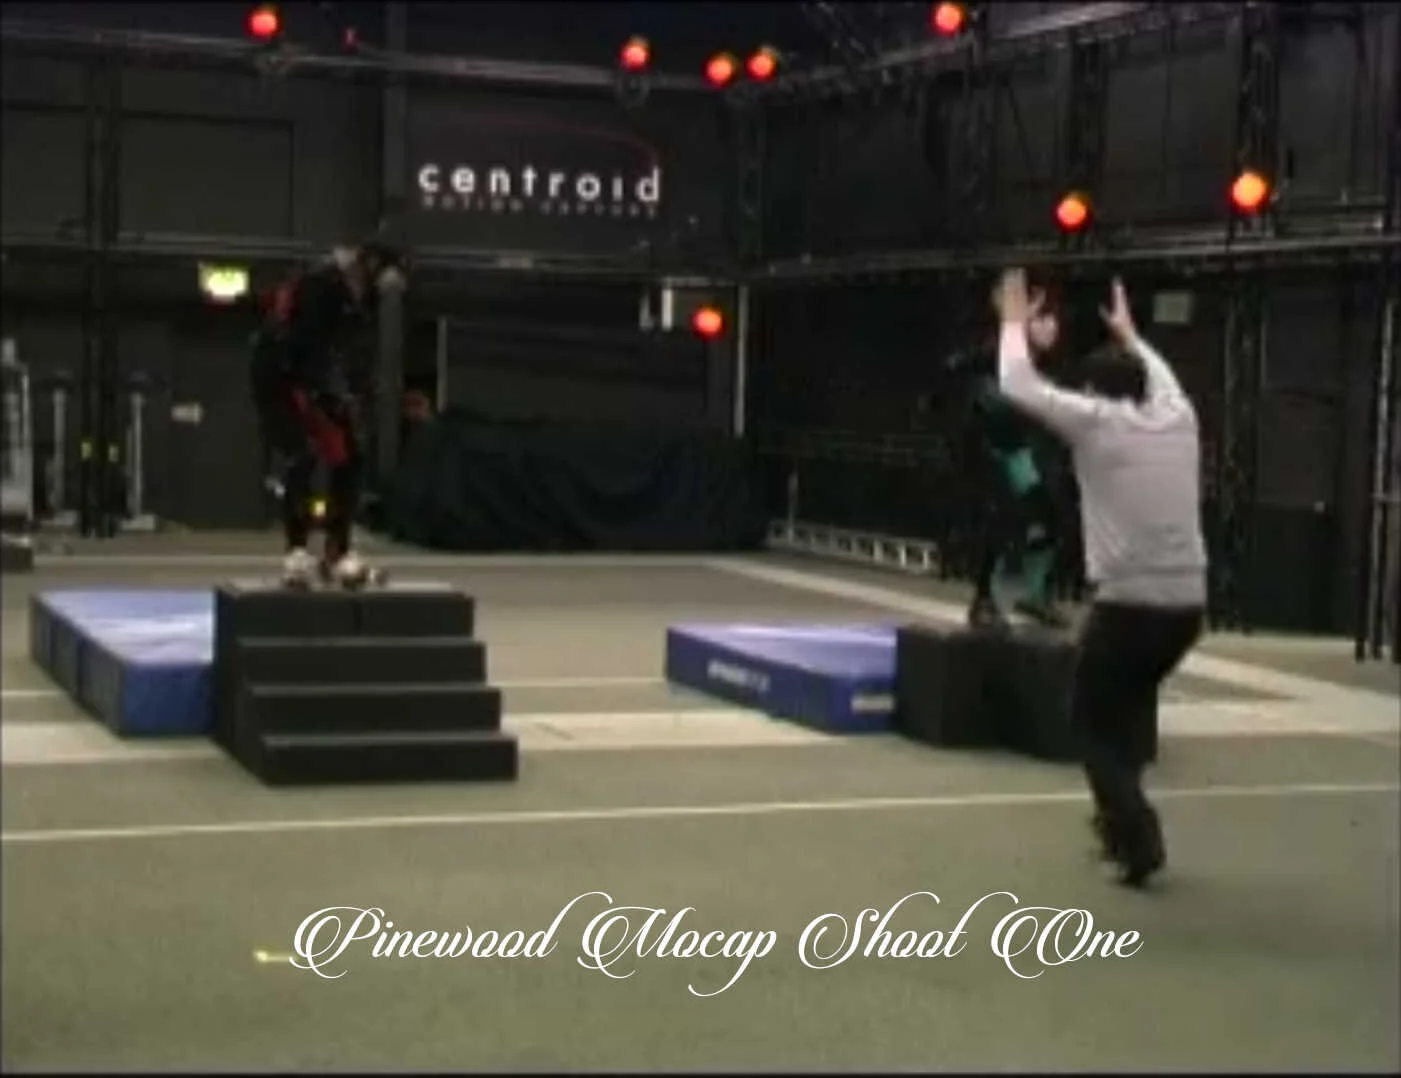
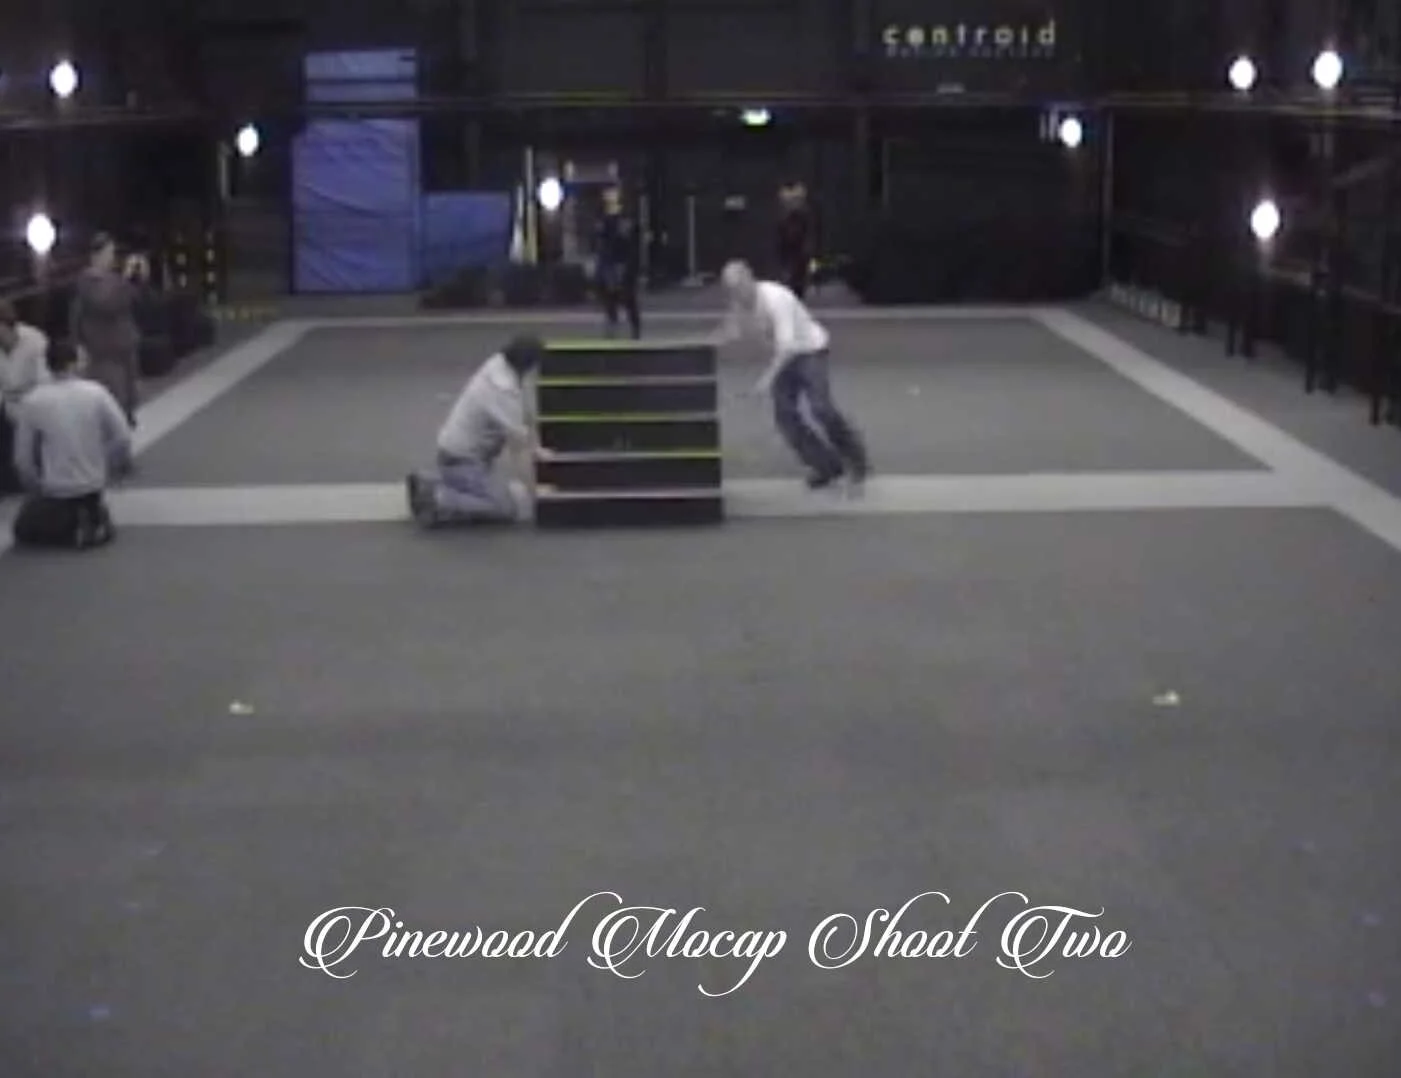
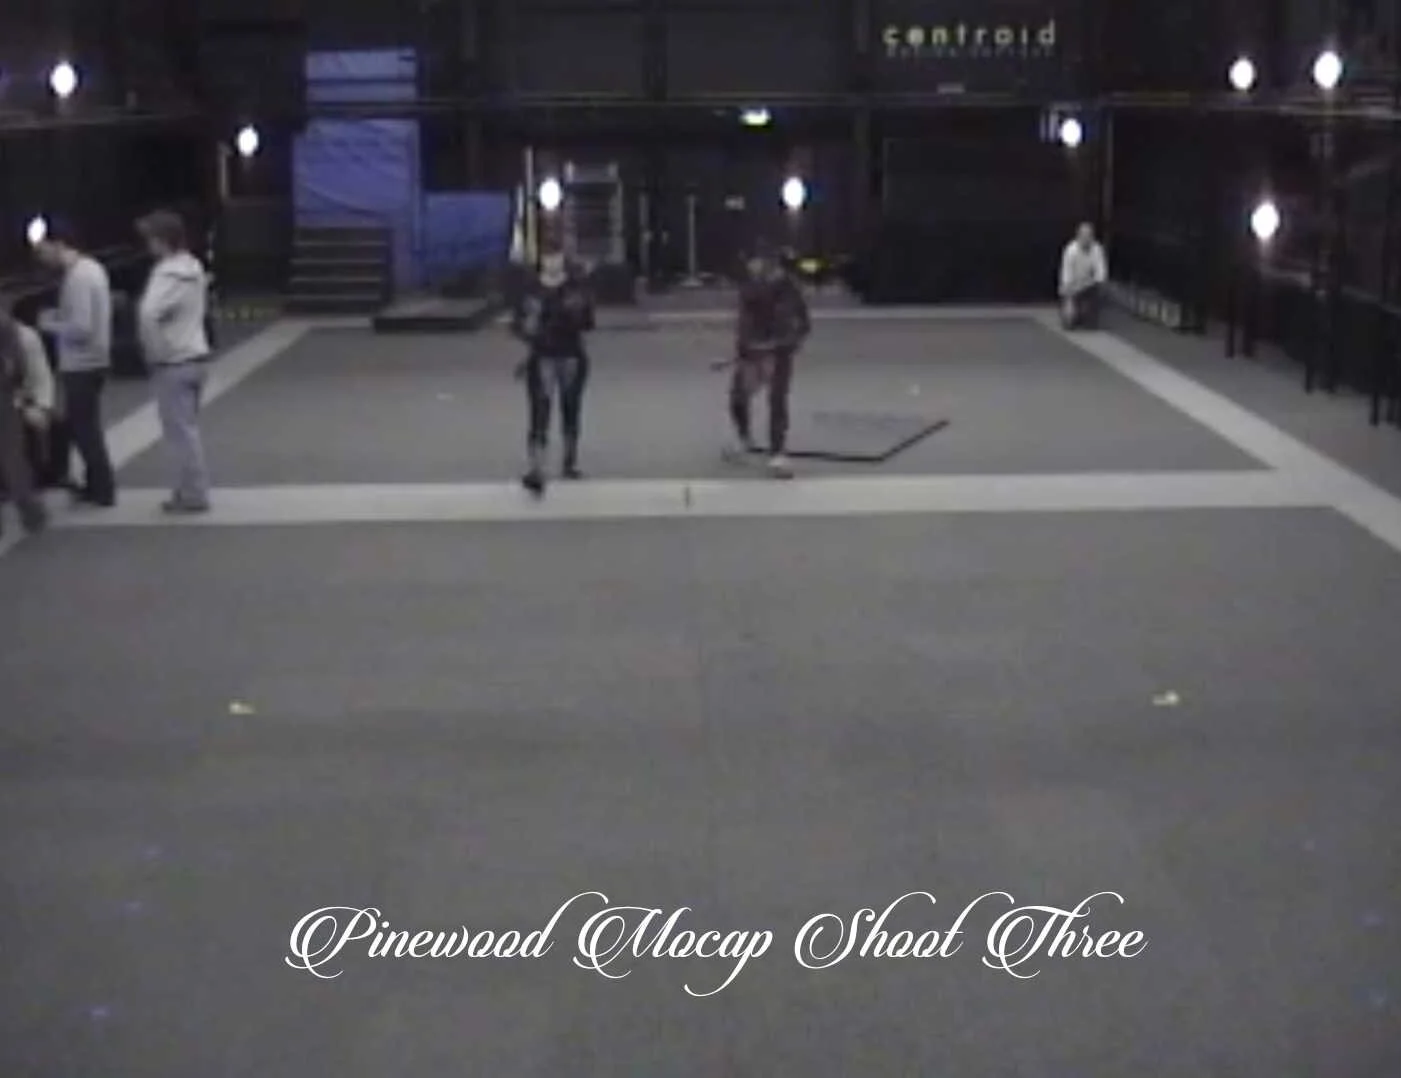
A selections of witness cams from the shoot at Pinewood. It was a great experience to direct the mocap performance and I was helped by an incredibly talented team at Centroid.
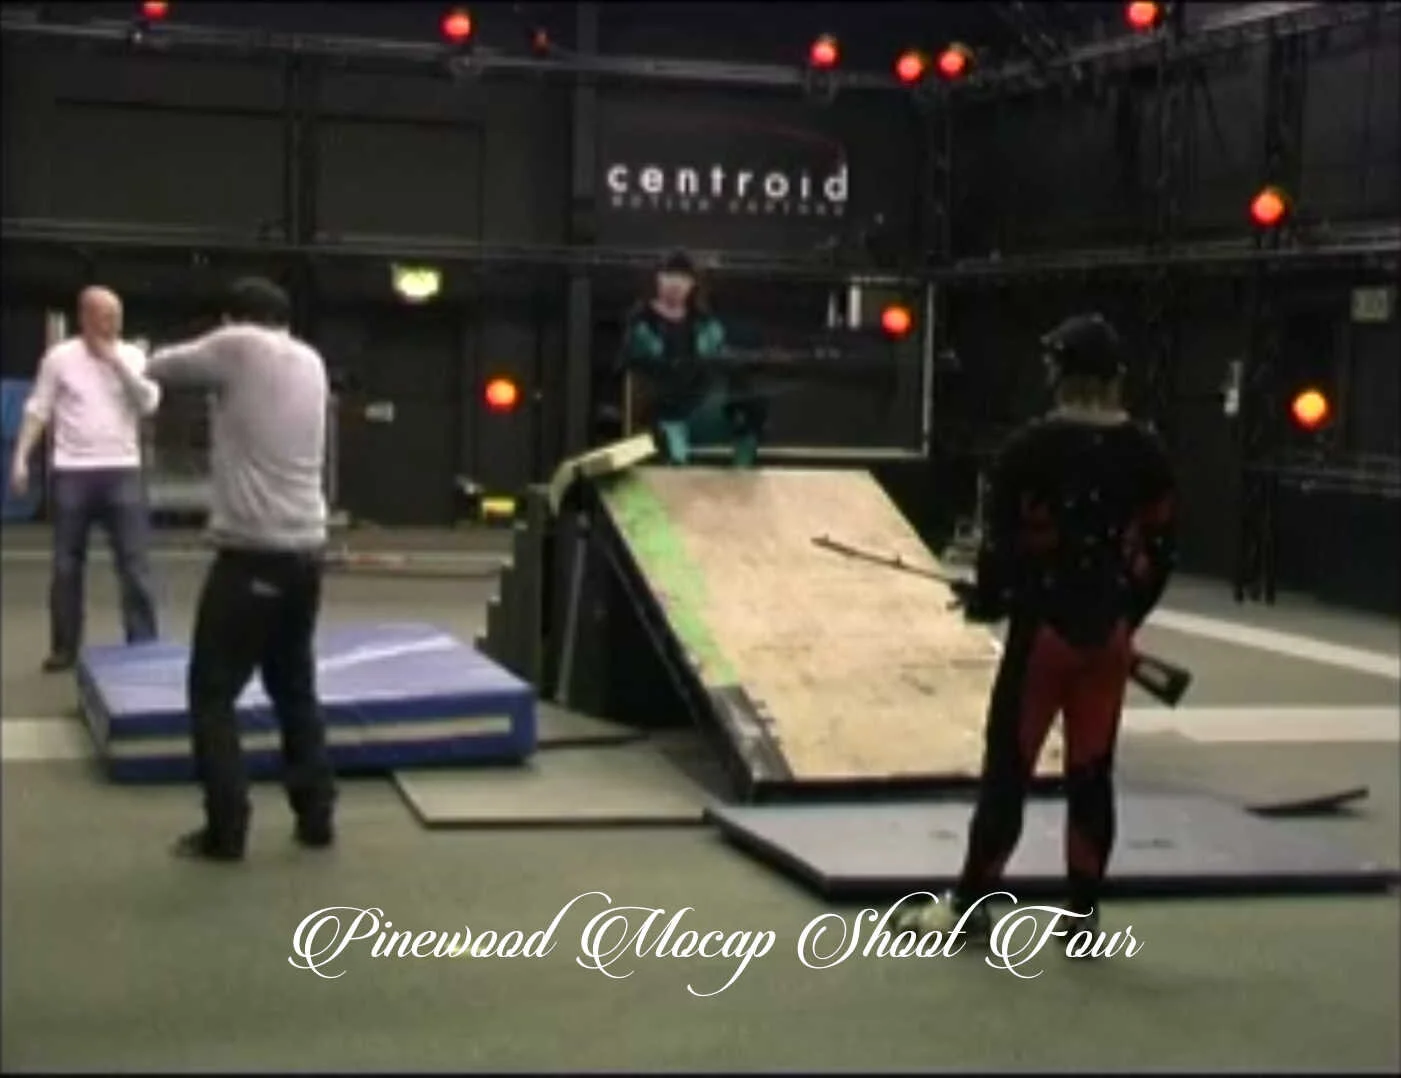
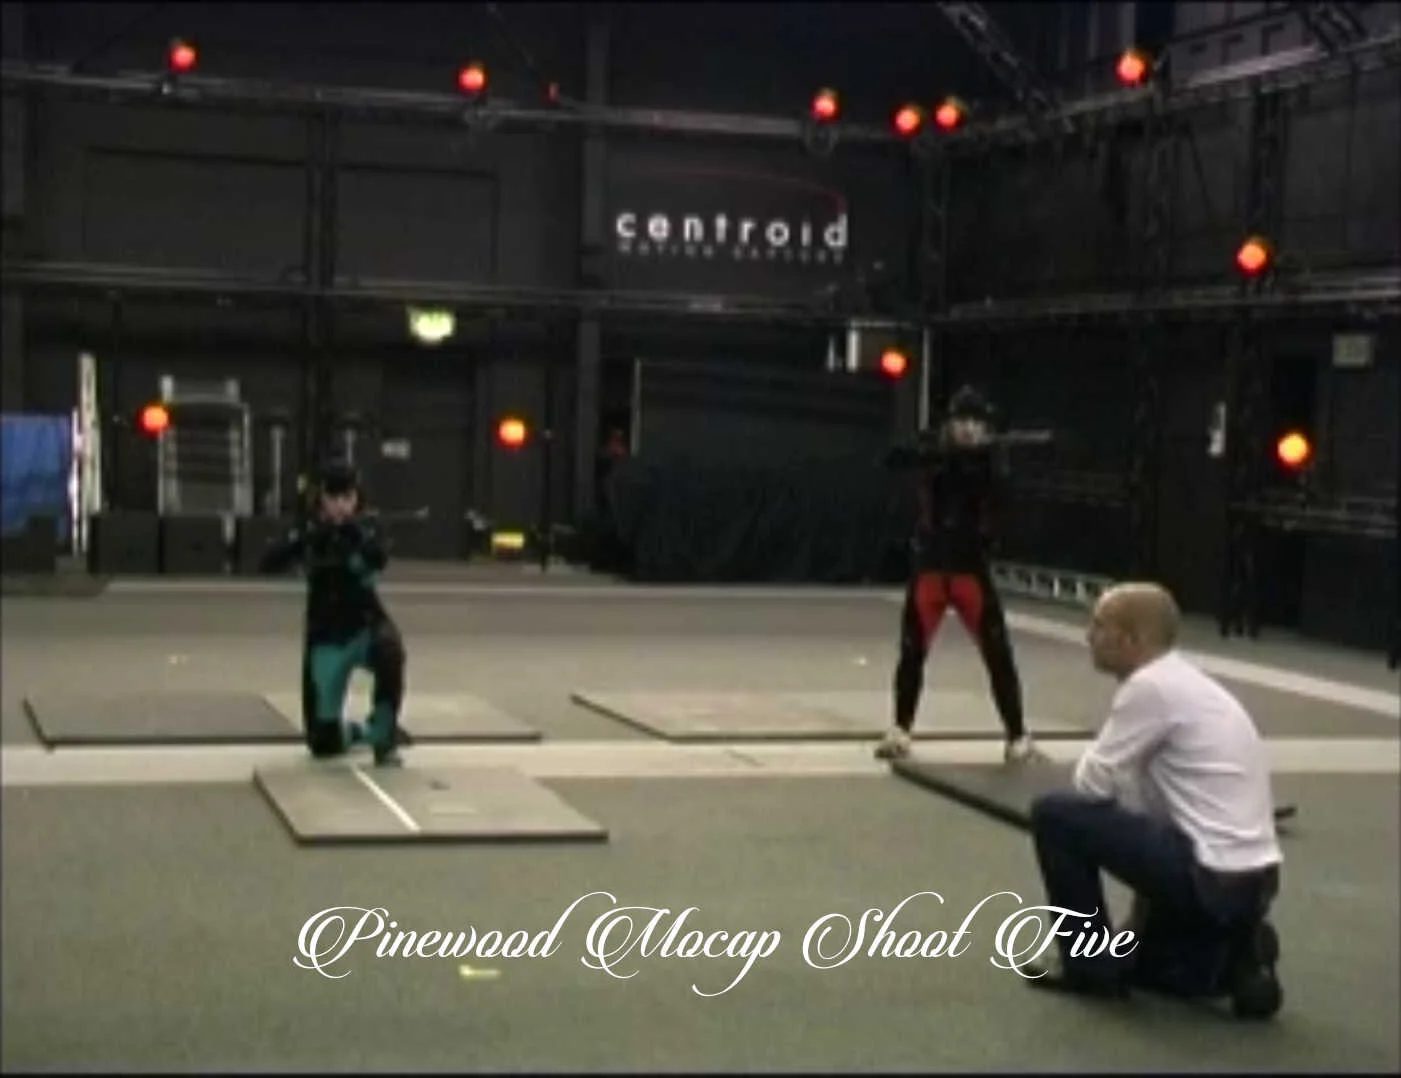
I had created a rough shot list of general actions that I wanted, marches, runs, firing, being hit and death falls. We shot over the course of a full day, we captured some awesome data.
These are the direct motion builder feeds I used to see the performance on the crude set geo. The raw motion capture looked amazing, we were all very excited to get our hands on this data.
Principal Photography

Had to get a shot of the clapperboard. It was such a great experience directing both the motion capture and the live action.
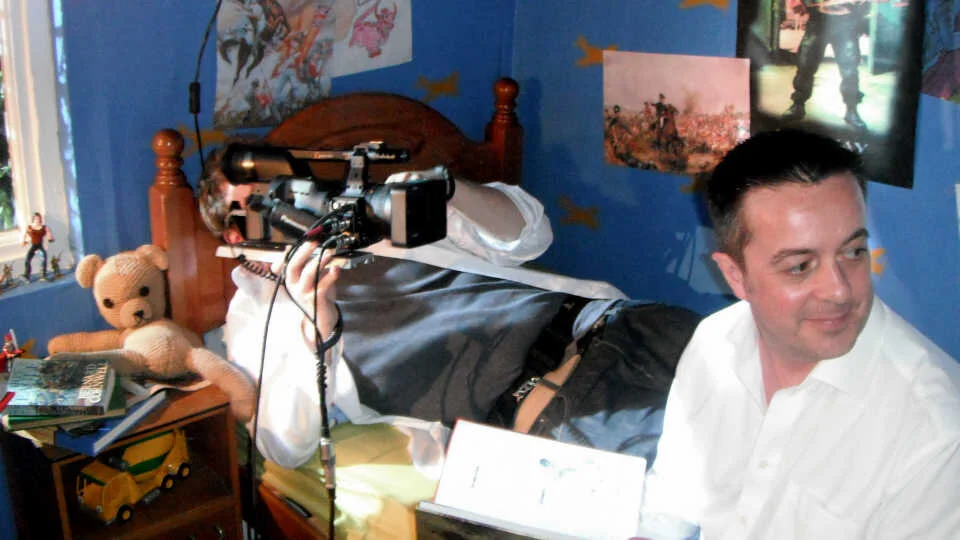
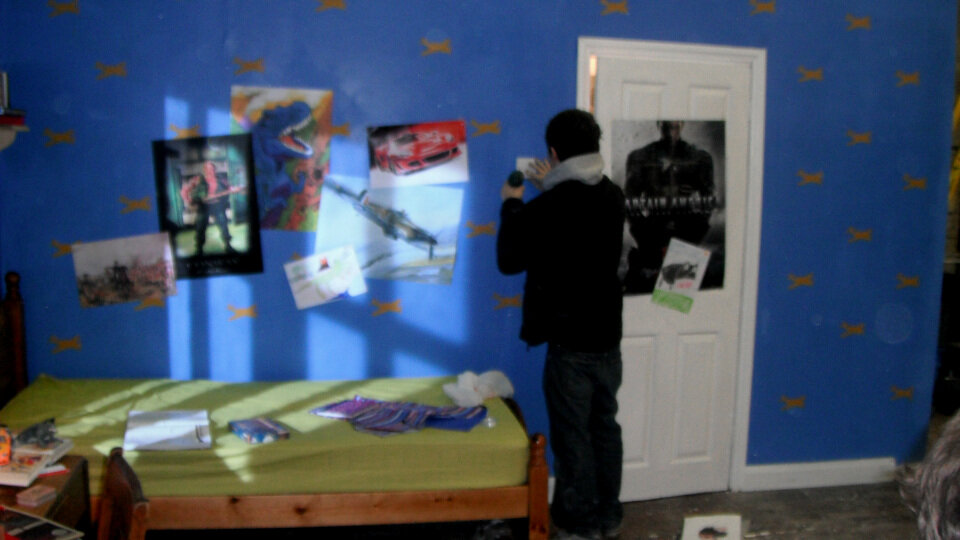
The photography was handled by a good friend during film school, we’ve since collaborated together on his first feature. Budgets are always the bane of any production but our course head and his little boy made cameo appearances.


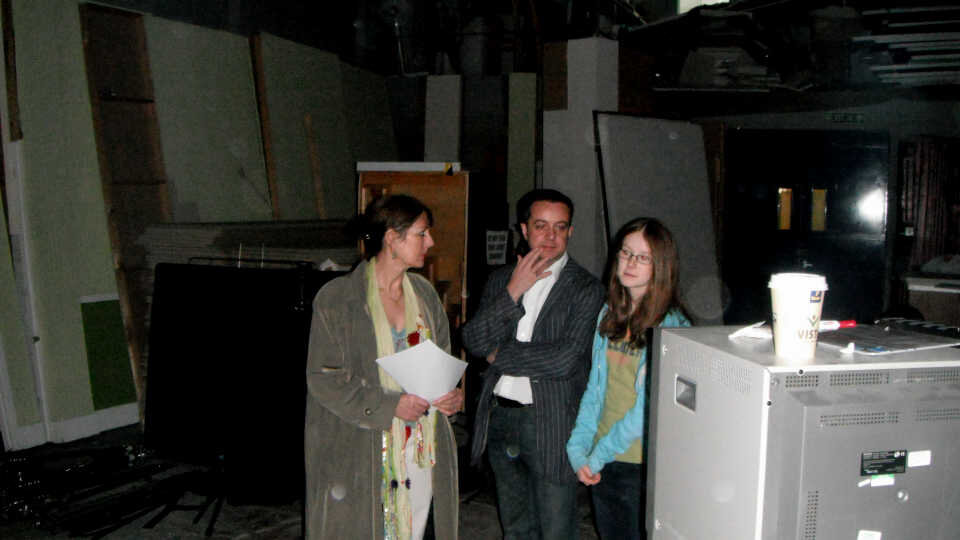
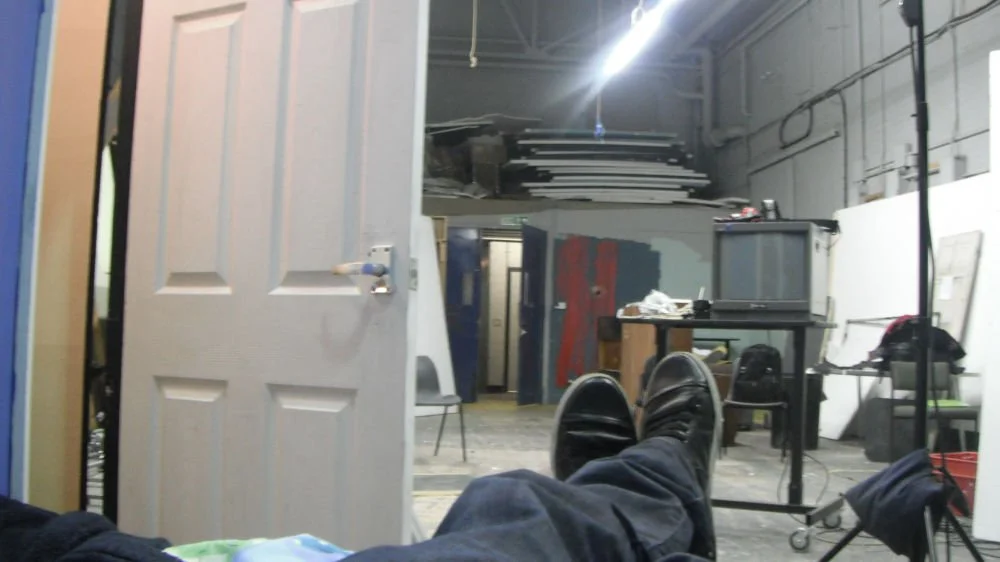
A few shots of my classmates and the course leaders, they had a lot of belief in this little module come film.

I like to reference work within work, we placed a poster of Conway from our earlier class film and a Spitfire. Although at the time it was not hugely relevant but I went on to make a short film during the Pandemic — It’s always about the long game.


I’ve only got one photo of the incredibly talented production designer but it’s of him working. Steve put together a truly wonderful set.

I can remember staying late the night before the shoot helping Steve, it’s one of my most treasured memories of film school.
Production Hiatus & Summer Fiction
The production ironically stopped before the VFX work would even begin. As a class, we all focused on the summer fiction films and prepared for film school graduation. I secured a job in Soho for One of Us. Unfortunately, Table Top was a causality and remained unfinished, apart from a handful of shots.

These are a collection of some of tests that one of my classmates, David Jacobs did while I was away, they were beginning to show real promise.

These were the last we all saw of the film. I’ve often wondered about getting the film finished…

A Decade Later
During the pandemic, I’ve taken the time to learn, create and share my work on a new website. The NFTS has had such a huge impact on my career that I wanted to share some of the wonderful shorts I was part of during my time there. While searching through old drives I came across a folder containing a handful of the assets and a QuickTime movie of the selects. I feel I owe it to my tutors and my class to finish Table Top, here goes nothing…
Taking Stock
The first place I started was to review the original assembly edit. An assembly edit isn’t really reflective of how the final film will look but it did thankfully present me with what I had to work with.
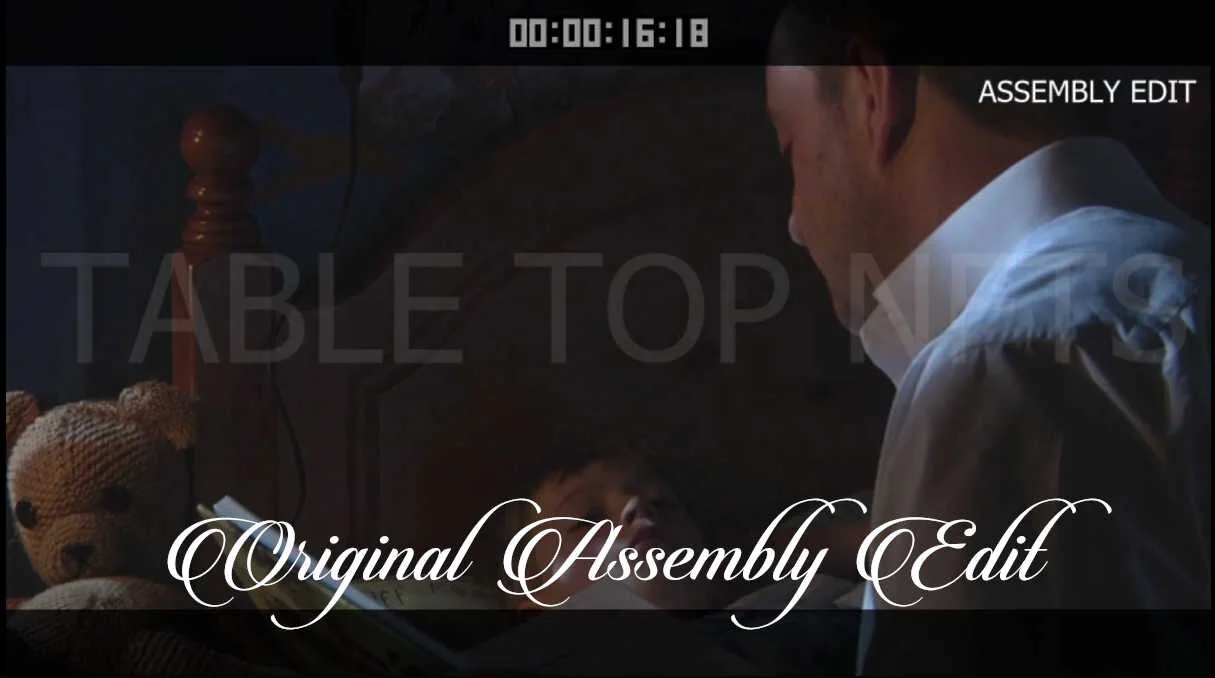
I wanted to be brutal with the edit, distil it down to something that slowly gathered pace whilst setting the story, showing the father and son relationship. The frame holds looked cheap and anything out of focus was disregarded.

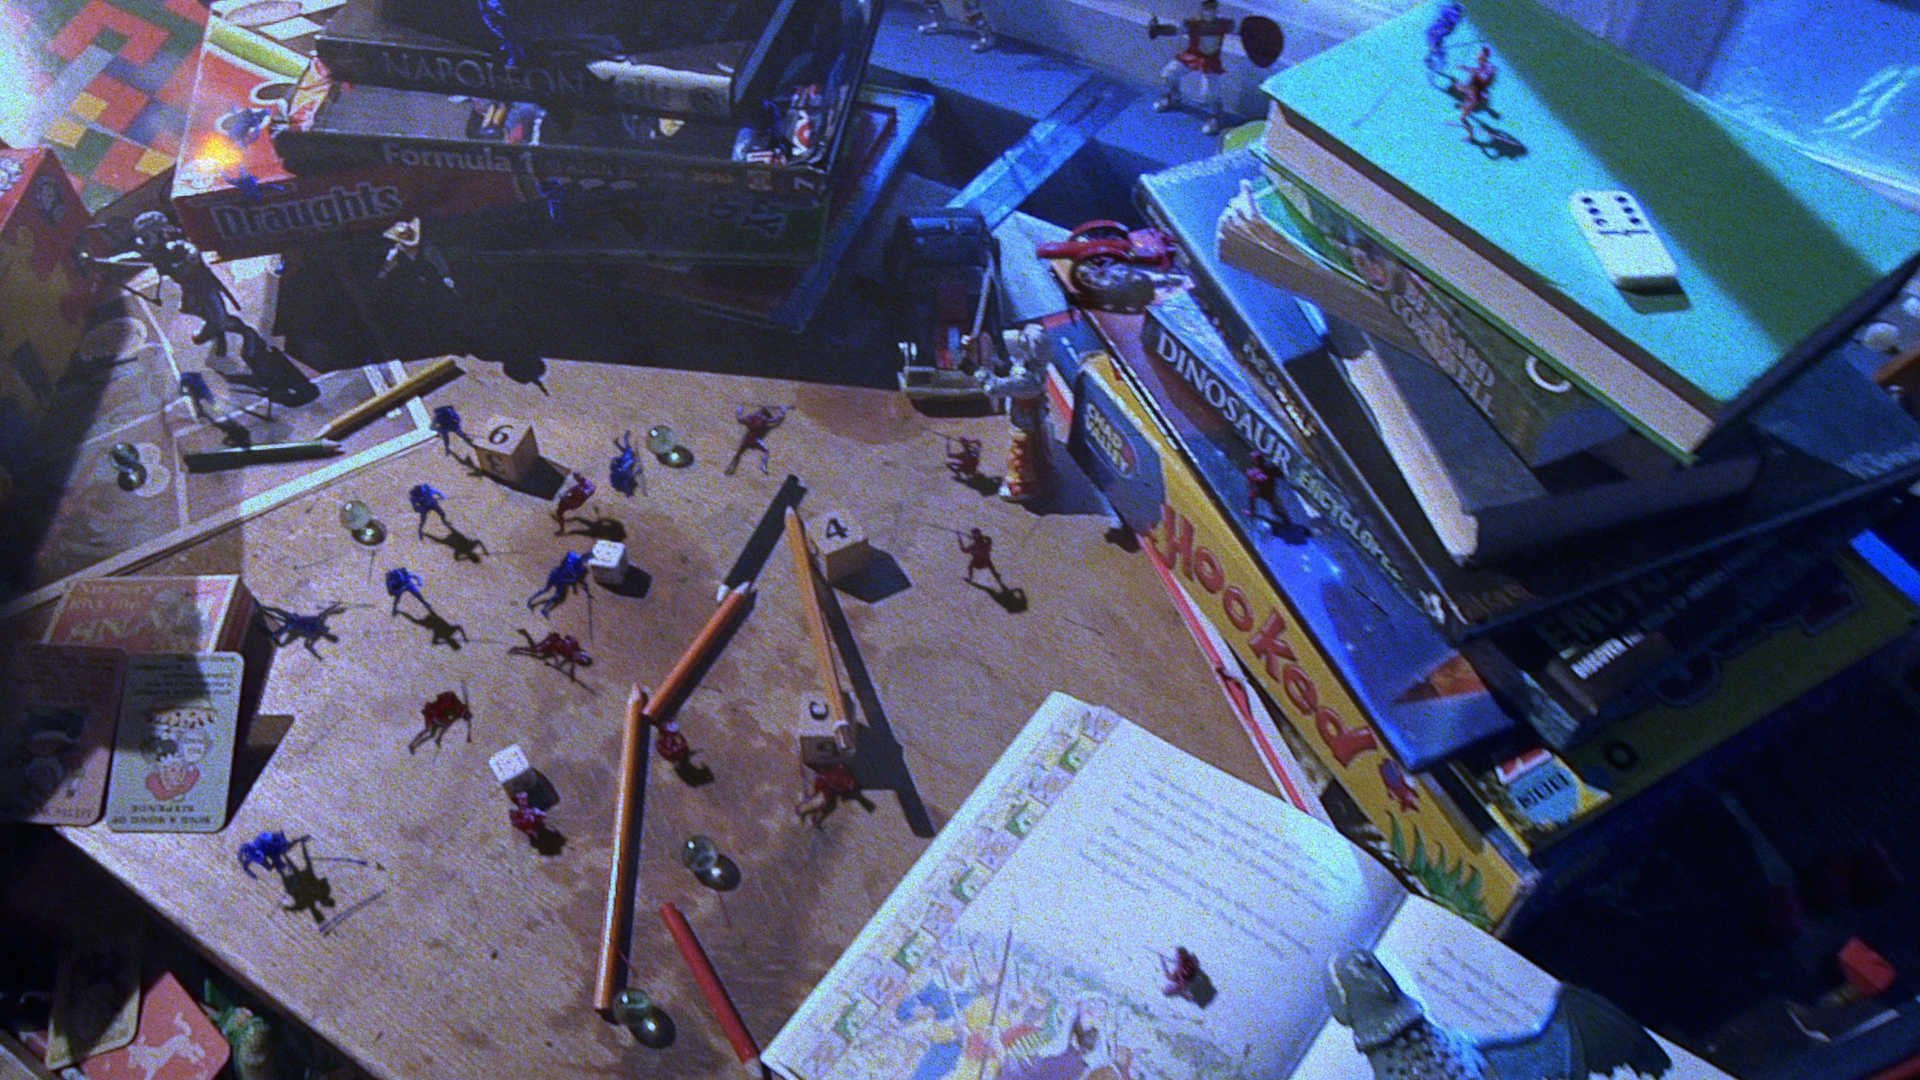
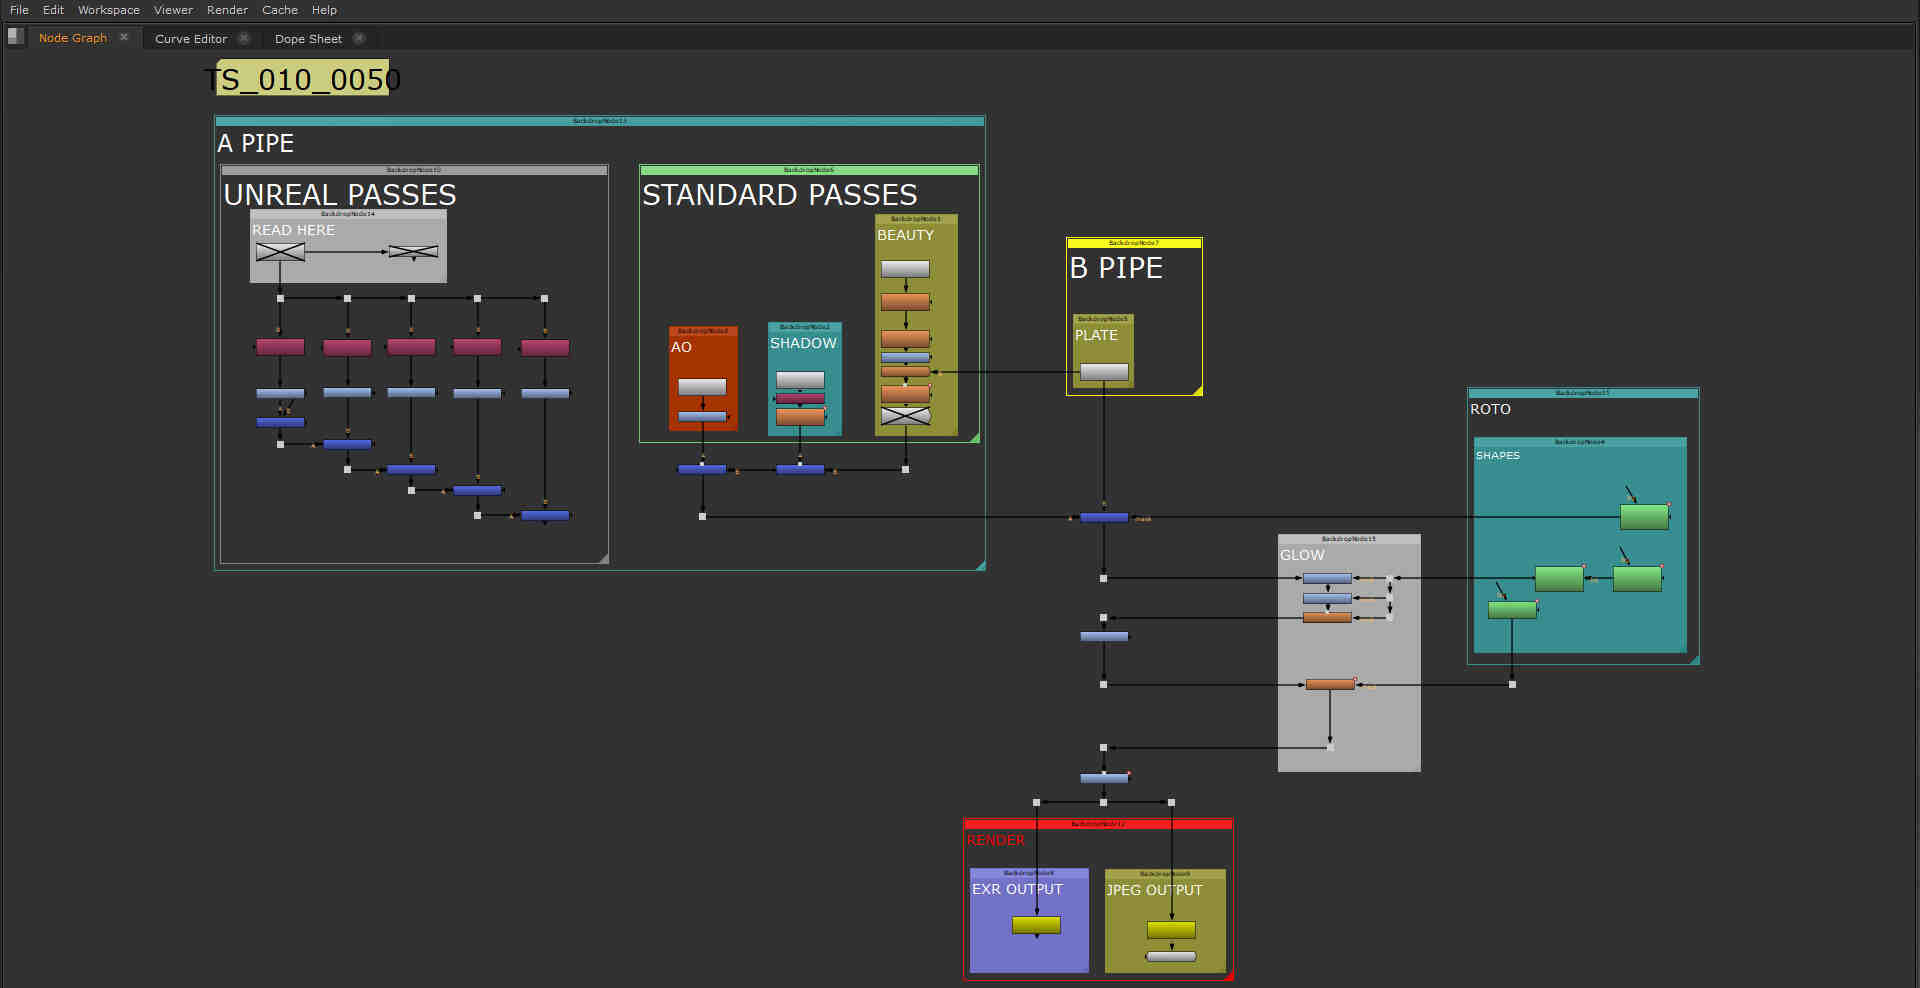
The QuickTime was the only source of the plates from the shoot. In an effort to get everything organised I split the footage into 3 categories, fs010 (Father and Son), tc_010 (Toy Coverage), and ts_010 (Toy Soldiers).


Using the contact feature in Nuke gave me an over view of the shots I had at my disposal, I put a red cross on the shots that I felt didn’t work.


To get this homebrew production going, I added burn ins to each plate containing a frame counter, shot code and whether the shot was a VFX shot. I plan to do a series of re-positions on these plates and having the information on the plate will help.

Making a shot document really helps, I made something similar when producing Dogfight earlier this year - invaluable.
Editing
Making Dogfight early last year, I was feeling confident that I could edit this short and create something that felt tight and well structured. The rough cut was a rewarding exercise. I used HitFilm to cut the film and I used it’s pretty robust tools to further aid the edit with re racks, basic grades and remapping frame timings.

When assembling the VFX shots, I wanted to guide the eye and create a feeling of progression. The opening shot is essentially a lock off so I decided to add a 2D push in and feature just a solitary soldier, appearing on top of the books. The next 3 shots leads the viewer to the center of the table where the battle will take place.

I deliberately chose to introduce the opposing faction on a cooler plate to contrasting the shadowy scenes in the first 4 shots. The whip pan helps to ratchet up the pace, we cut straight into a long tracking shot and little by little reveal the melee. The final shot, gives the viewer a chance to take it all in and it brings us right back to our starting position, the story comes full circle.
Camera Tracking
Getting tight tracks can be difficult when you have all the information at your disposal, here I had nothing apart from the camera used on the day of the shoot.
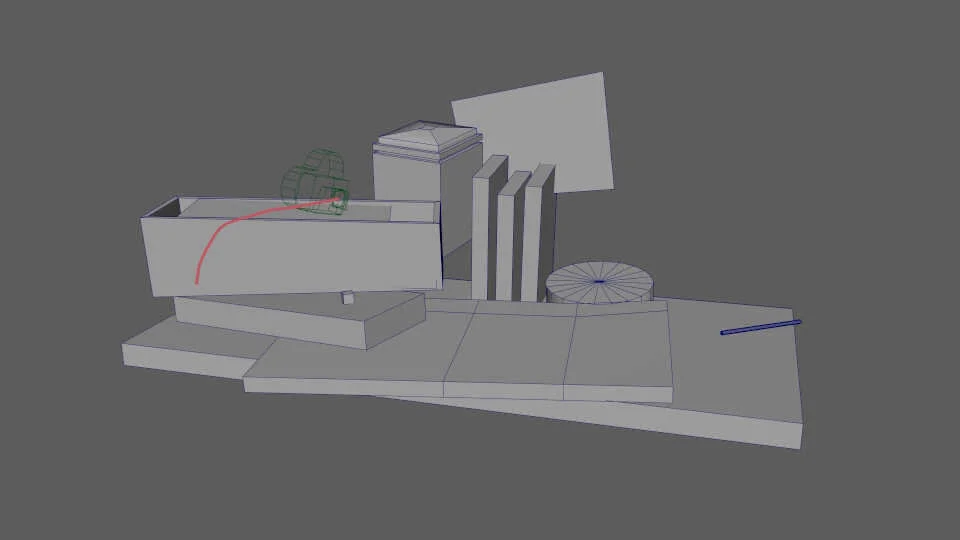
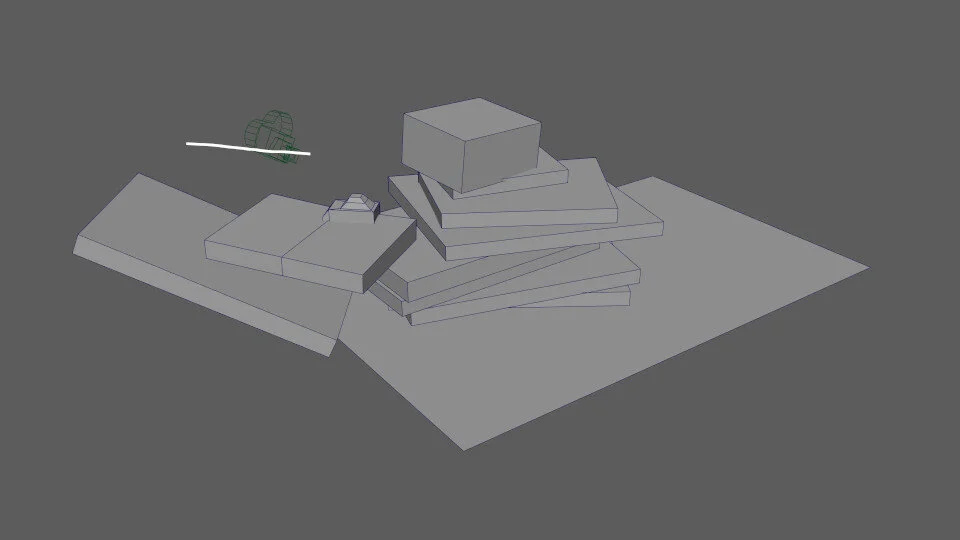
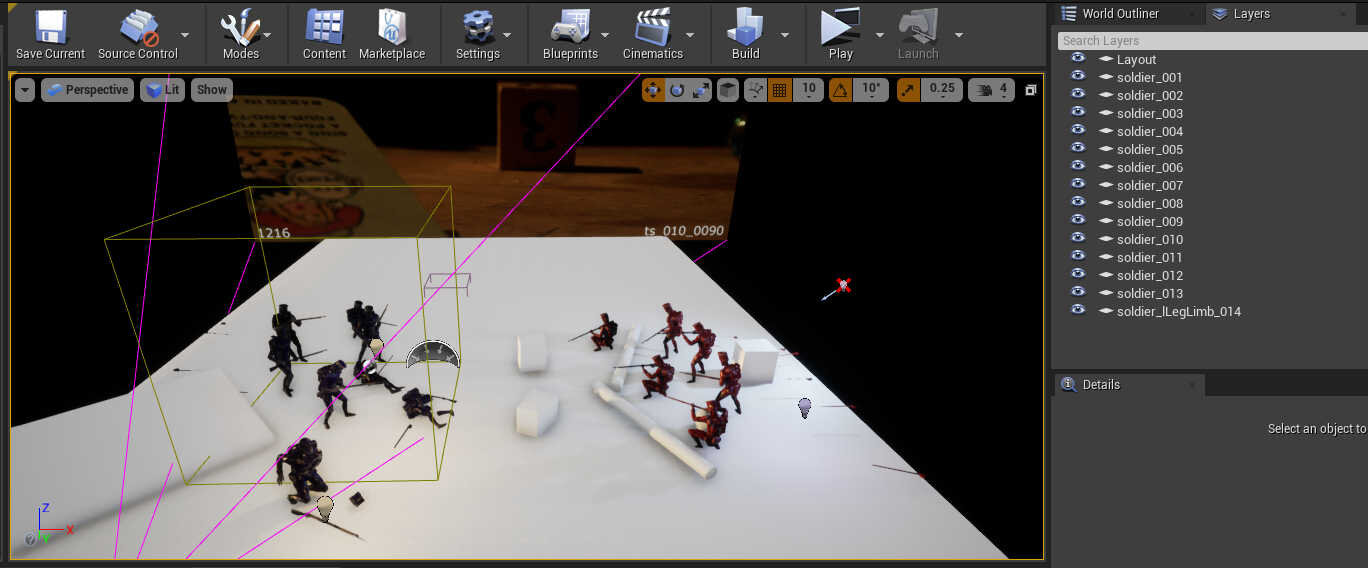
Even with limited information, I spent the time to get the camera track feeling logical. I studied the plates and focused my efforts in creating geometry that matched.
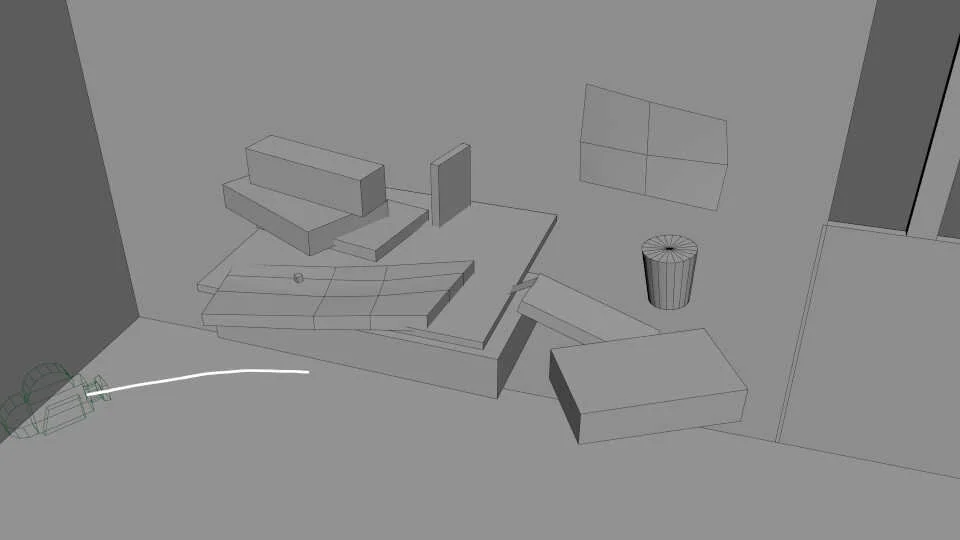
Something that worked in my favour for the tracking and building the geometry was the majority of the shapes were angular. Areas did slip but the geometry was mainly to catch shadows and help guide the layout of the soldiers.
This shot tracked relatively well but it suffers from a lot of fine vibration from the dolly move, something we didn’t feel during the shoot.
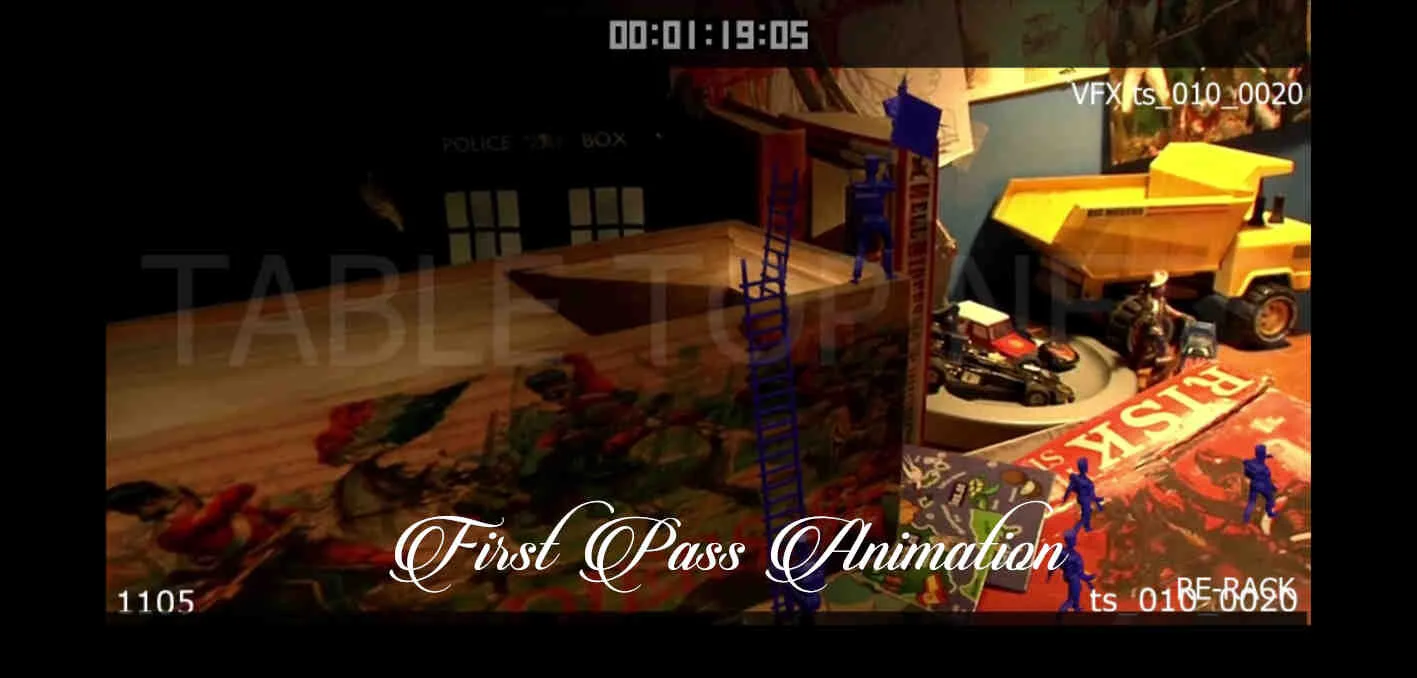
Post Vis and Layout
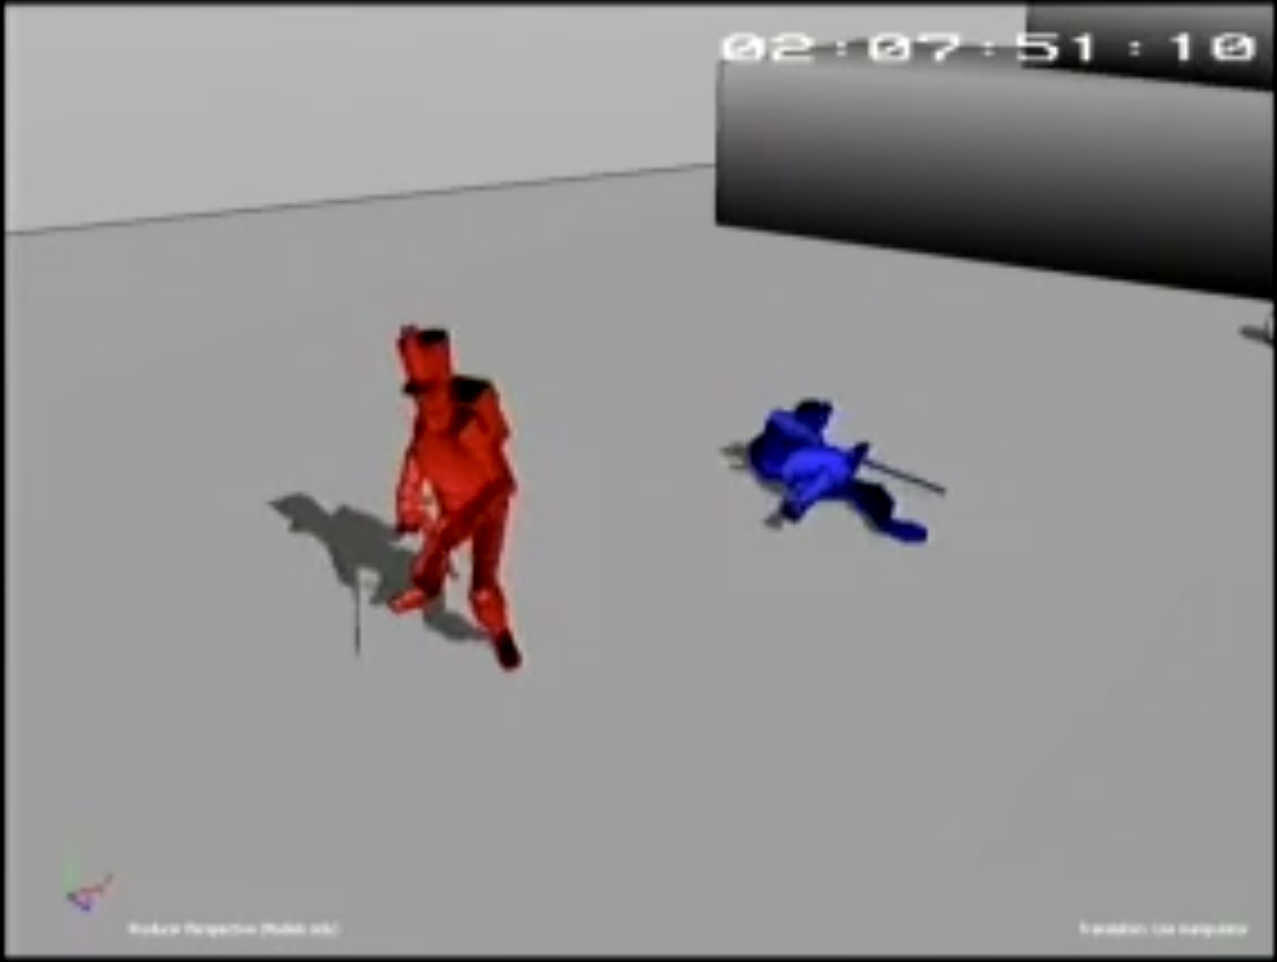
The process here was to build the story up from the six shots. Before I started modelling the soldier, props and building the rigs I went through the mocap data and pulled various poses out and created a cheat sheet of actions that I could use to layout out the beats in the story.

I had a wide range of mocap at my disposal for this, marches, walks, runs, rifle fire, deaths and cannon loading. This was essentially a blocking pass with my CG actors. I built a few props to supplement the poses, very basic but would serve at the foundation for the modelling that was to come.
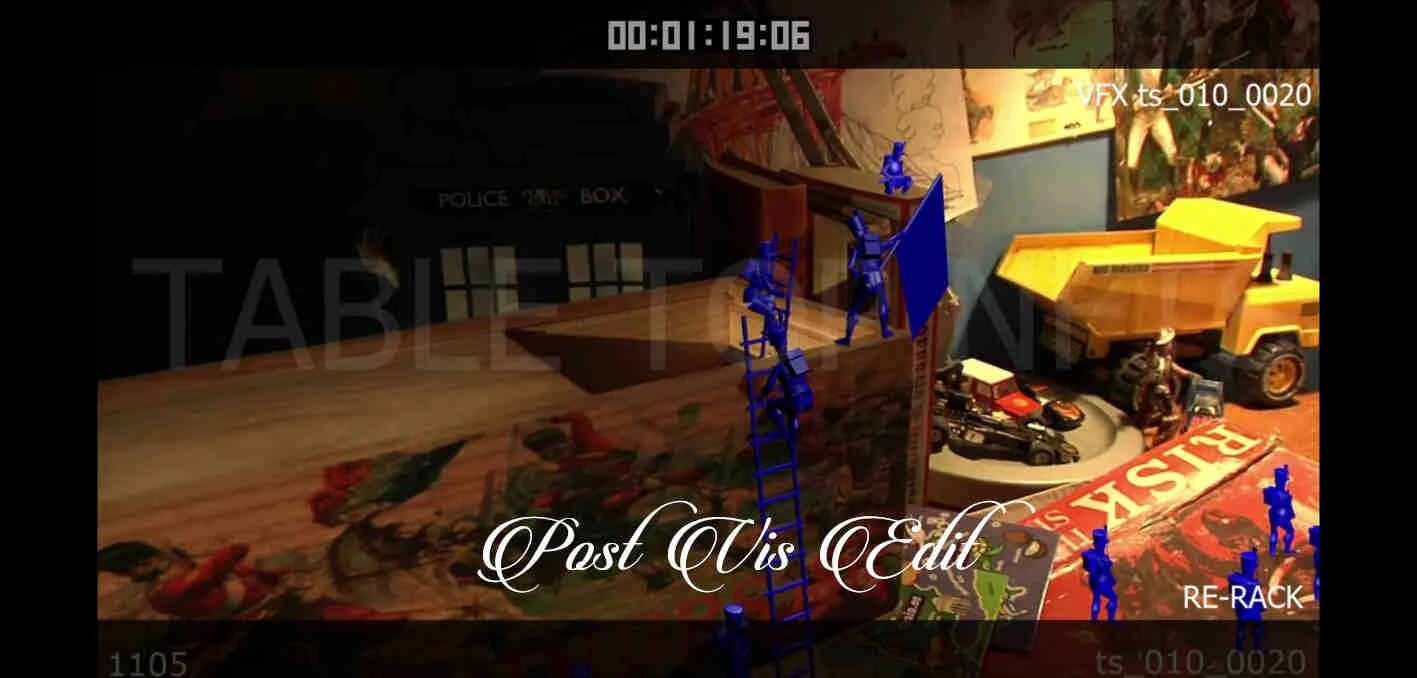
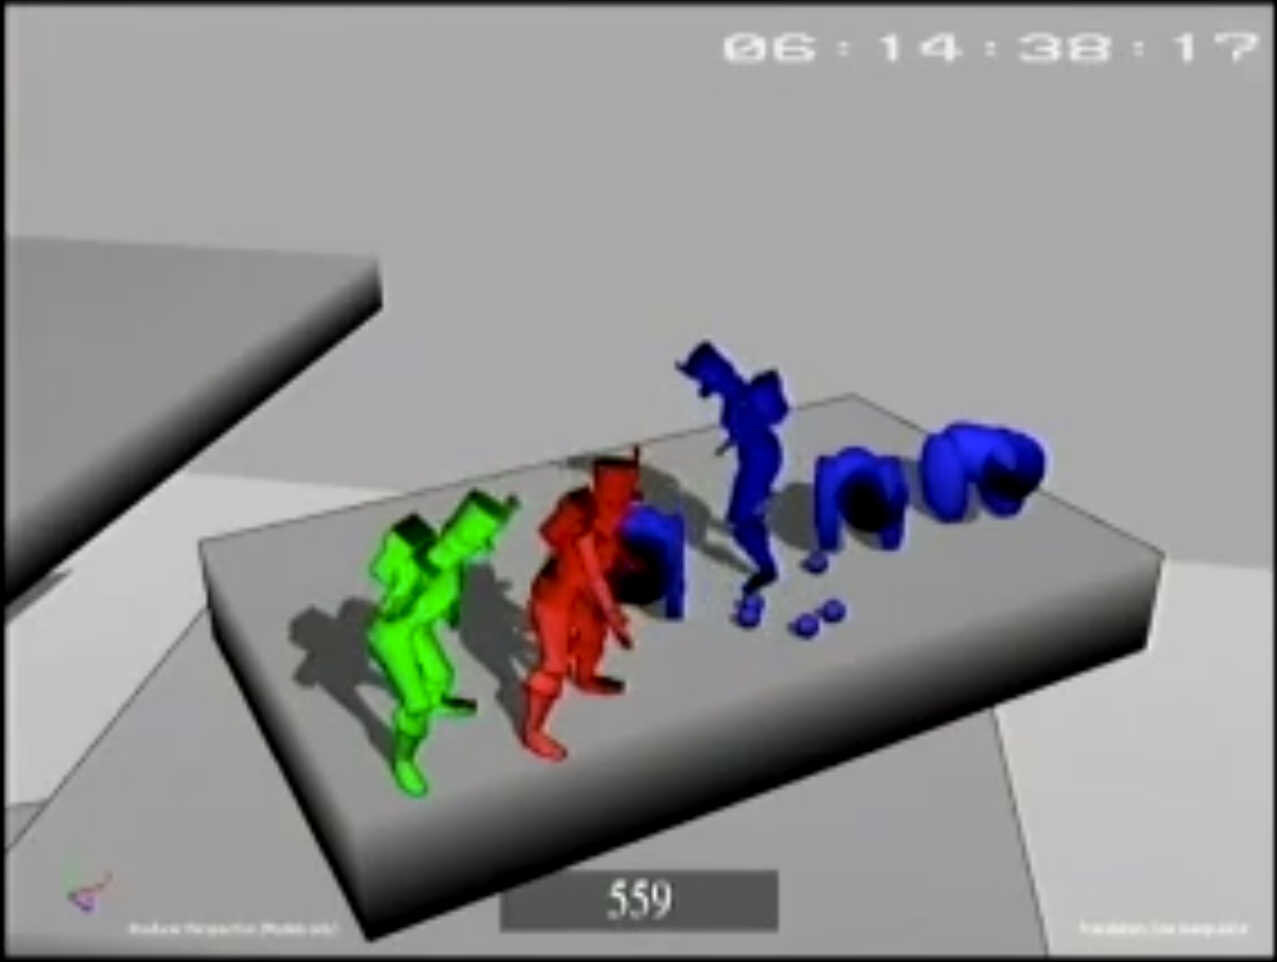
The initial post vis pass was to quickly visualise the story, I didn’t worry about lighting, although I added some basic shadows to add a little texture. Solid colour used for the soldiers and rough positions, this pass was instrumental for getting the scale correct.
Modelling, Texturing and Sculpting
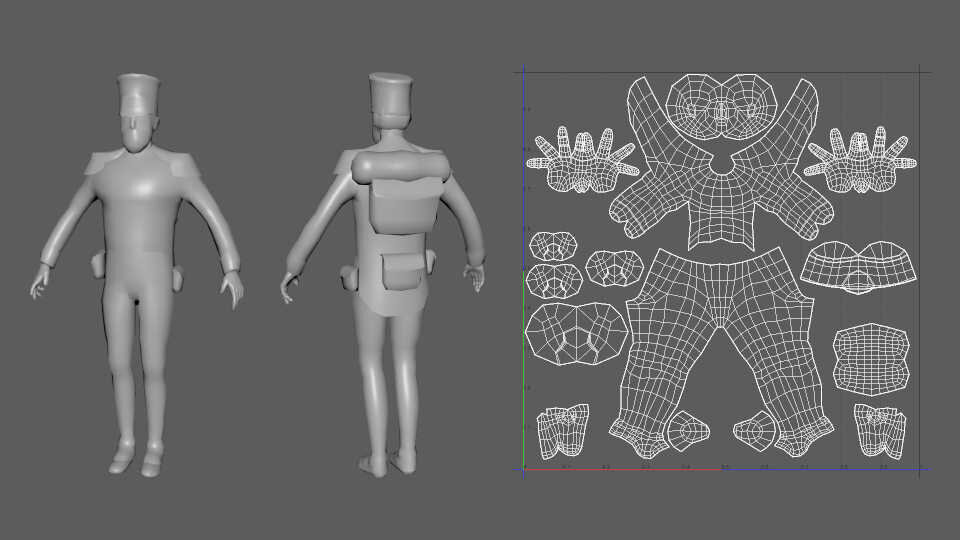
The base mesh for the soldier was simple. The plan was to create all the detail from the sculpt, the soldiers were small in almost all of the shots so I had a good idea of what would show up. The 1 UDIM UV tile helped streamline the process.


Mudbox is a piece of software I’ve been using throughout my career and it was perfect to allow me to get the soldier looking good. The map extraction tools are very powerful too.
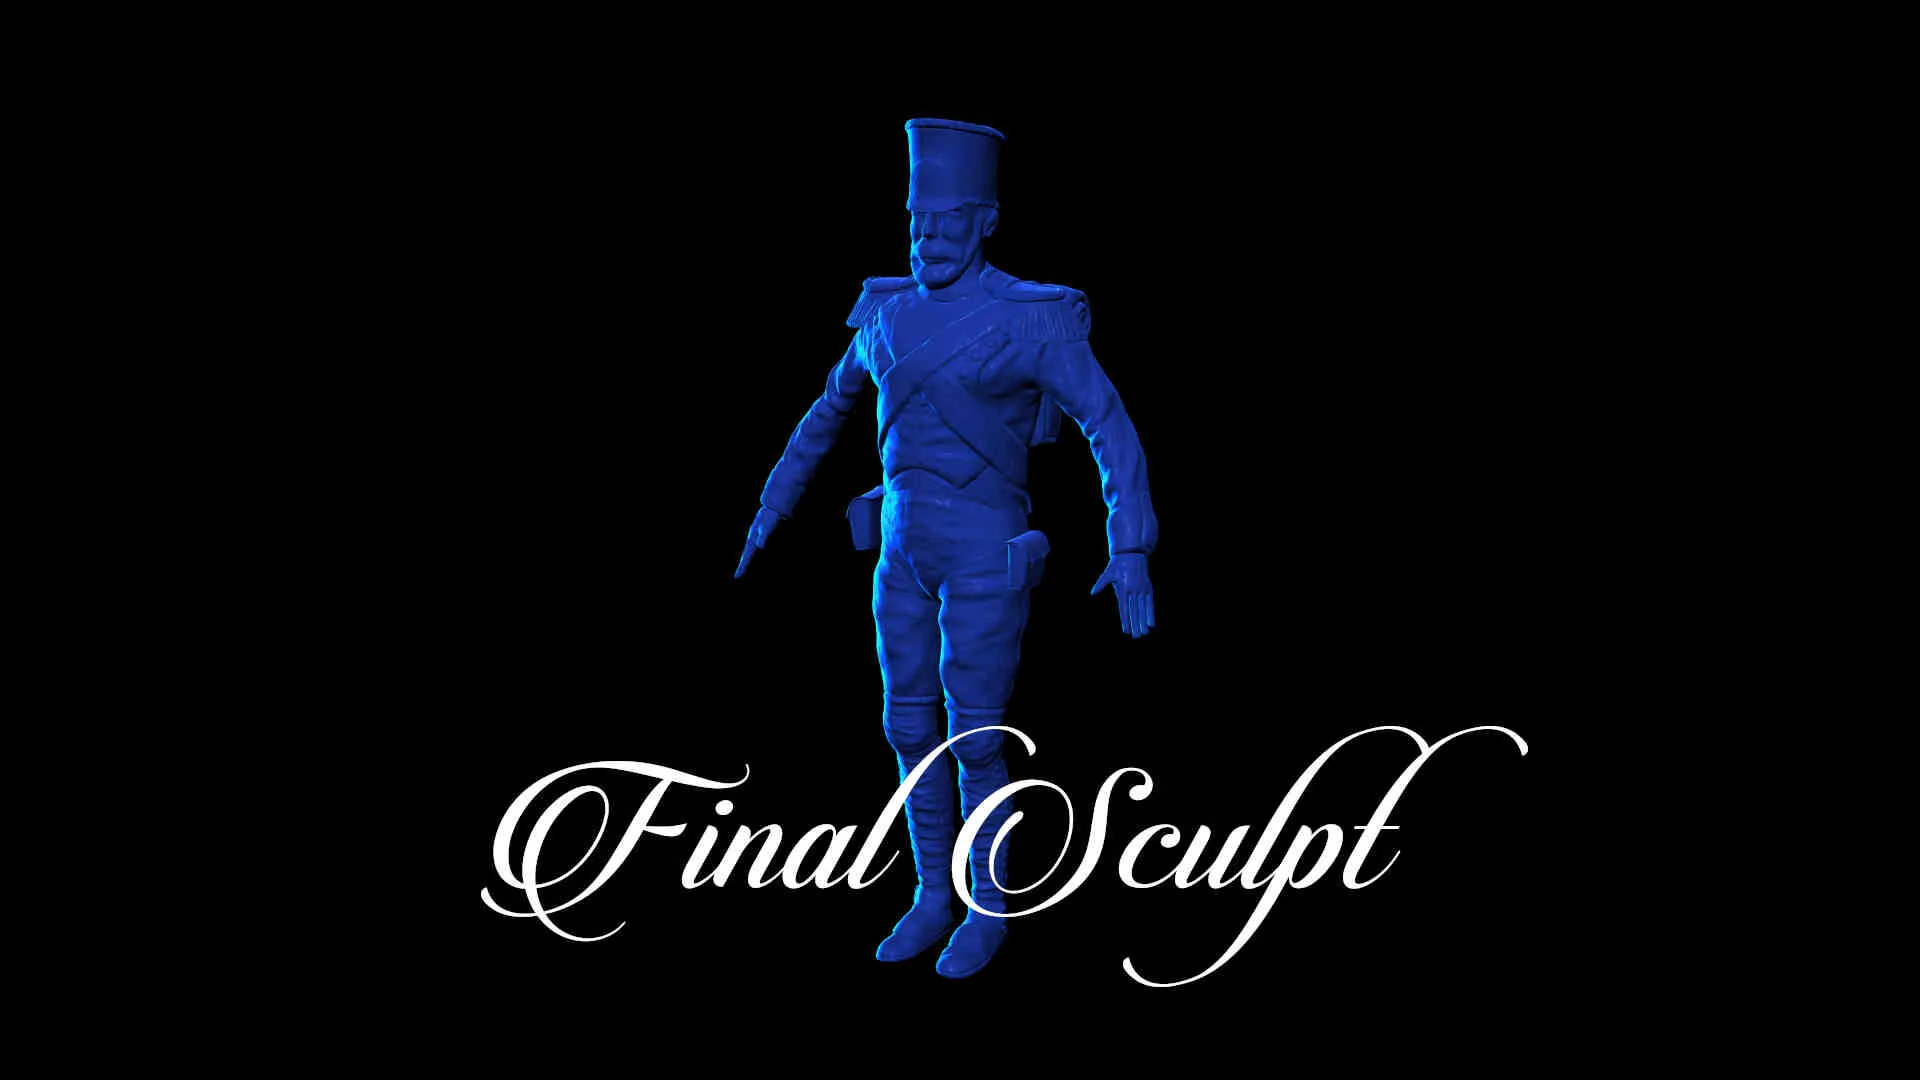
The final sculpt from Mudbox, the detail would be applied to the mesh via an Unreal Engine friendly normal map.

The soldiers were plastic on set but I wanted to add more interest so I opted for a painted metal look. The main texture was a default smart material and I modified it to suit my liking. I tried to destress the areas that would be the most touched and wear the paint back to the bare metal.
Rigging
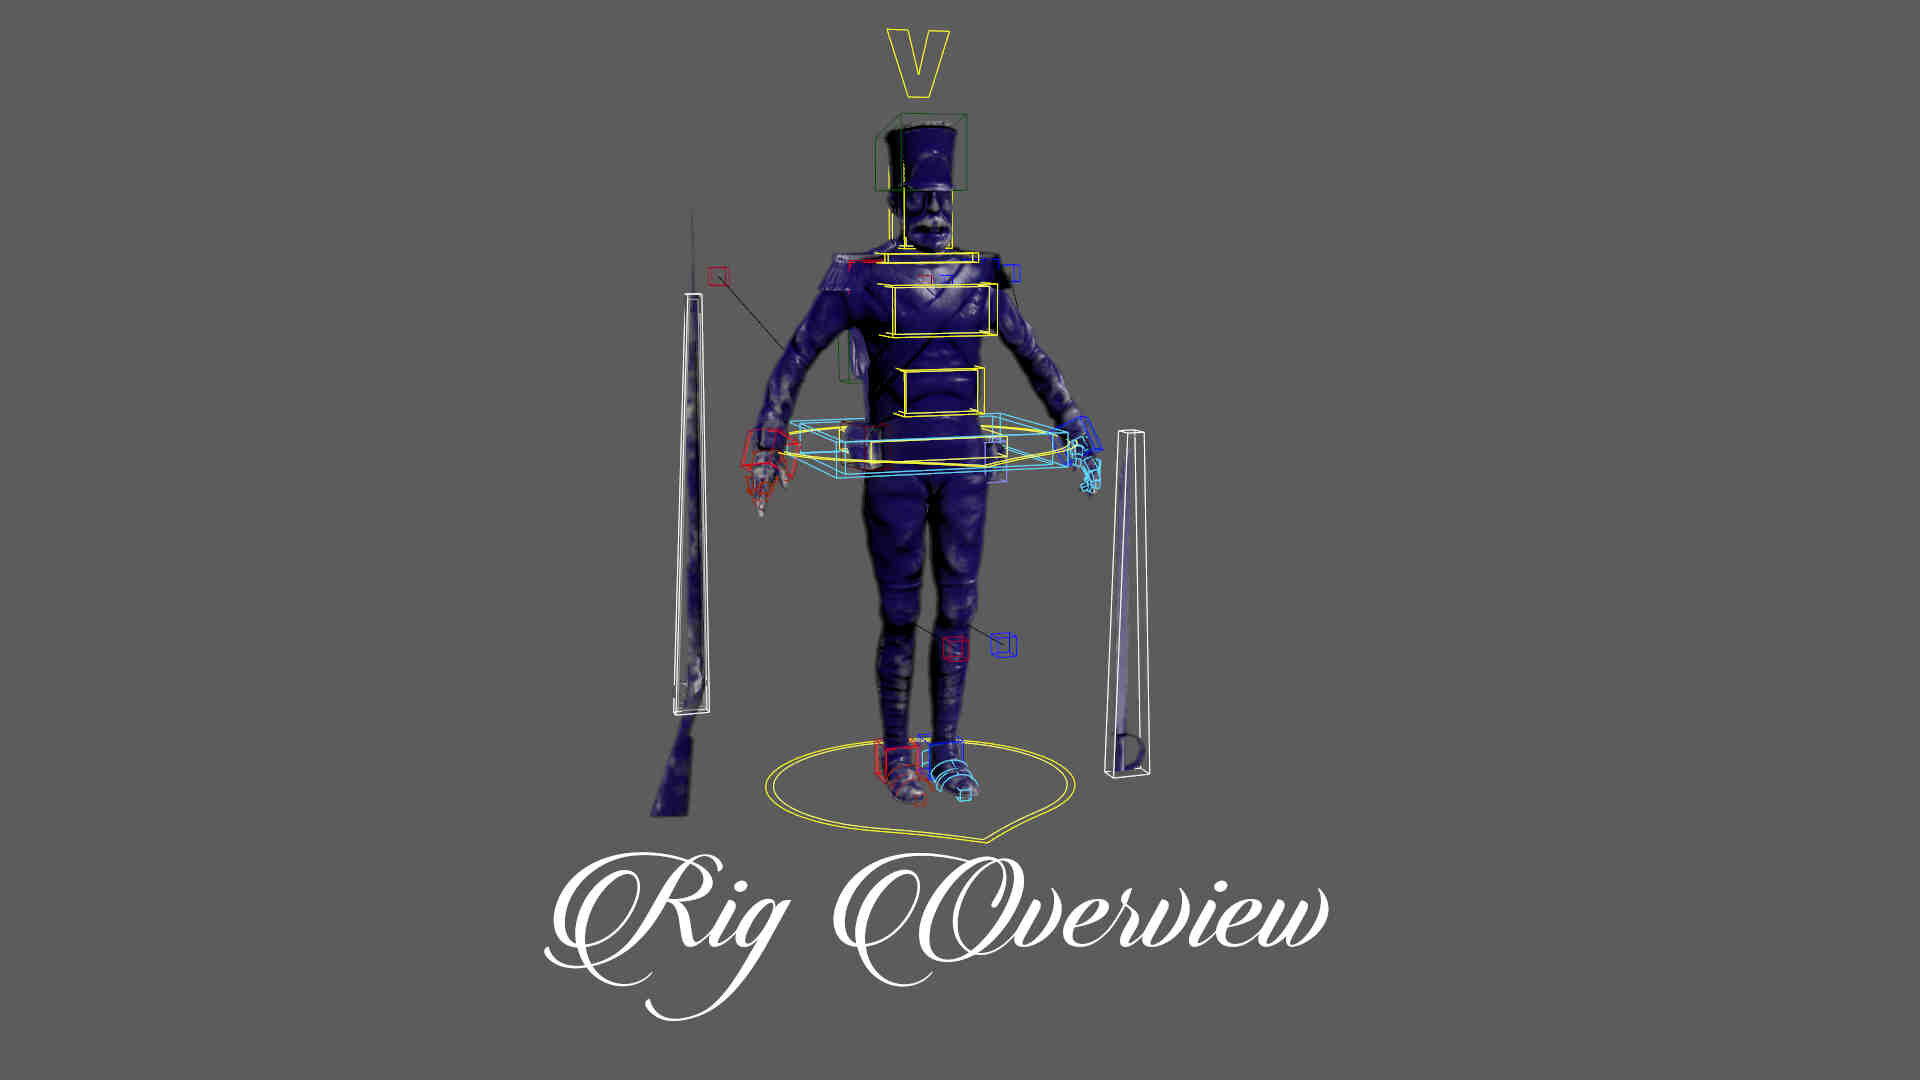
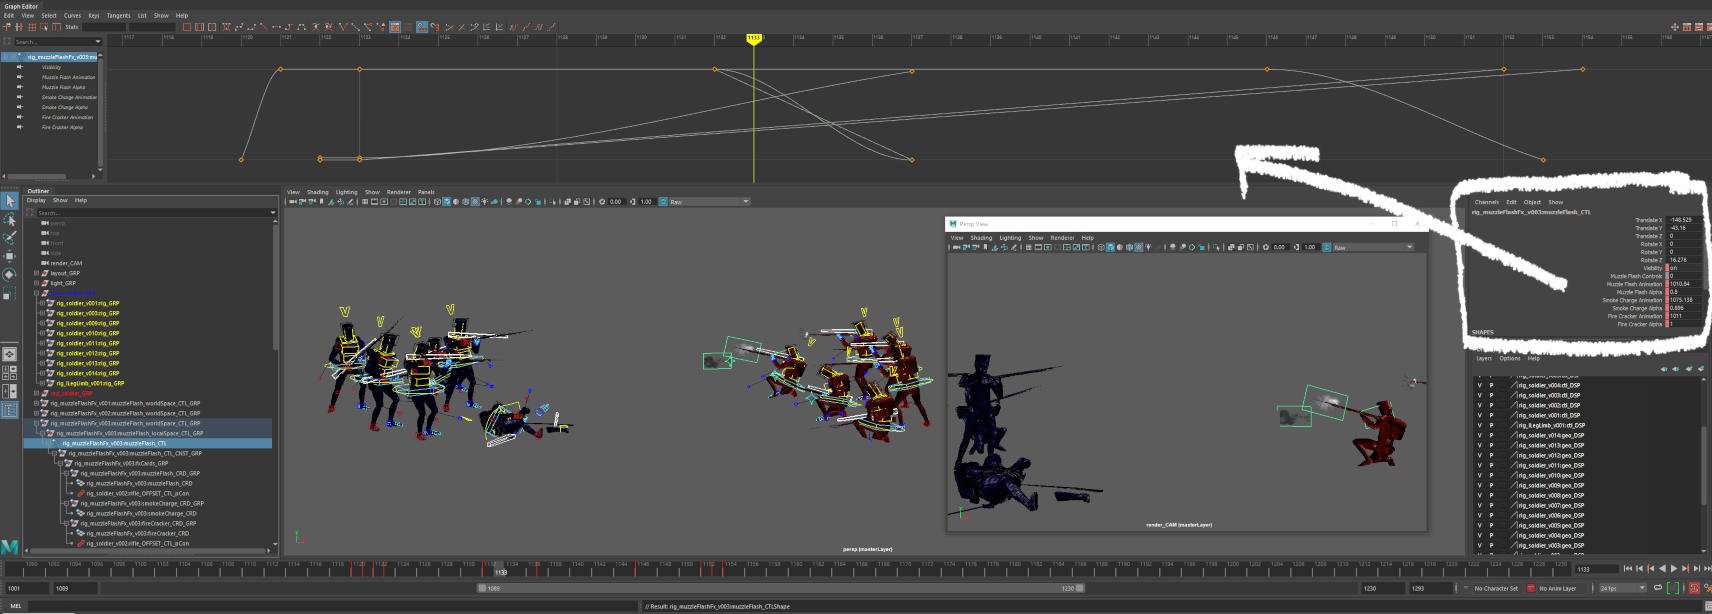
Once again I repurposed my python auto rigger to get the soldier rigged. Another project meant another round of changes, improvements and general fixes. The rig itself was simple had minimal joints so it remained lightweight to allow for speedy playback inside Maya.

I split the rig into LODs to aid performance in the Maya viewport. LOD1 was the visMan geo from my film Dogfight, tweaked, chopped up and parent constrained to the joints. This allowed me to work quickly while I was still modelling and sculpting the other LODs.


I created an alternate rig for the soldier, an injured version to show battle damaged. The cannon rig was rigged using a series of simple prop rigging scripts, all based on locator positions, I try to make my rigs follow a certain look.


The ladder was rigged just in case I wanted to be able to animate being moved into position by the soldiers climbing out of the toybox. The ladders that didn’t animate were exported as static meshes for Unreal. The flag would ultimately be an alembic cloth cache but the rig would be the driver for the simulation.

I setup up a texture switch on the rig so I could use the same rig for animation and then switch the soldier colour to either red or blue. The textures were exported at animation friendly resolution of 521x512.
Motion Capture Re-targeting
This was an area of the production where I was able to use a script I had written ten years ago in conjunction with a script I had written to complete the transfer of mocap data, the first script was MEL based and the counterpart was a Python script - “The circle is now complete…”
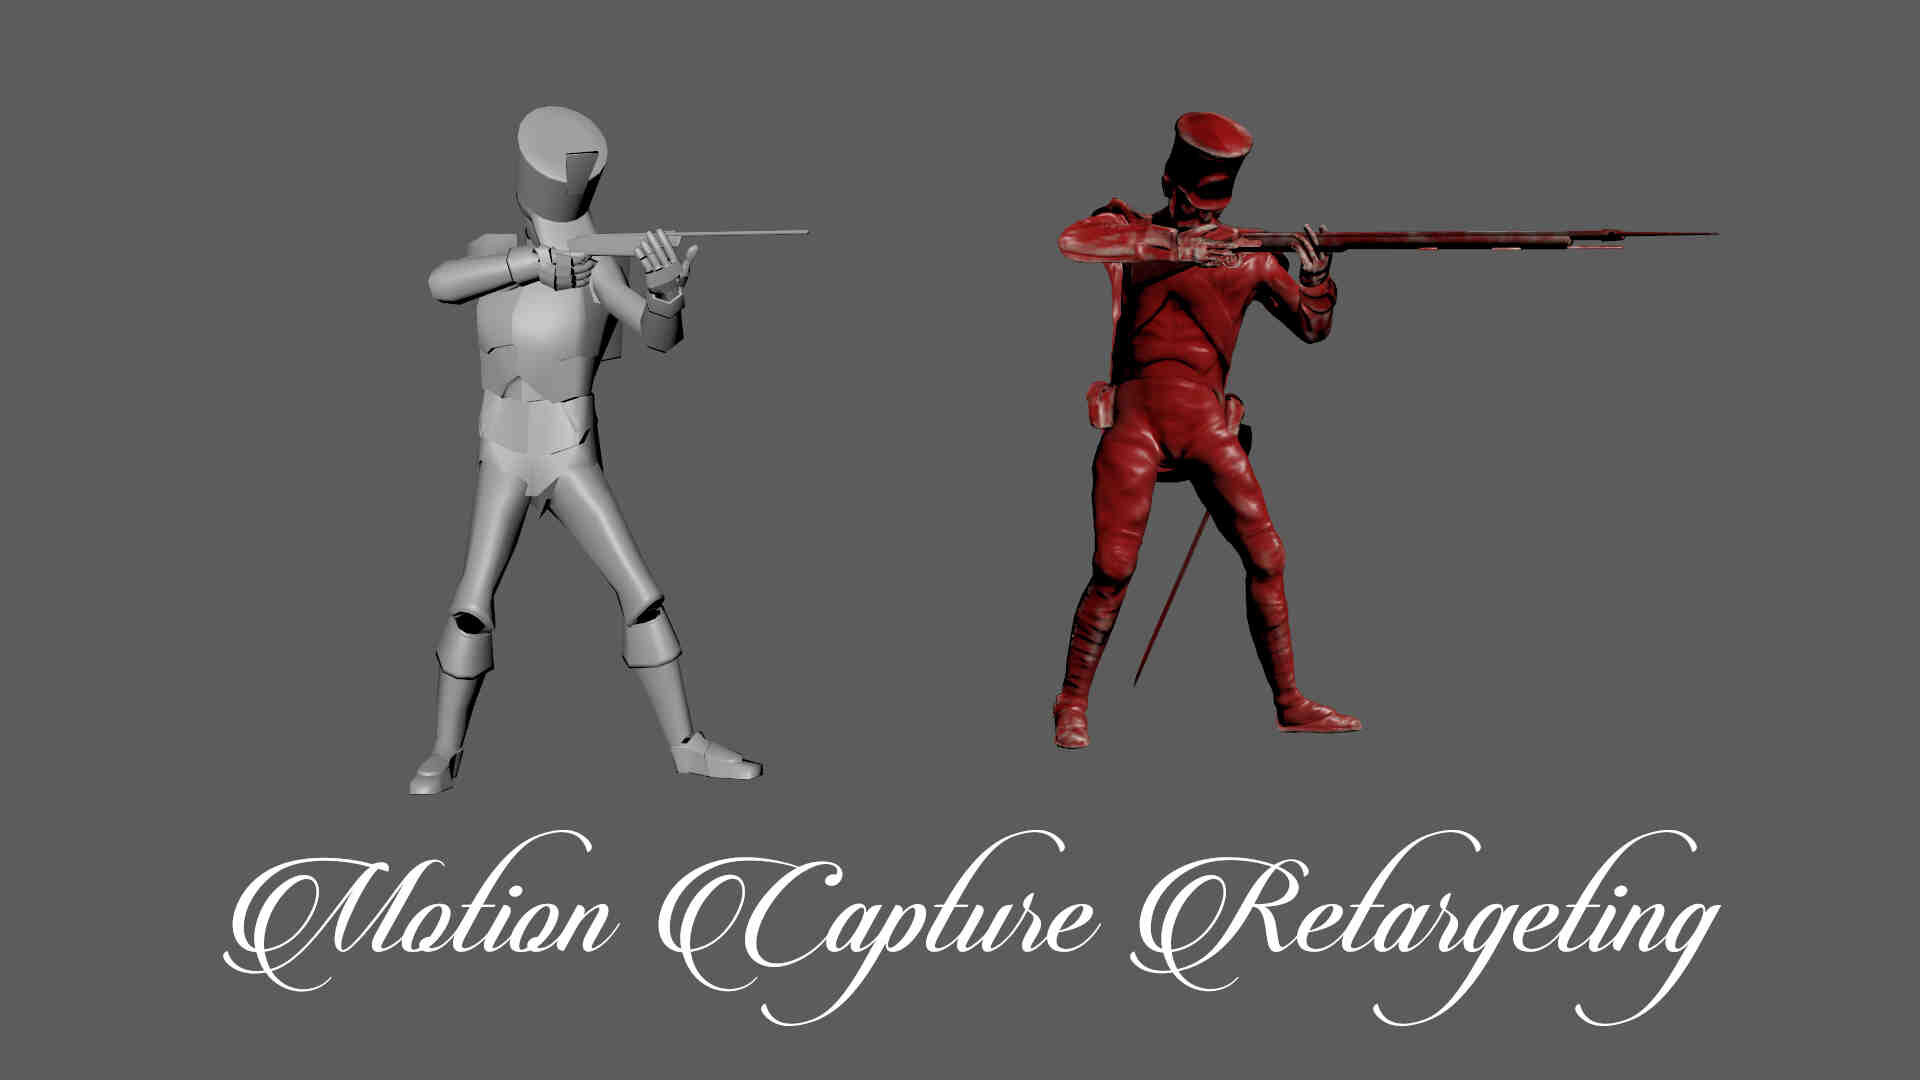
Automating this step allowed me to quickly churn through the sizable mocap library. The MEL script prepped the skeleton ready for the new soldier rig to be connected and bake out the motion capture to the controls to allow for cleanup and further editing. The Python script simply adjusted the rig pose, stored the control positions, constrained and baked down to the new rig, a huge time saver.
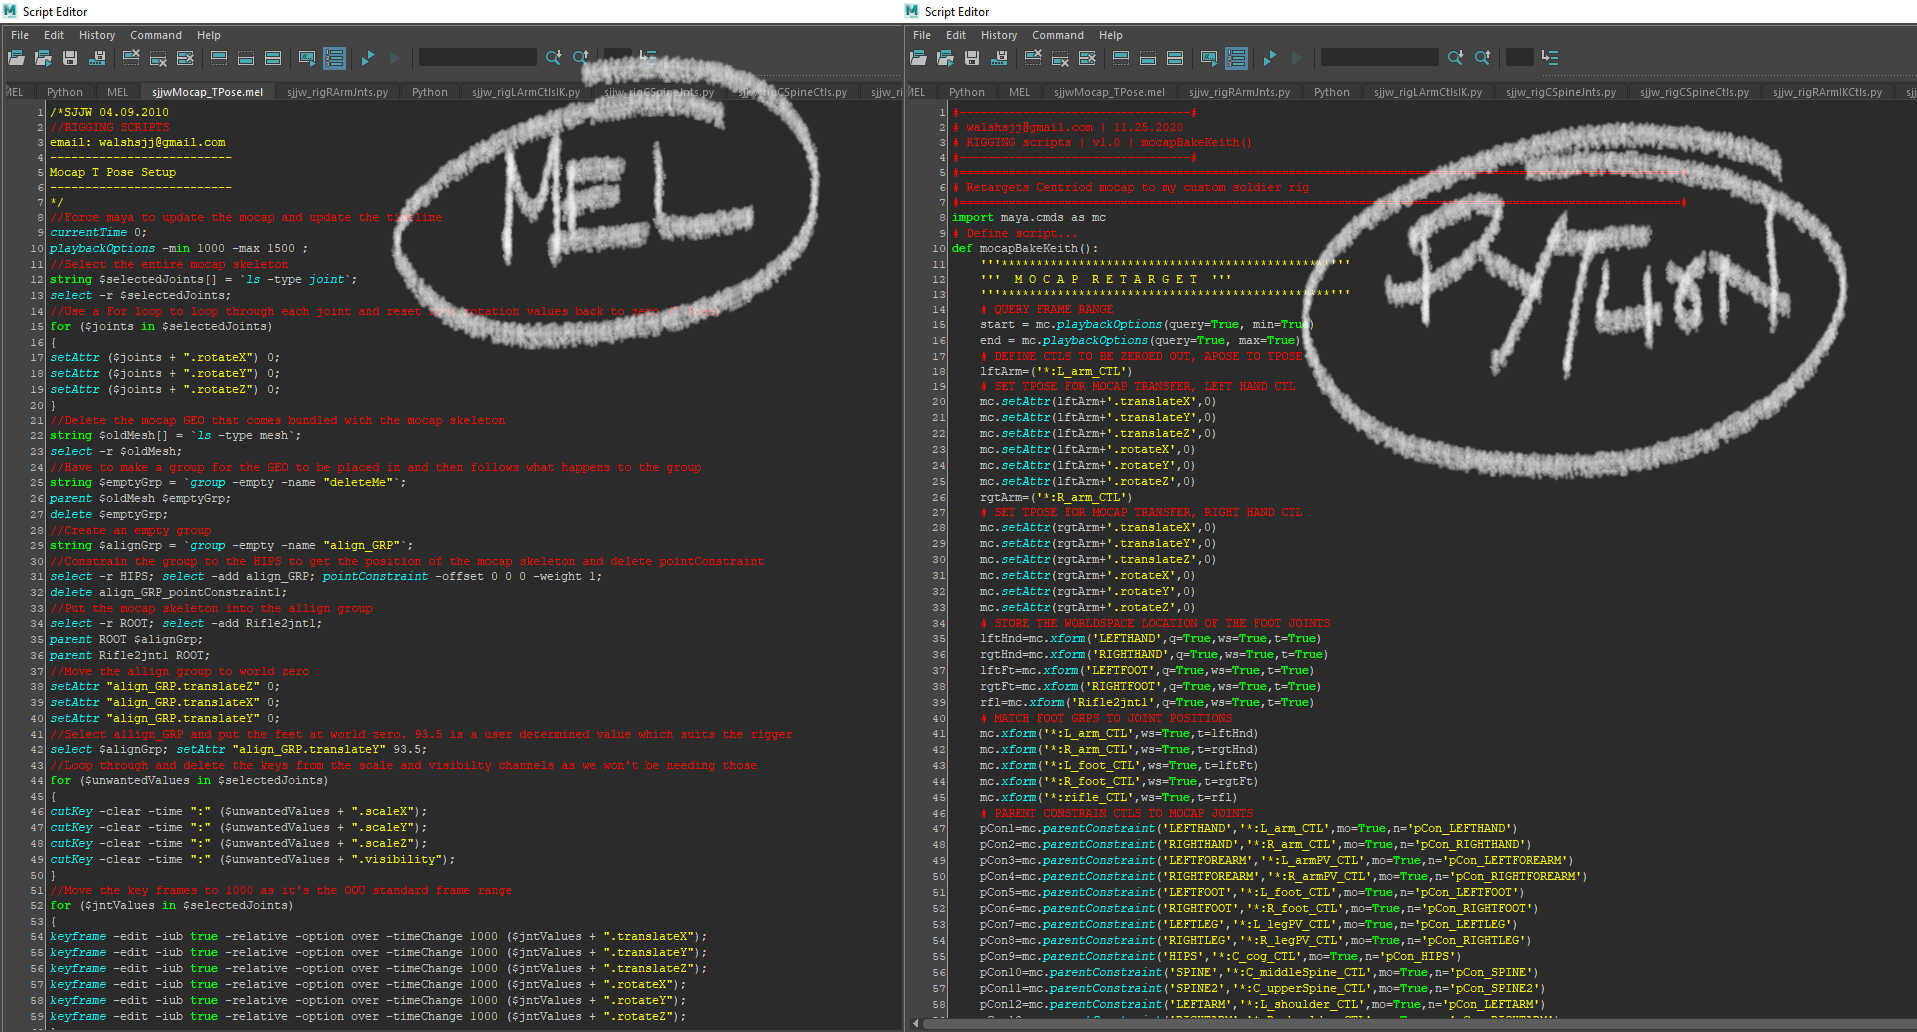
The scripts side by side, it was surreal to be able to actively use the original MEL script to get this film finished. Since switching to Python, most have my scripts have been rewritten so as a little tribute to my journey, this was used as-is.
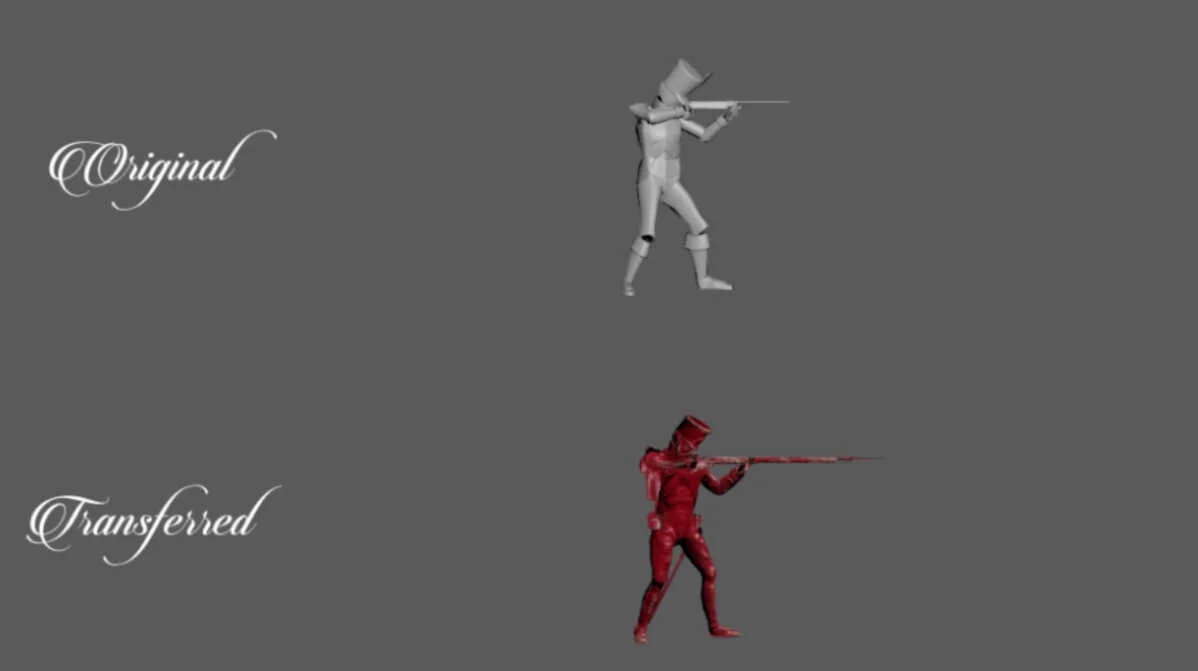
Once automated, the process of cleaning up was simple. I had made offset controls to help reposition the animation, the rifle was something that always needed tweaking. The bulk of the editing was done in each shot scene, as the soldier often remained small and therefore minimal alterations to the original data.
Animation
Getting to the animation was where I could really start to have fun with the film. The jumping off point was to replace all the static posed soldiers from the post vis and bring in the retargeted mocap and layout out the animation. At this stage, I did almost no clean up - this pass was purely to get all the soldiers moving, interacting and for the plates to feel alive.

Studio Library was used to store all of my retargeted mocap to my current rig. I also used it to store shot specific animation that had been cleaned up and could be reused.

I wanted to ‘Pipeline’ the work on this film, I made a simple HUD in Nuke where I could pipe in the latest playblast from Maya, add a few details such as a frame counter, shot name and the version. I could then render and use in the edit.

For the HUD tree, I created a mask to place black bars onto the footage and a series of text nodes. I added a switch node in the event I needed to output the default blast. The idea with nuke was that I could further squeeze the file size to help the playback in the edit.
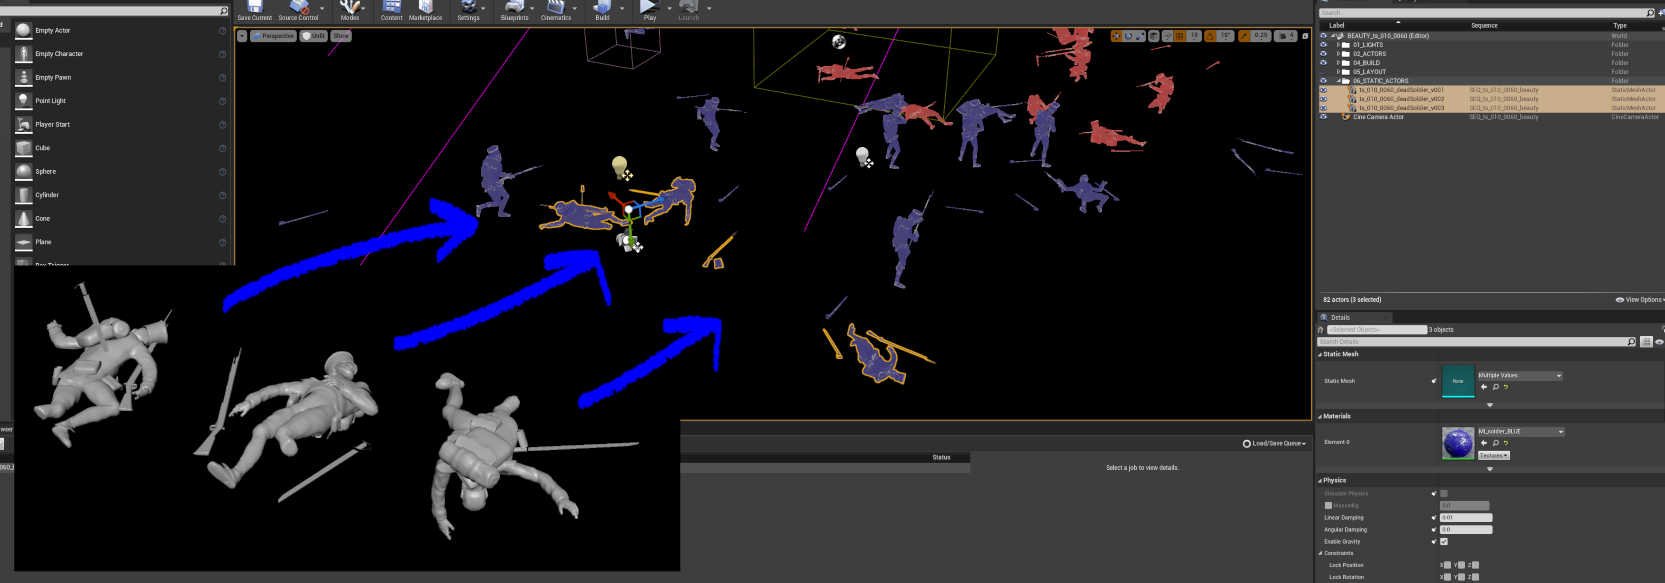
The animation rig also helped with the set dressing, I made a custom model in the rig for adding quick static poses to the final shot. The dead soldiers were exported as static alembics and dotted around.
CFX
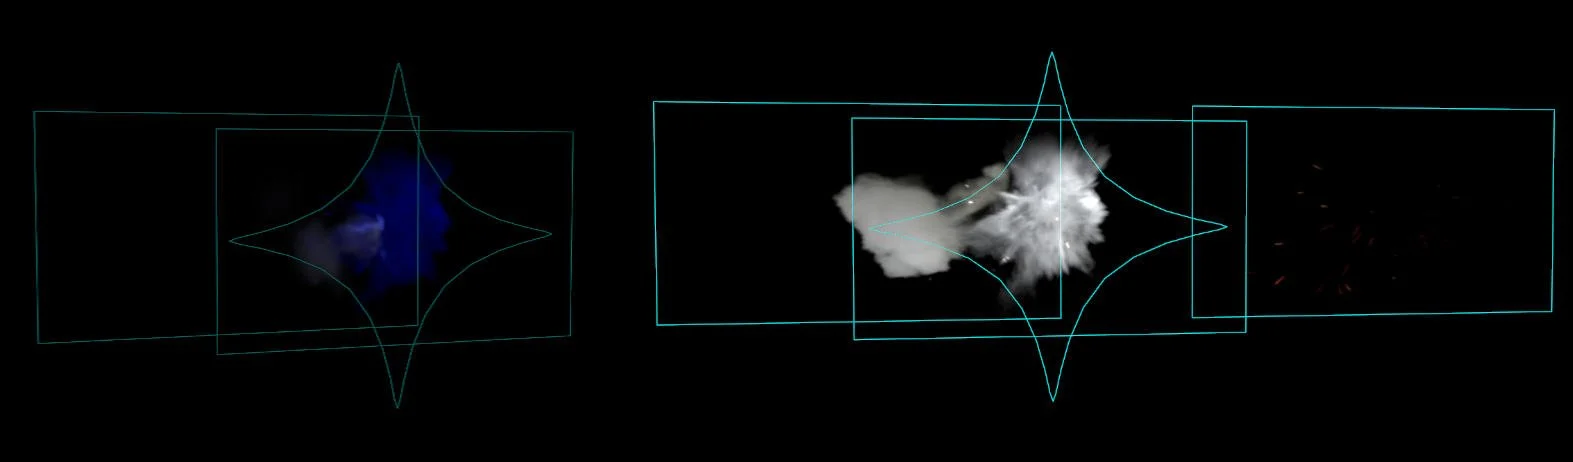
To supplement the animation and to add texture to the shots, I decided to start the shots off with a lone soldier, appearing from behind the books carrying a banner to signal the start of the attack.
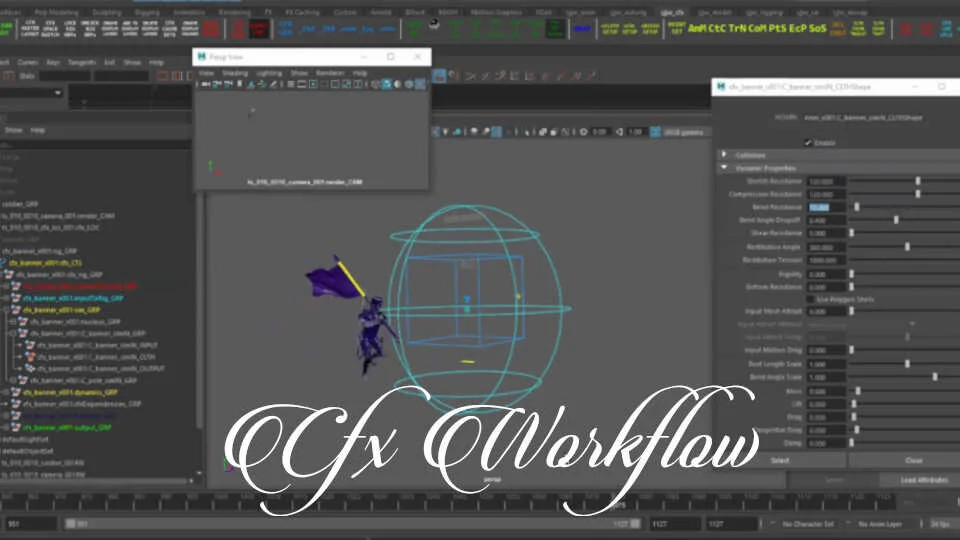
The CFX process, once the rig is made, it’s referenced in and I get to work, it didn’t take long to get the banner looking good, to speed up the simulation I removed all collisions, shot ts_010_0010 the soldier is small so I removed unnecessary computation.
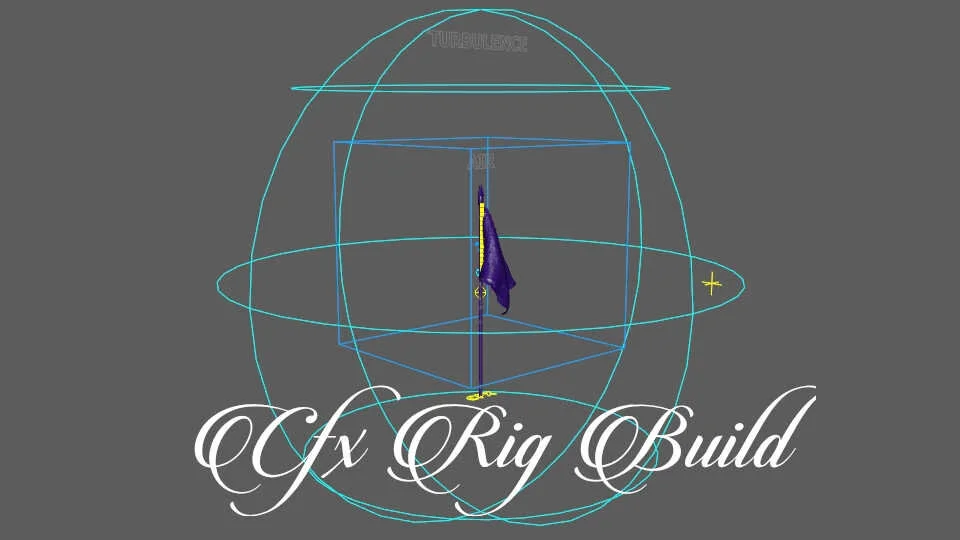
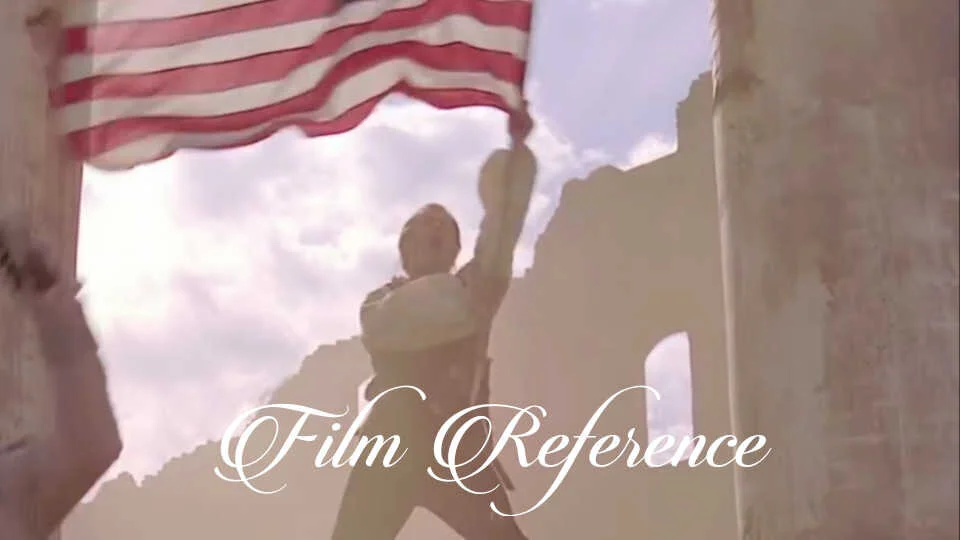
The CFX rig was made using my custom python scripts originally developed for Boxer. A couple of extra features were added in the form of dynamic forces. A scene from The Patriot was used for reference, it’s a great scene, I have a soft spot for the film now that America is my home.
The finished simulation with retargeted mocap and a little extra polish. A very triumphant solider to start the battle.
Unreal Engine
I wanted to get my lighting matching the source photography, to be able to achieve this I experimented with the ‘Image Plate’ BETA feature. It’s a little niggly but it allowed me to pick colours and better tune the direction of the lights.


The setup is intensive but was a massive help, I was able to create much stronger lighting.
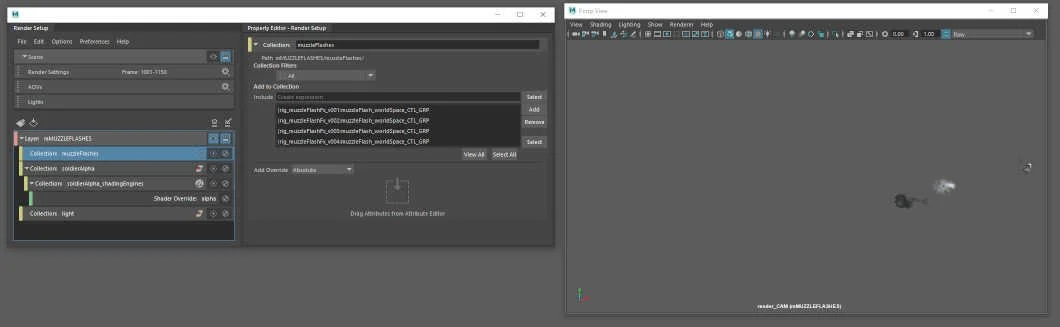
Every VFX shot had several soldiers, and every shot it was necessary to split the characters off into separate renders. Similar to Maya’s display layers, Unreal has layer functionality. Once the layers have been setup while you can actively use these same layers at render time.

I used Unreal’s ‘Stencil Clip’ layers in the render options, I could simply add my layers from the World Outliner and populate the stencil layers.

The film was composited in Nuke and extracting channels or passes from an EXR is very easy, using Nuke’s ‘Shuffle’ node I can pick the soldier and start laying out the comp.
Arnold

I opted to use Arnold to quickly get shadows. The setup was simple, I cached the animation as alembics and the layout geometry and assigned two basic Arnold shaders, the standardSurface for the soldiers and the shadowCatcher for the geometry. Finally positioned a light based on the positions from the Unreal setup.

Before rendering I enabled the shadow catcher AOV and hit render. The result was an image with the shadows dumped into an Alpha for compositing. With an average wait time of 20 minutes for the full range, I set up my initial comps with a single frame render before I rendered the sequence.
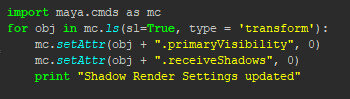
In an effort to set these shadow renders more efficiently, I wrote a very basic Python script to loop through and set a couple of variables, nothing huge here but it saved me a lot of clicking and scrolling through menus.
FX
I wanted to add some extra texture to the main battle shot. To facilitate this I made a couple of simple card rigs. The fx elements were meant to feel like they could have come from a child’s imagination.
The rig consisted of a main CTL curve which could be placed at the end of rifles or onto a body part to simulate a hit.
The rig had several custom attributes to speed up the process. The animation of the cards was in an essence presetup, loaded into the shot and then the keys could be slipped into place to match the action.
The FX cards were rendered through Maya’s render layer manager. I made a custom ‘Use Background’ shader and used that to create a simple alpha for the soldiers - I wanted to keep the compositing time to a minimum and this pass could be merged over my current comp, nice and easy!
Comp
The compositing for the short was relatively simple, most plates required roto work but the shots were predominately A over B comps.
Each shot started from a template, in a couple of shots I used the render passed from Unreal to give me extra control but each initial comp was generated using the minimal passes, Beauty, Shadow and AO.

When opting for extra control I was still frugal in the passes, I found that I only needed to pick a highlight or enhance an area of reflection.

The battling soldiers exist in the boy’s imagination, I wanted to try and push a dreamy feel. The CG equivalent of Vaseline on the lens.

I used a couple of simple roto shapes, a grade and a glow to crank up the blue tones in the light through the window. This gave the shot a soft, flashback quality.

The plates were also all pretty yellow in tone, I wanted to remove that as much as possible.

The result after balancing the black and whites instantly lifted the plates and gave the shots a crisp feel, the dreamy glow enhancements were clearer.

During the edit, I wanted to tweak a shot but avoid any rendering of the 3D. I decided to try out Nuke’s ‘Camera Shake’ node to create some impact to enhance the cannon shot in ts_010_0050.
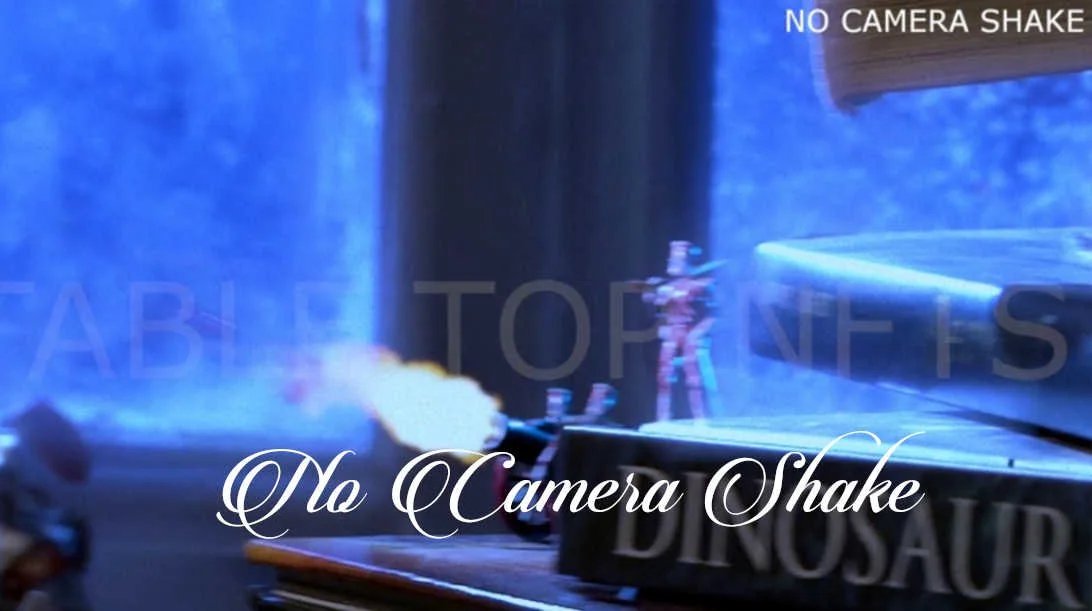
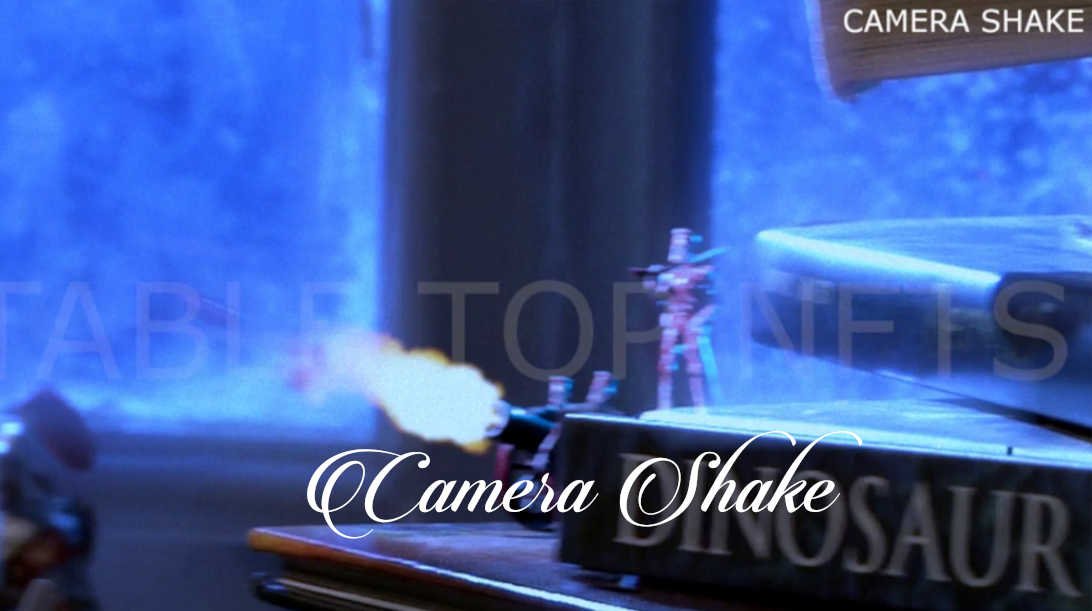
All I needed was a little extra shake at the moment of fire and the impact on the blue soldiers at the tail of the shot. The plate was also scaled 10% as this was a 2D fix.

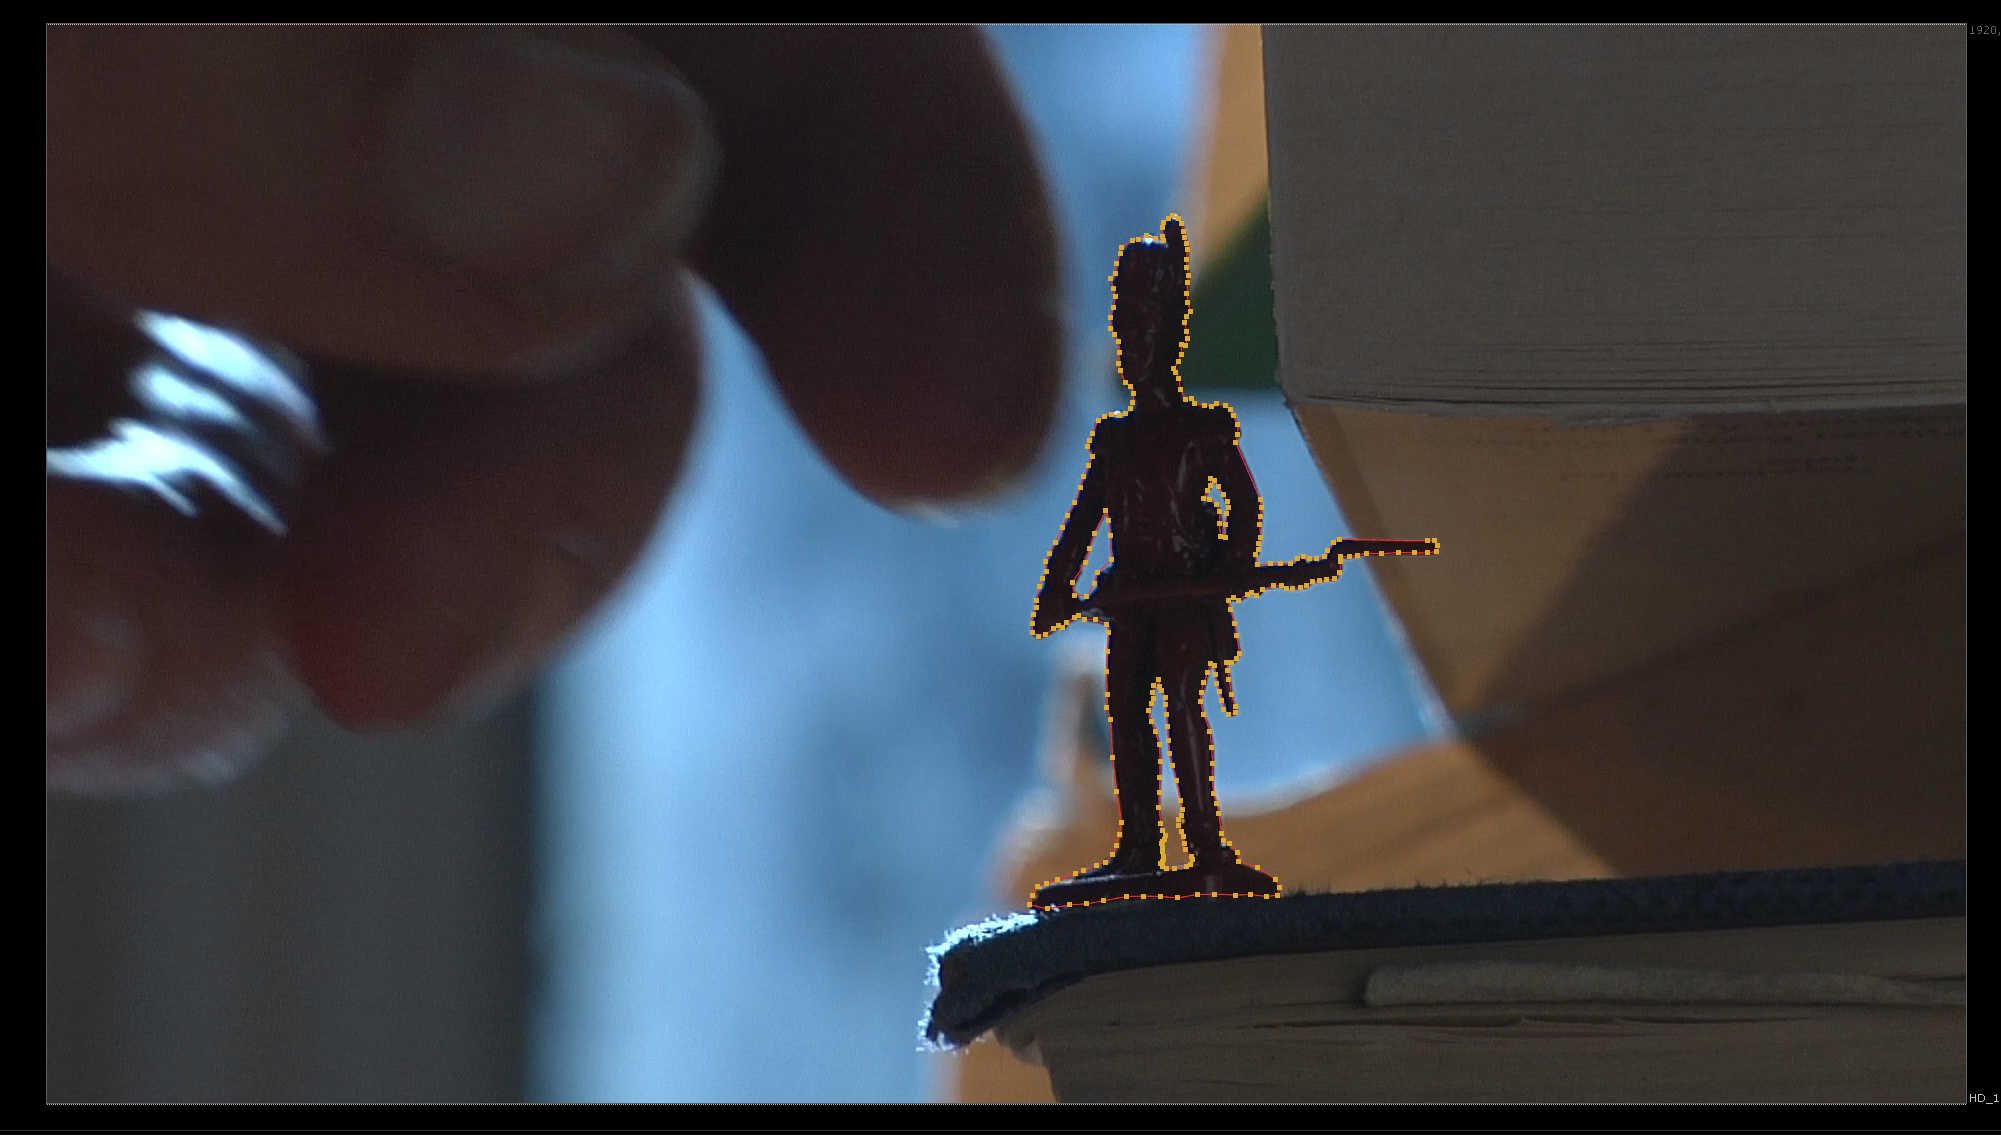
I always wanted to end on this shot but it needed work, the soldier was too dark. After some simple roto, plate looping and switching, I was able to pull and grade the soldier and push the red tone.
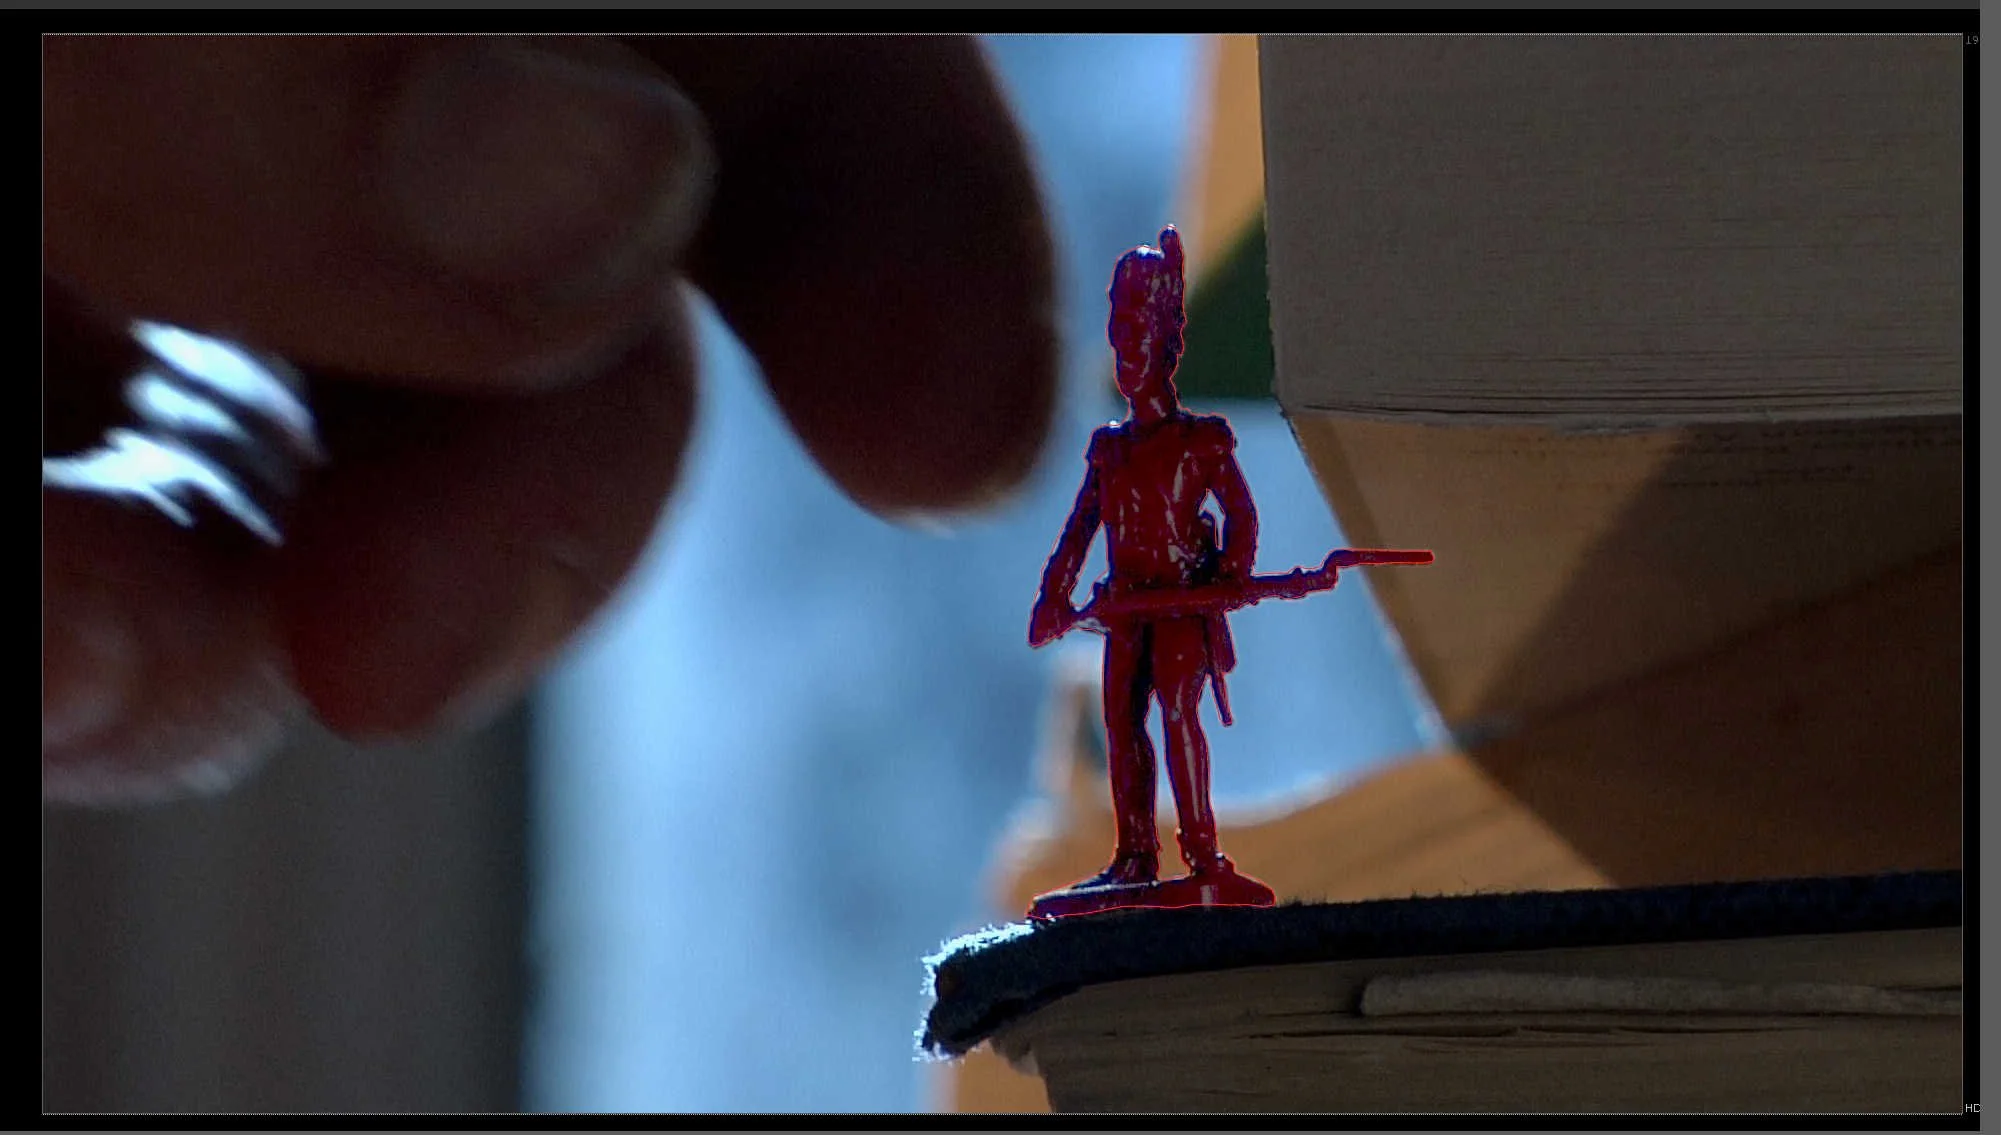
The roto needed to be tracked but with a fixed camera it was straight forward.
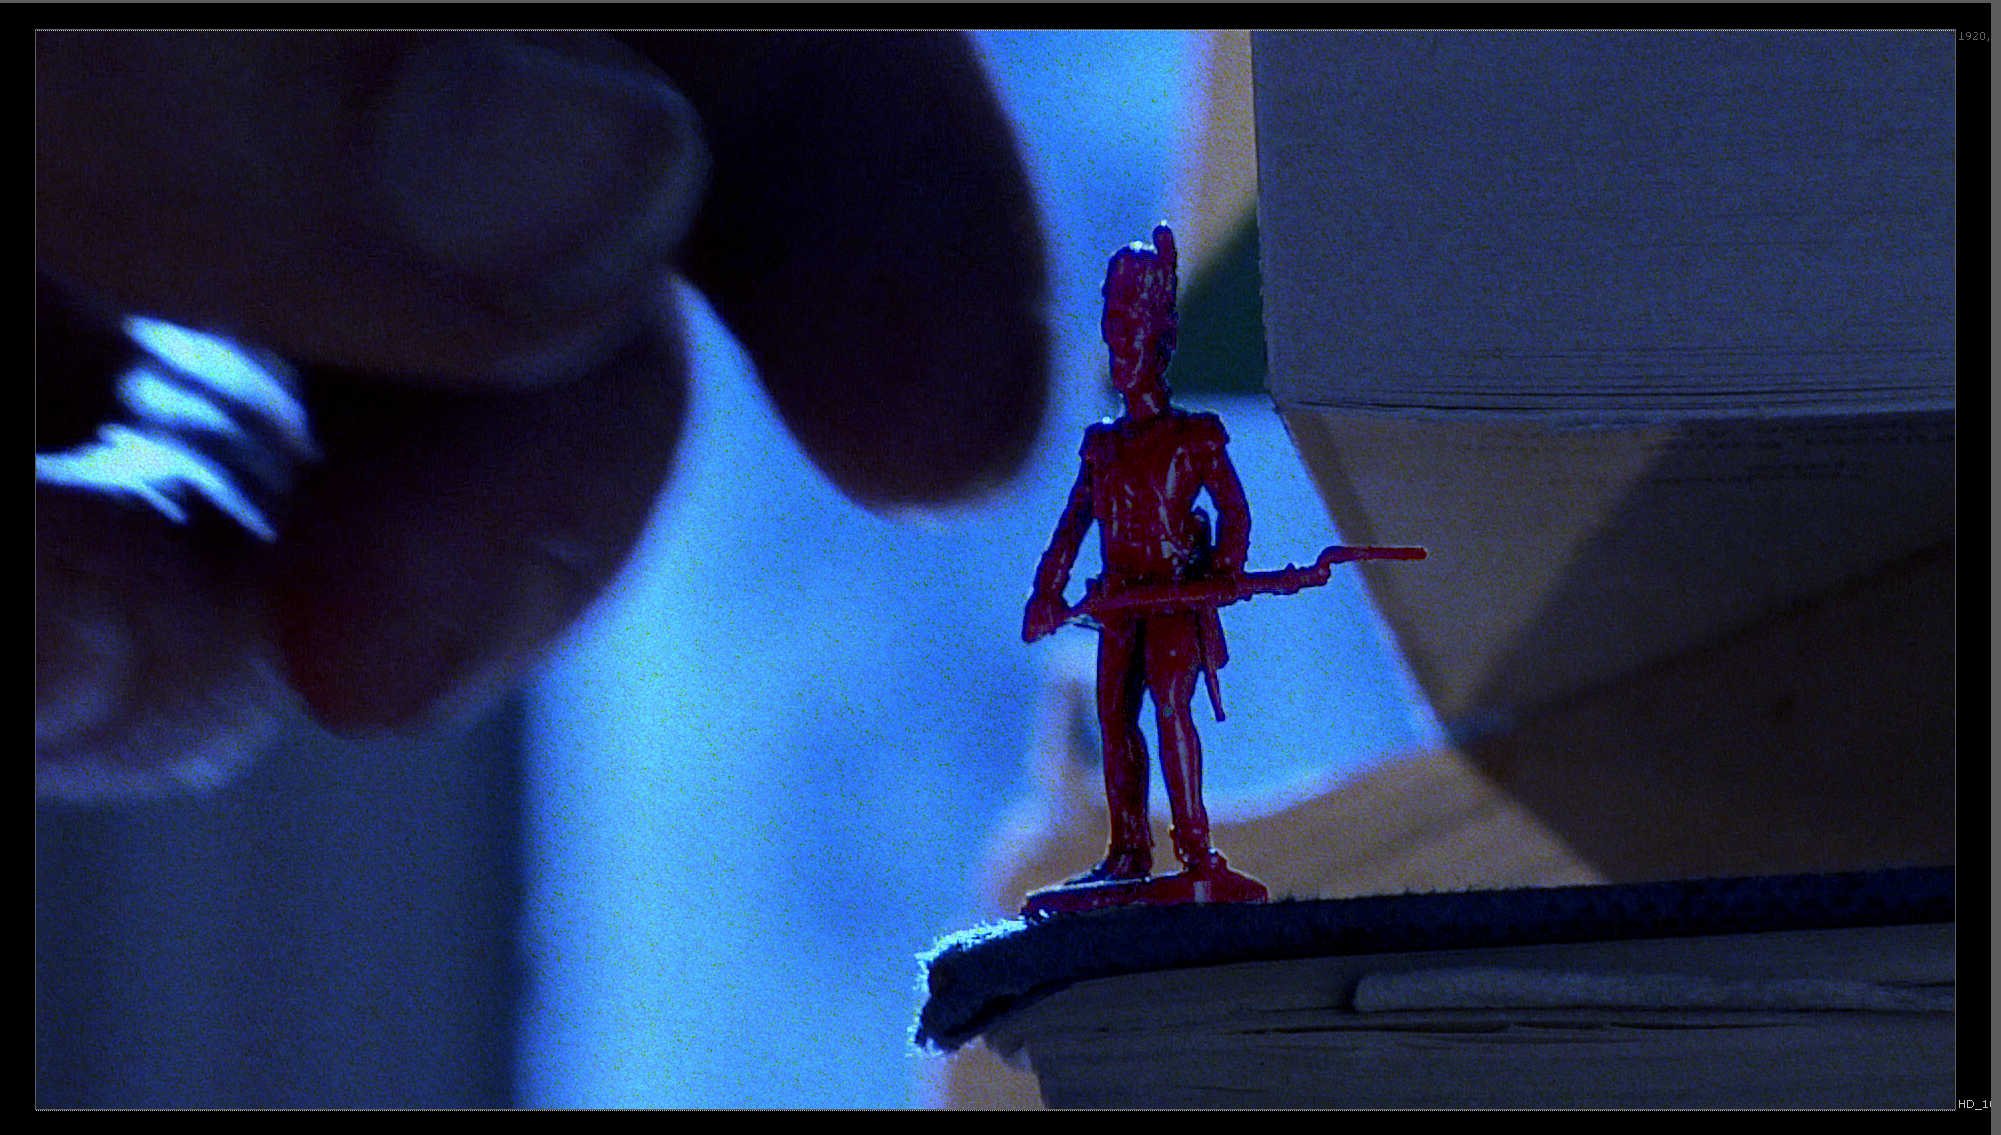
The final roto, the red soldier lifted. Also the final grade and grain were applied here.
Editing and Sound
I planned on getting my old course leader to re-record his dialogue but with schedules and work commitments I opted to keep it as captured on set - somehow the naivete of the original voice had some weird time capsule-like charm about it.
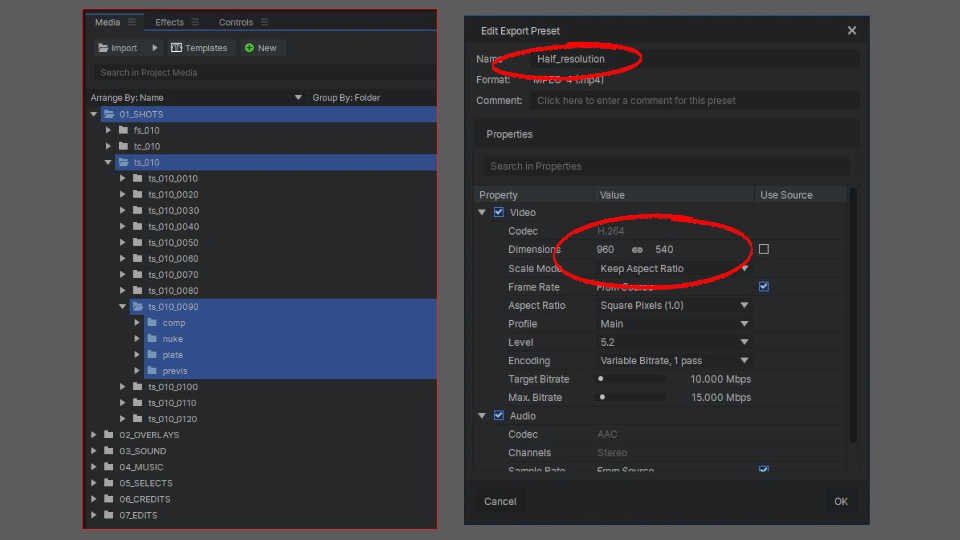
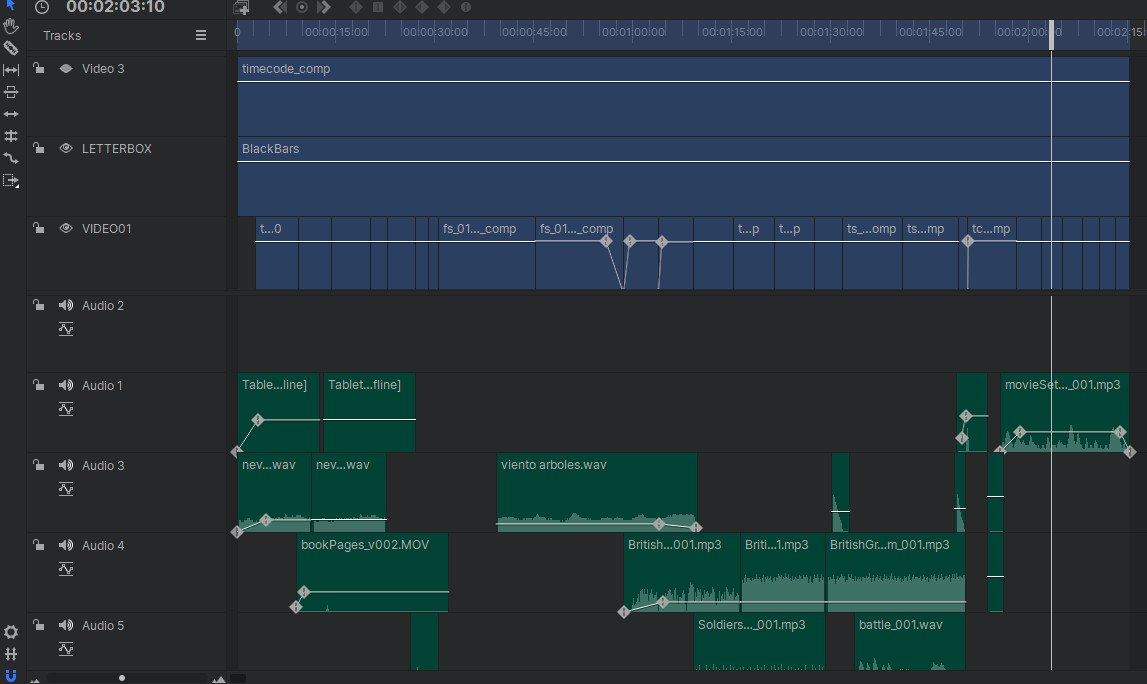
Organisation is so important when editing, so I tried to create a structure that would contain all the footage and images I would be using throughout the edit but also scale with extra data if I needed it. I built a simple preset to keep the work in progress edit file small.
I tried to keep as much sound as possible from the original recording. I enhanced it with clips sourced from Youtube or free soundFX libraries. I did record a series of very crude folley with my iPhone - just helped to add some extra noise.
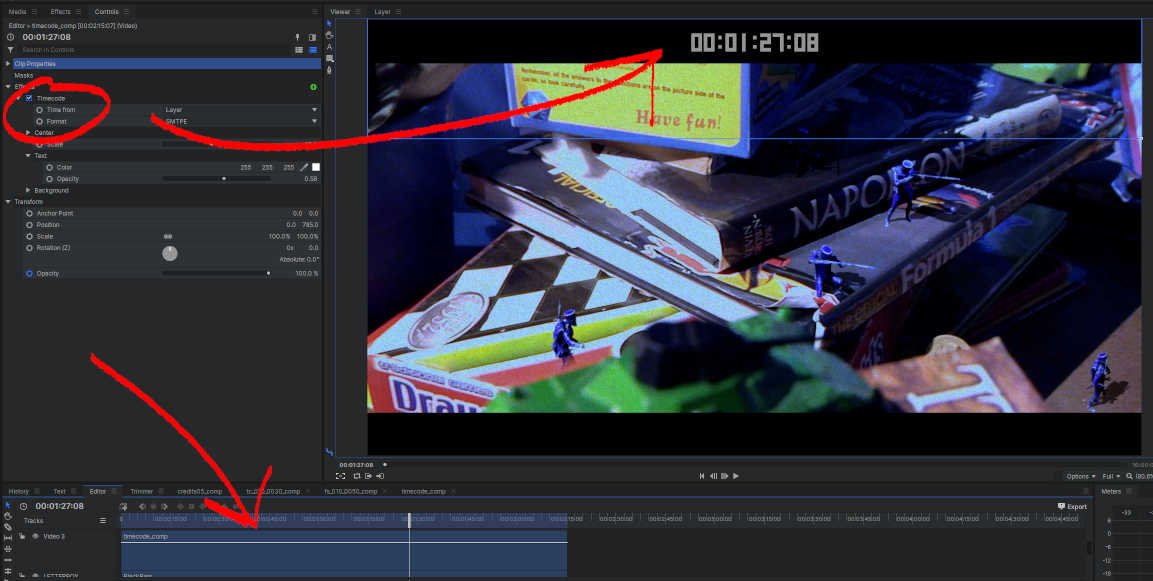
I used Hitfilm’s effects library to add a simple timecode read out to the edit. It was as easy as making a blank composite and adding the timecode preset, the options are minimal but it proved very valuable - even in this short film edit.
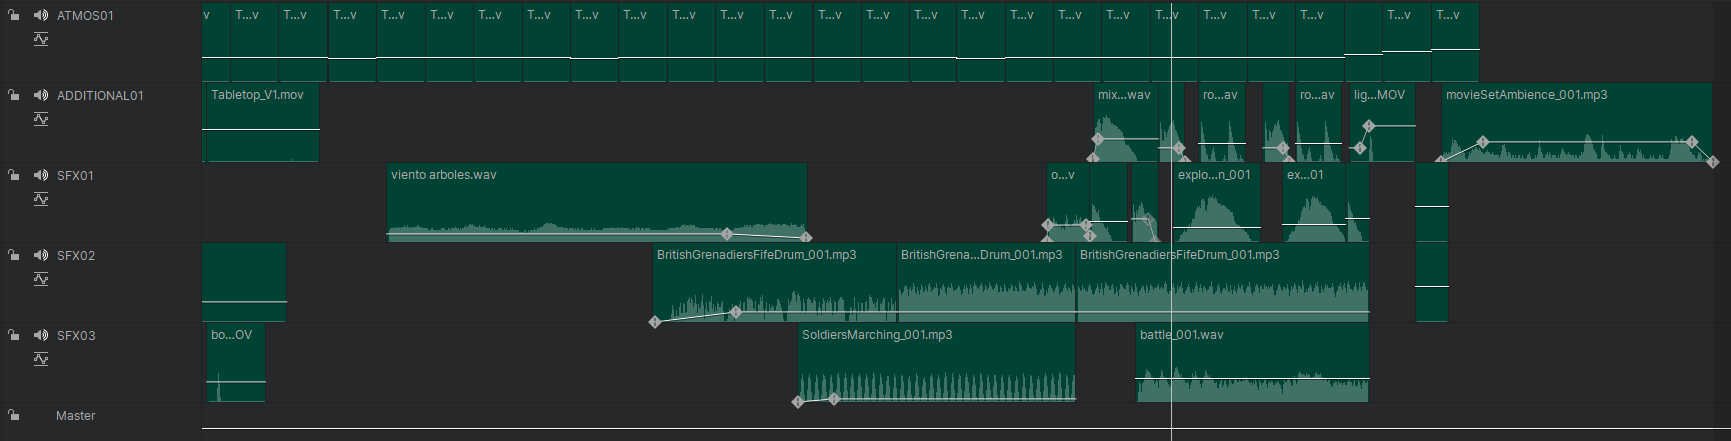
A couple of clips were retimed to enhance the depth, after all these were toy soldiers but it had to feel a little chaotic. The extra layers made the simple VFX really sing in those shots.
That’s a wrap
Ten years is a long time, it’s been over a decade since my time at the National Film Television school and to see this little film finally completed after it spent such a long time languishing on an old hard drive. Seeing the footage from the shoot, the pictures showing my class and crewmates having so much fun really brought back those treasured memories. I tried to document it as best I could, there is only so much original material from those wonderful years but I wanted to share the journey.
Film school has bestowed truly wonderful opportunities for my career and I feel humbled that I can finally share my first foray into filmmaking and this story with you all.