
This plugin is a revelation for working with Unreal, it allowed me to work incredibly efficiently and saved me a lot of headaches from not using Unreal’s native Movie Render Queue.
Set up the Reader Node

Once you drop down the Unreal Reader node, it’ll look something like this, and you can start to populate it. I used ML as the filter to load in the map, I only had two maps on this, one was the main project and the other was a Dev map, easy to completely avoid that with the ML tag. Loading the sequence was done via a wildcard, I ignored some of the shot name and just looked for the shot number and version, I left LS in the path just for clarity more than anything else.

Once I was happy you can click Write to Disk and the reader node will tell Unreal to render, in layman’s terms the reader is a wrapper for the movie render queue. I did encounter a bug where if I rendered the frames and pulled them back into the file via a read node the renders would always be half the resolution I rendered at 1920x1080 would be read in as 960x540, I’m not sure if this is due to my non commercial license or a bug. I did find a workaround, two options. I could either render at 4K and then it would read in as HD or choose to read the file via the reader node and that’s the option I decided on.

Once I made one shot and established a base line settings for my renders, these settings were propagated into all shots, mainly just copying the node into a new shot comp and updating the shot path. Once updated, click on Fetch Latest and refresh your shot and Nuke will pull in the new shot for you to render.
Having the Temporal Sample count set to the value 2 helped fix some motion blur bugs straight away and the warm-up frames to 32 just meant each shot had ample time to ramp up before rendering.
The colour workflow is also enabled here, checking the OCIO Enabled connected Nuke to my Unreal setup and I could set my colour space options here.
The rest of the options stayed at their defaults, only a handful of shots forced me to start dveling into these to get my renders working.
A Bug Workaround

Read File Checked on the Unreal Reader Node - 1920x1080

Read File via a Nuke read node - 960x540
Motion Blur Settings
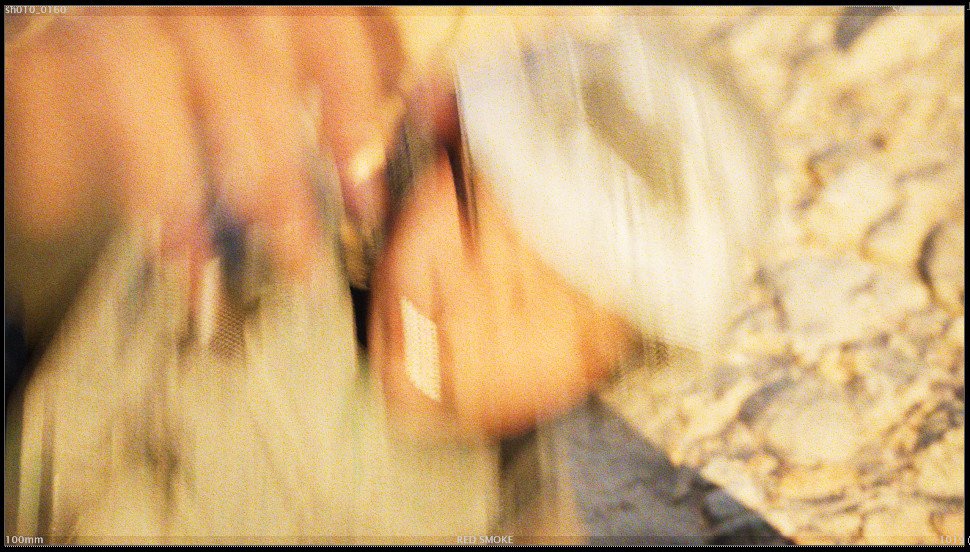
Getting realistic blur is always important when rendering, it helps the previs look and feel more filmic. The reader makes this very straightforward. In the reader node, go to the Advanced tab and look for Temporal Sample count, the default is 1, which may be fine for the very first version but once you start working I would increase these. Most of my shots are set to 2 by default, some faster-moving shots are rendered at 4. This shot, sh010_0170 has a very fast motion where Nico is bundled to the ground, I settled on 32 but you can see how different the settings can be,

Temporal Samples 2

Temporal Samples 4
Temporal Samples 16

Temporal Samples 32

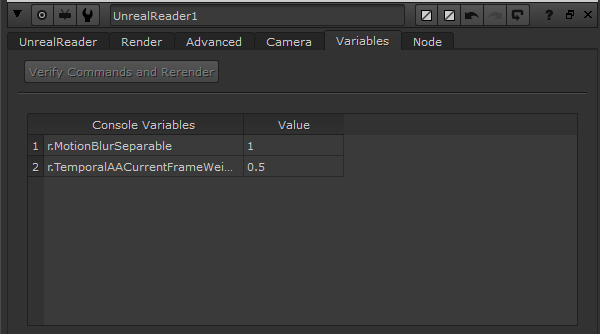
I also use the Variables tab to further tweak the renders using Unreal’s built-in console commands. After some research I found these two commands to be useful in pushing the blur that little bit more.
Cryptomatte Workflow

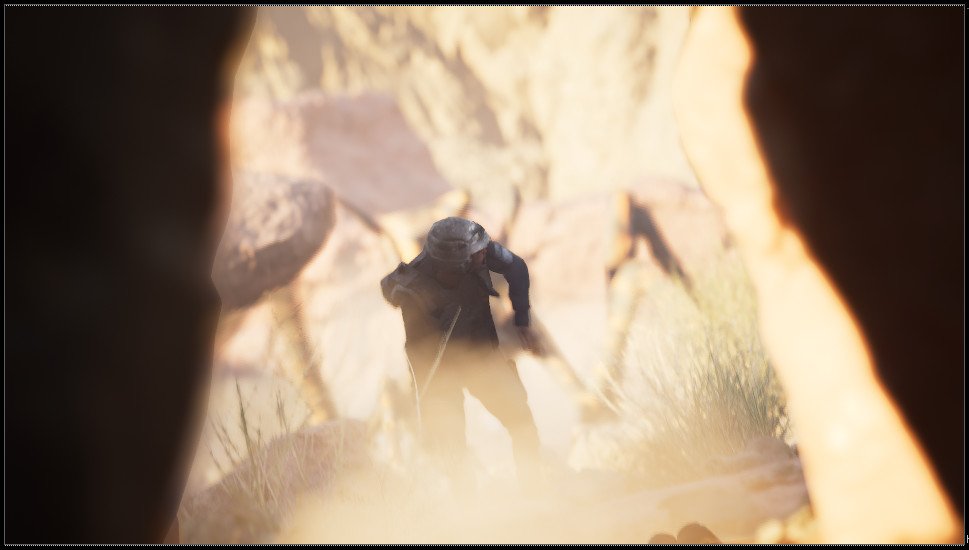
The Unreal Reader node gives you access to a ton of render passes, one of which is the Cryptomatte. This pass is excellent to quickly isolate parts of your image for tweaks. I wanted most of my shots unotuched but some modifications were needed to push the shot a little more. Here I used the cryptomatte to isolate the cave walls either side of the image, my thinking was just to darken them and thus funneling the eye down the center directly at Nico.
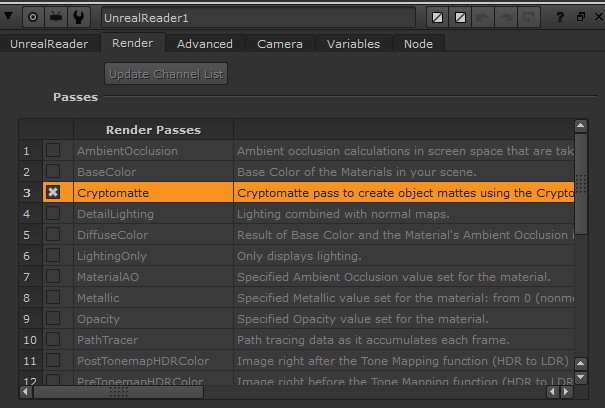

In the Render tab, you’ll see all the passes on offer, all you have to do is click the pass you want, update channel list and render. When it’s finished you can acces the cryptomatte pass with the cryptomatte node.


It’s a very easy workflow, just click the image and you’ll start to select the parts you want to isolate for some comp work. You could also look for the names of the objects in Unreal if you knew, not that beneficial here but if I were to say do some work to Nico, I could wildcard her selection with *Nico and she would be isolated.


I’m not the strongest comper so I try to make my comps as simple as possible and my main reasoning for this setup was to try and learn some more about Nuke and also see how quickly I could make tweaks in comp rather than go back into Unreal. The process here is, isolate the sections via the cryptomatte, copy the alpha, then blur and colour correct before a final premult to make sure only the areas I wanted are effected and then merge over the original render. It’s not the most elegant setup but this is previs, it was fast and it worked.
Position Pass Workflow


Another pass I wanted to play around with was utilising the Position Pass to place 2d elements, I thought it might be a useful way to add in explosions without the need for tracking as the position pass gives you a point cloud of the entire shot and then you can place your element correctly in 3d space. I didn’t end up using this in the final film but I did have this basic setup in the edit for a long time. I thought it would be useful to show it. This setup was from watching tutorials and seeing what worked and what didn’t.
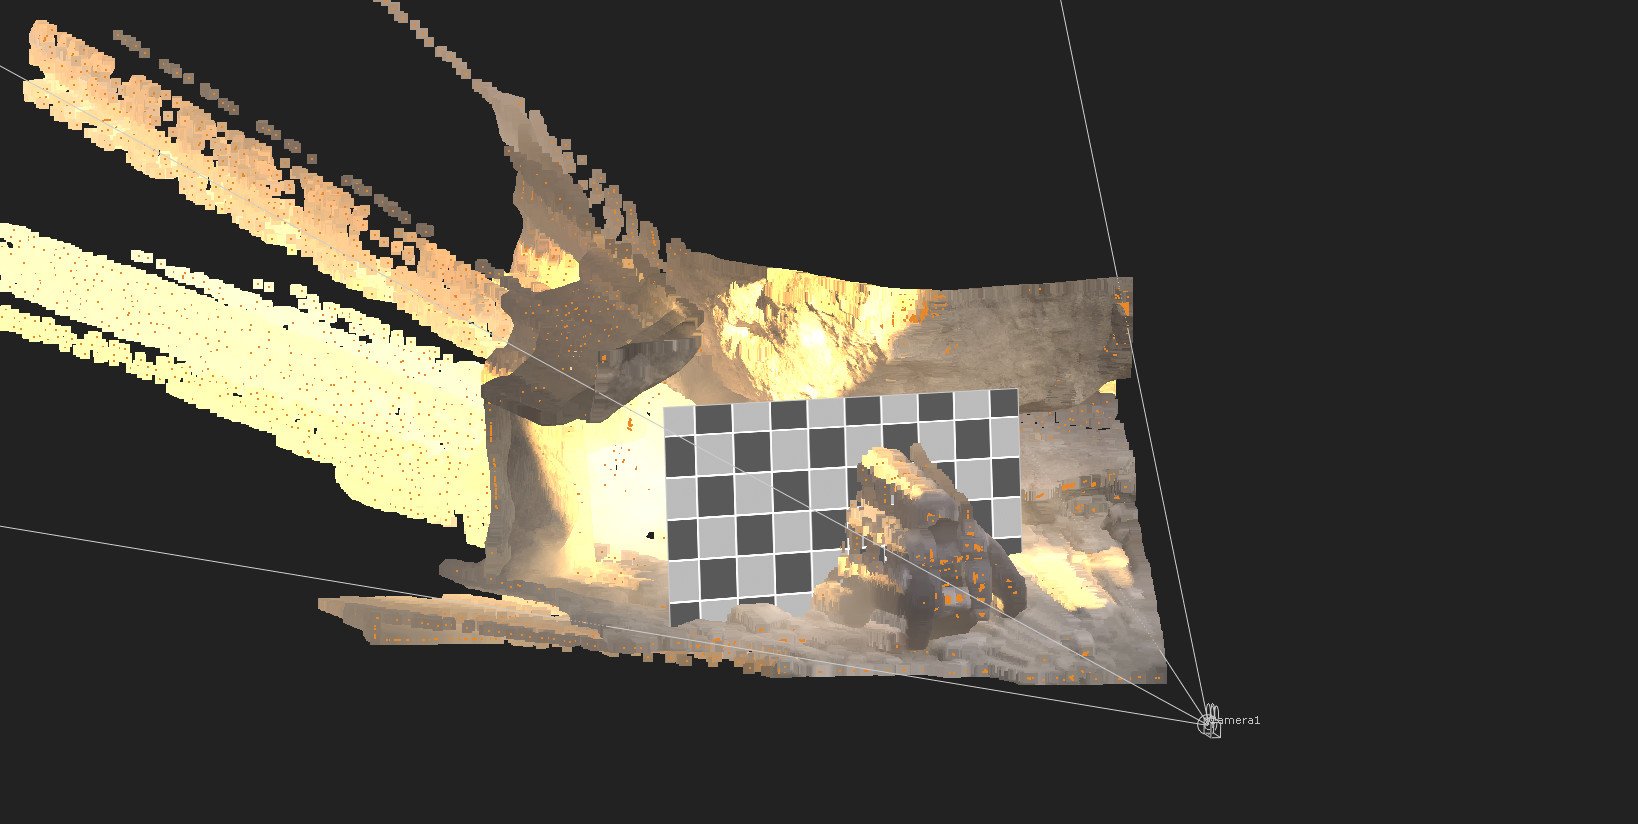

Using a Card 3D Node, I added a checkerboard, mainly just to see what and how it was all working. Up until this film, I’d not experimented with the position pass workflow so with stumbling through it I was able to set it up and replace the checker card with a pretty low rent explosion element from my ancient library.


Same setup, I swapped out the checker card and replaced with a crude explosion element, I added a little grade and glow to make it sit a little better into the plate. To make it a easier to work with, when rendering the passes, I switched the option Scene Units from Nuke to that of Game Engine and it made Nuke’s 3d space more comfortable to work in.


To get the element to sit between the Bug and Nico, I had to generate the Cryptomatte pass and isolate Nico and the ground around here, simple compositing and another useful exercise. With some more testing, this could be a really great addition to the visualisation workflow. I do fear that Nuke is just too expensive against the cost and relatively ease of use when it comes to After Effects. I could see this working in a smaller team, food for thought.