
From the start Red Smoke was just basic Maya and Nuke while I was getting my scenes worked out. Finally, after a hardware upgrade, I was ready, or at least just wanted to jump into Unreal and start playing around. I designed a workflow to ensure everything came across. Initially manual and then supplemented with a few small scripts to help automate the repetitive aspects of getting the assets from Maya to Unreal.

To start this process off we have to do a little prep on the assets we want to export. The workflow is two parts, in Unreal we need an asset that contains the model, textures, and skeleton. This is saved out in a Rest Pose. The pose is the standard rig A or T pose, with no animation. I exported all my assets as a rest pose in the FBX format and imported them into Unreal. The idea is that you put the asset into the sequencer and then attach an animation clip, via the +Track button. Nice and lightweight and a real breeze, once you have everything working.


I found that when exporting the Rest Pose FBX from Maya it to set your frame range to a single frame, 1001 and also bake all joints. The joints I needed for Unreal were located in a selection set.
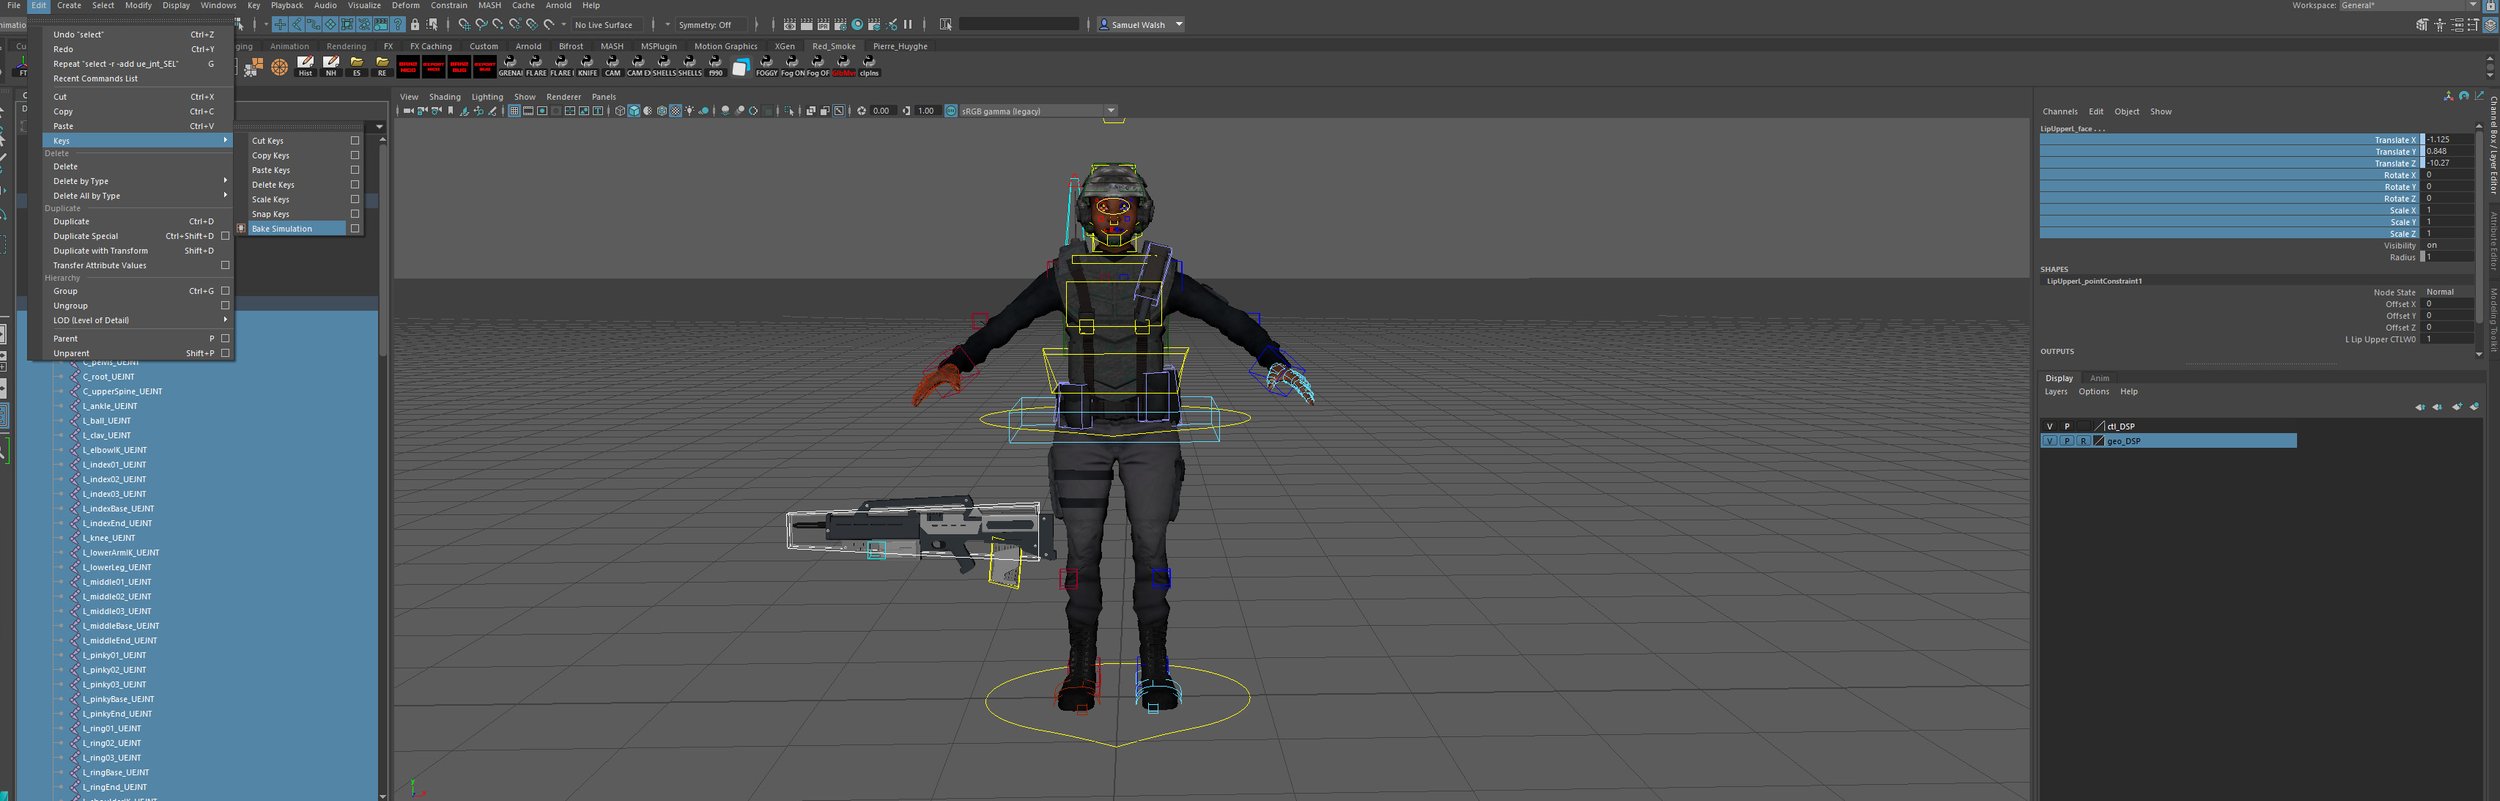
Use Maya’s Bake Selection to bake the animation on the joints on frame 1001. I found that setting the FBX to bake didn’t help and it was always better to bake before exporting to FBX.
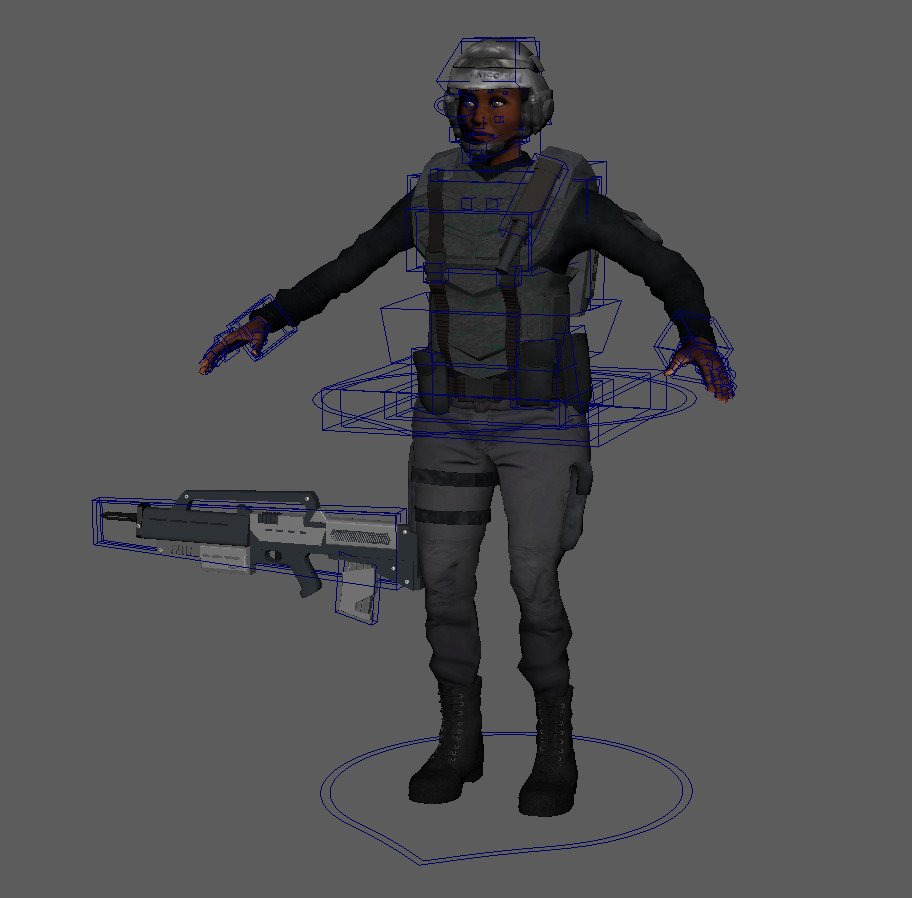
Rest Pose Not Baked before Export as FBX

Rest Pose Baked before Export as FBX

Rest Pose Baked only Skeleton before Export as FBX
If I didn’t bake the FBX inside Unreal would still work but the file contained all my rigging curves and increased the file size, this did mess up my Houdini crowd imports so I wanted to fix it. I decided against removing the geometry on these exports, mainly as I wanted to use these in Houdini for my debris FX simulations, but it would be lighter to export just the skeleton as the asset already lives in Unreal, it just needs animation.

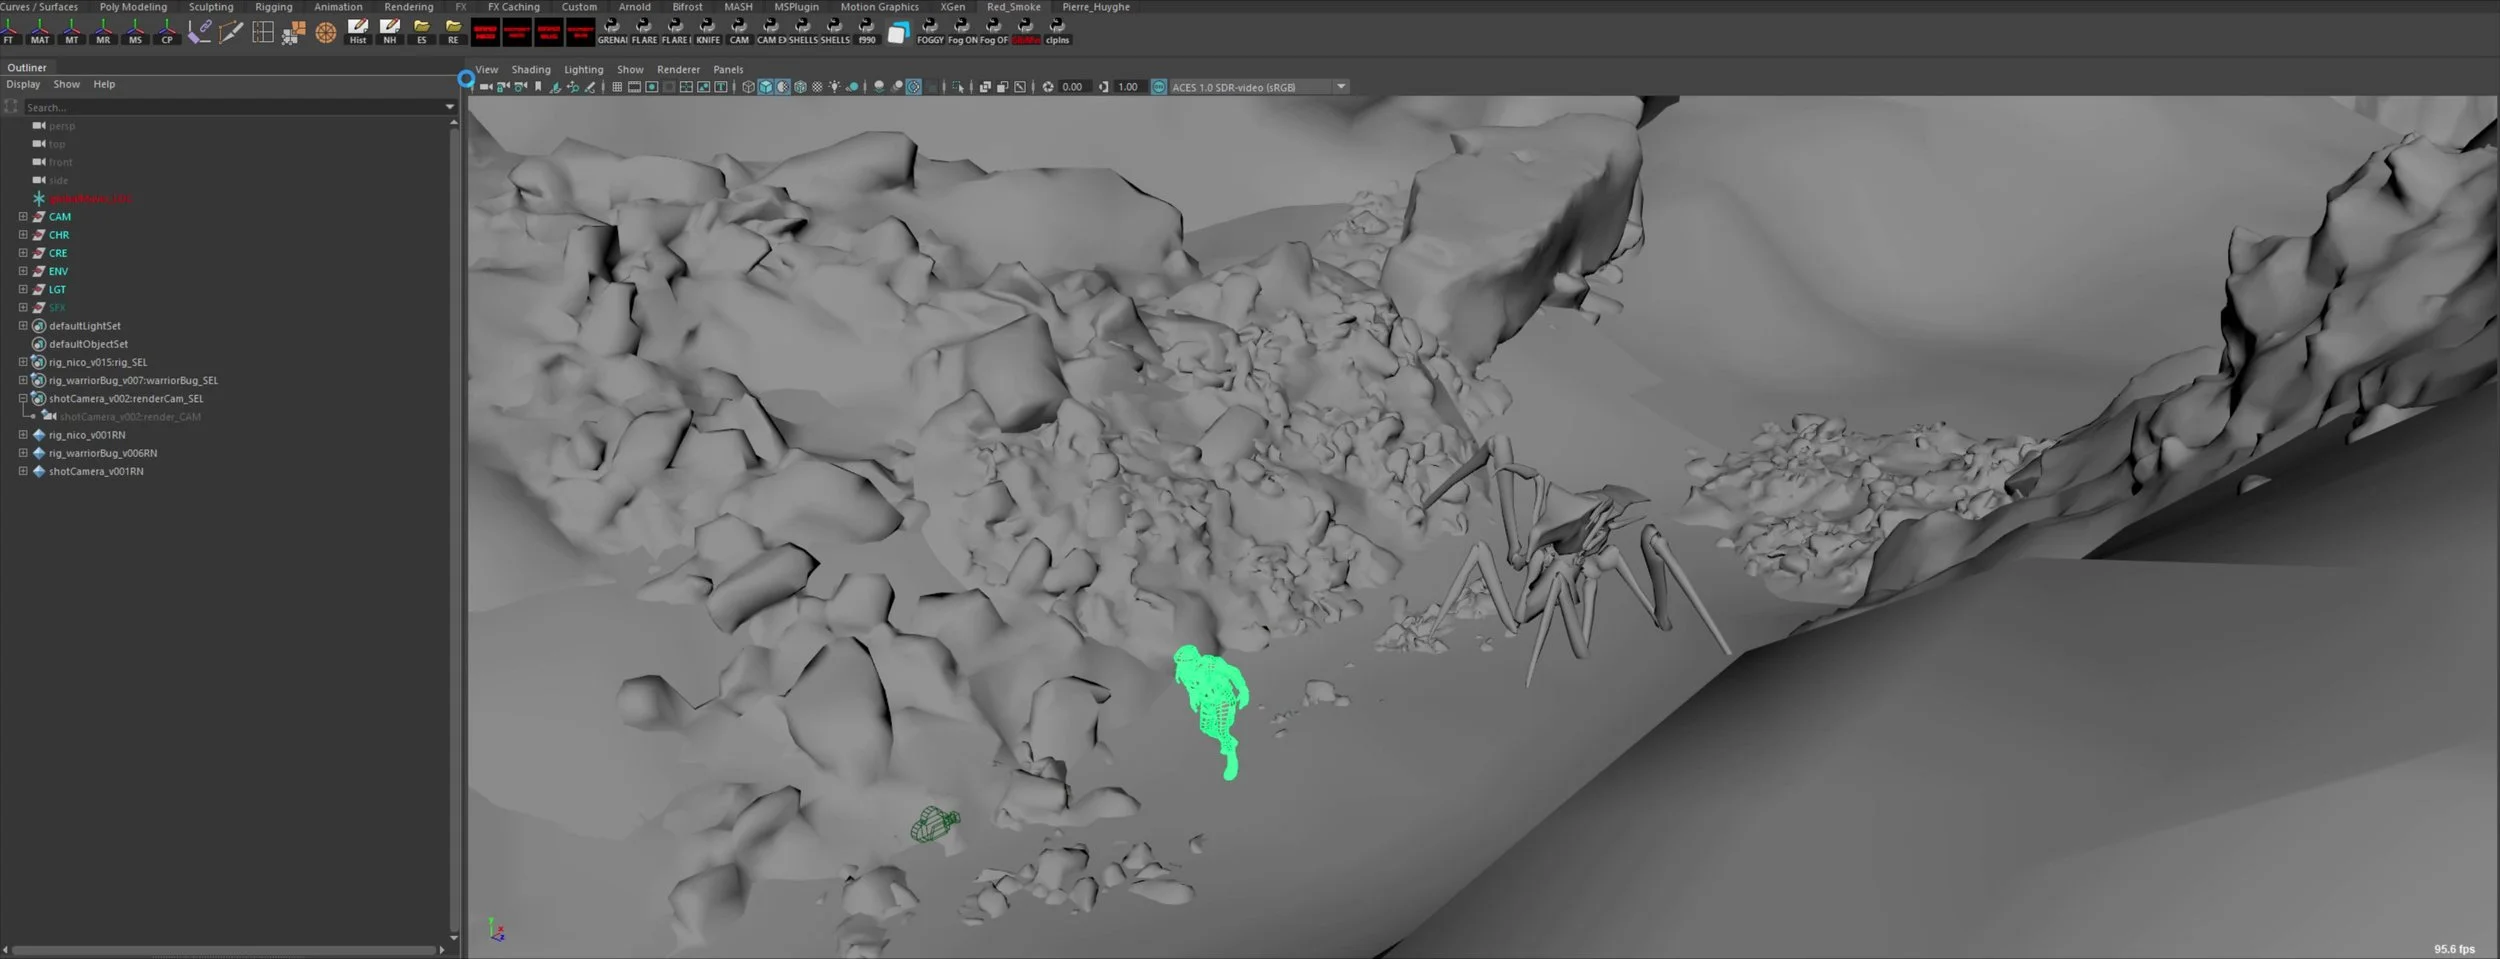
I’ll use sh010_0210 to show the process I went through to get Nico, the Bug and the Camera exported from Maya and into Unreal. The first thing I like to do is do a Save As and save the new file with the suffix, _bake. Doing this avoids any accidental saves over my animation with baked rigs. You can always get the animation back using Studio Library if that ever happens.


Once the file is saved we can start to get the assets baked out in the FBX format. The process is similar to exporting the rest pose, this time we are baking the skeleton to the shot duration. All my shots were exported at 990 for Nico’s antenna to simulate correctly. That little bit of code can be found on the asset page in this wiki workflow ramble.

The camera was a much more involved process, the render_CAM was nestled inside the hierarchy so meant getting it out a little more difficult also having it located in a set didn’t work as I’d hidden the transforms to not touch them while animating. The only solution was to make a camera, constrain it, and then bake that out. Doable for one shot but a little time-consuming for not only every iteration of that shot but all shots in the film.


A quick screen capture of the process of running through my automation for exporting Nico, the Bug and the Render Camera for sh010_0210. It’s about a minute, so pretty fast.
I added the Export Selection to the shelf as a button, to improve the speed. I wrote a simple script that would select the set associated to the asset I was exporting to avoid having to go digging through on every export.
The code snippet to select the camera, all assets had a variation of this I could click for exporting purposes. Another one of my mini macros.

The scripts for the assets were straightforward. The script defines a couple of variables, queries the shot range, bakes out the transforms within the range and then finally parents the asset to the world. The reason for the last part is that I ran into issues if I exported assets that were in a nested group setup with additional transforms, having it parented to the world solved this.

The camera export process was much more involved process as mentioned above, the script made this a much more pleasurable part of the shot exporting process and made sure the camera also had the focal length, and depth of field settings baked ready for Unreal.

The gist of the script is that it duplicates the camera in my camera rig, unlocks the transforms and parent constrained to the orginal rig cam. It then connects the camera settings, focal length etc, queries the shot range and then bakes. The camera settings are on the shape node in Maya so the script runs through the baking twice to capture those. Finally deletes the parent constraint and renames it ready for export.


In the sequencer, add your rest pose assets and then using the + icon, add in the corresponding shot animation clip. You can search for it to make it easier as you might have tons of clips. Once added your assets will move when the sequencer is scrubbed or you hit play.


I imported my assets into my shots directly, and the settings were minimal, I unchecked Force Front X Axis as that broke my animation. Once imported you can check how the animation plays and looks via the Animation Sequence, if that looks good then we are good to move on.

Importing a camera is much the same process, when I make a shot I use Create a New Camera and then import the Maya camera into that. Once you know the import settings its a fluid process. This picks up all the required information from the Maya FBX export such as film back, lens, focus distance etc.

Here is a little run-through of the importing process, once I had my settings it was as easy as the video. The area that threw me initially was the camera settings import box, but once I’d tested the combinations and worked out what was happening the importing was almost autopilot.

For the camera import settings, I take screen grabs of almost every setting I have to change or have to remember. They’re littered all through this wiki and are a super helpful way to create your notes and documentation.
The Force Front X Axis here does just that, it switches the axis of my Maya camera to work within Unreal’s coordinates. If I didn’t check it my camera would be orientated completely wrong.
Checking Replace Transform Track, will make sure that you only have one transform track when you import and if you reimport, say an updated version, it will stop multiple transform tracks from being added. I can see that being useful in certain use cases but for me, it was checked off every time.
I left off Convert Scene Unit as my Maya setup matched the Unreal scale, 1 unit = 1 cm.
These settings will stay like this during your session but you will have to update them if you close Unreal or you have a crash, again, having a screen grab just helps to confirm your choices if you forget the combo, happens all the time.


Another couple of settings you’ll want to tweak are the Constrain Aspect Ratio and Exposure. The aspect setting will make sure you render your full frame and not an already cut-down image, essentially your render will have aspect bars baked in. It might be something that you want but I wanted all pixels as I wanted the option to do 2D repositions. Search aspect and check Constrain Aspect Ratio.

To make sure Unreal doesn’t apply any unwanted exposure to your shot, you can set the exposure to a default of 1 by searching EV and popping 1 in each of the boxes. You can also do this via a post process volume, but at the time I didn’t have one set up and preferred to set it on each shot cam I imported. The difference is very clear on these grabs.

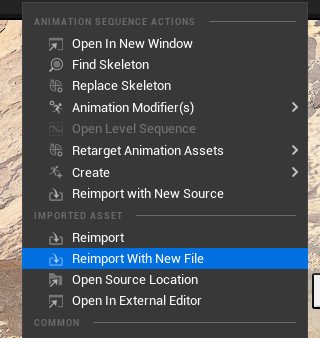
A handy workflow Unreal has is the ability to update or Re-import over your current FBXs for your assets. It’s great for working iteratively, you can kick out some basic animation with a camera and start staging, set dressing, and lighting and then when you have time or want to improve further you can run through the export process in Maya and then navigate to your FBX in Unreal, right click and then chose reimport. You have to manually update the FBX using this method as Unreal won’t natively read an updated FBX on disk as it needs to be ingested as a uasset in the project.

A You can also completely update the asset, I had varying levels of success using this method and I preferred to completely remove the asset and then importing it new. Certain assets like Nico went through skeleton changes and even though you could import onto the current asset, I would often get issues in parts of the mesh being broken or remove entirely as there wasn’t a clear way of telling Unreal which skeletal asset to use.