
As Red Smoke started out as a way to learn more about Houdini crowds, I needed a creature. Modelling the Bug was hugely fun adventure to recreate a version of the iconic design.


The internet is a treasure trove of old film sites, blogs, articles and interviews. I found these from an old Tippett Studio article and these are the orginal XSI models.

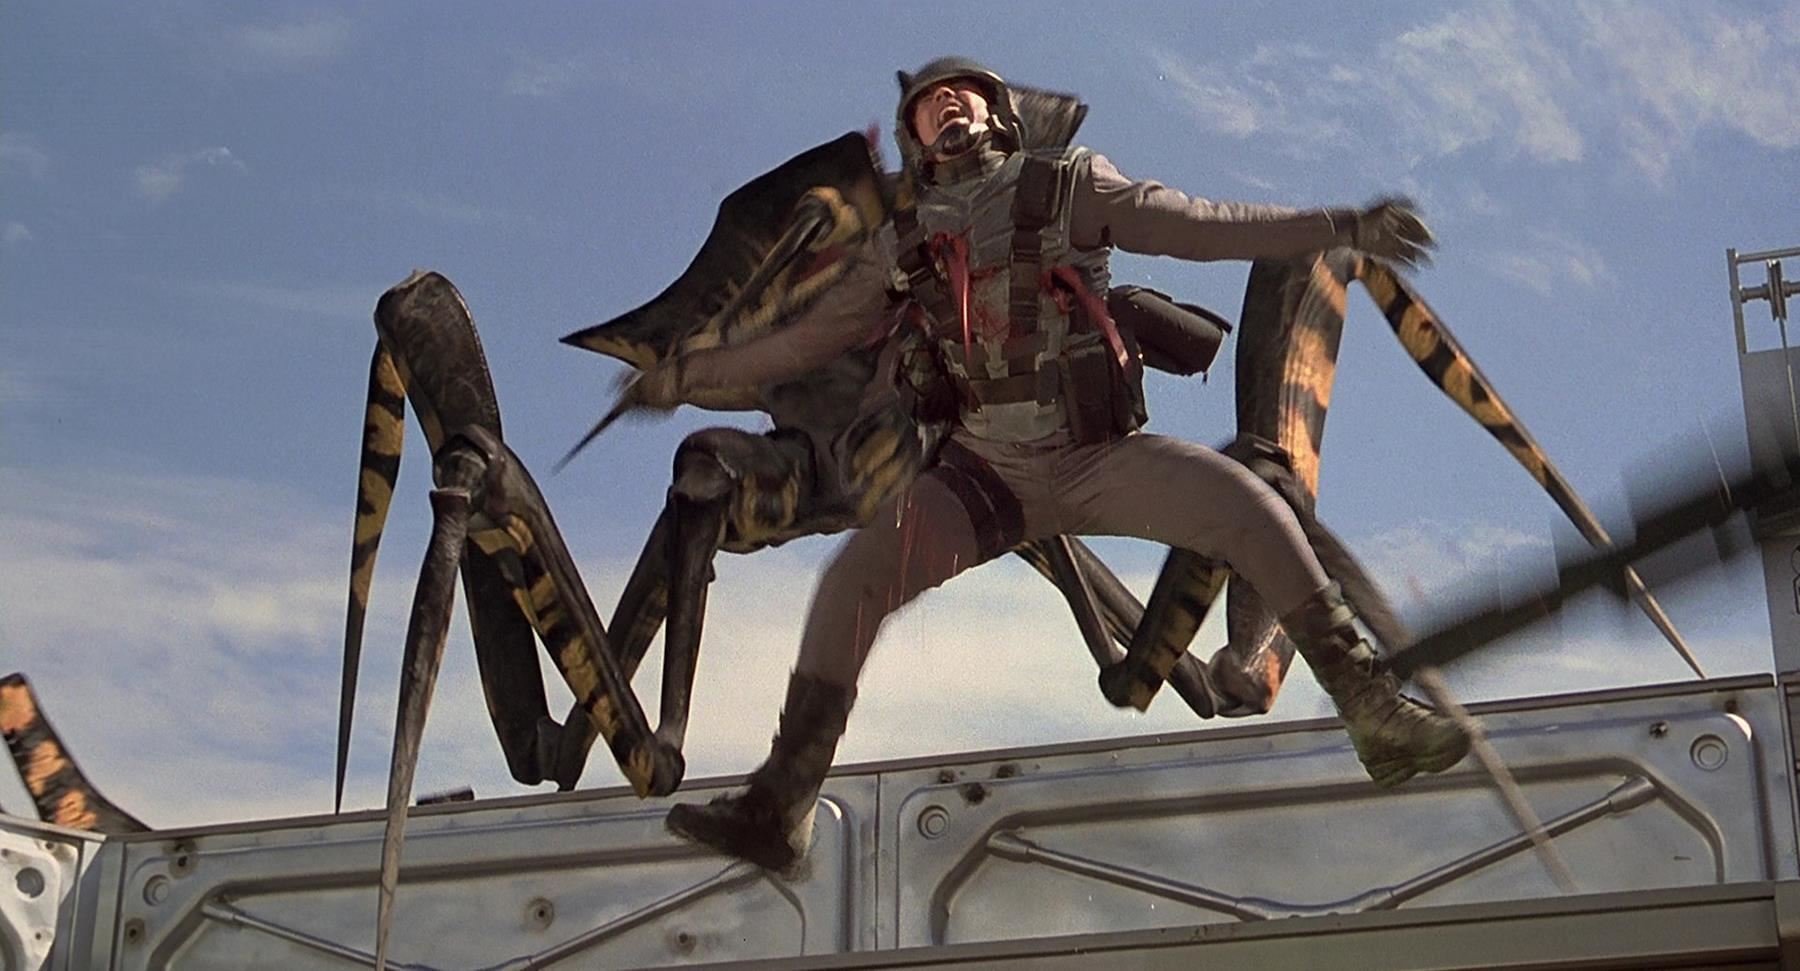

Grabbing stills from the film was a big help, you think you know the design and then you start looking and it’s really way more details than you thought. Renders are still lovely.

Start simply. Nothing but cubes, stretched into place to block out all the major forms of the bug’s anatomy. I started doing this after reading a fantastic book by Eliot Goldfinger. Highly recommend it.


Breaking down the bug into it’s basic shapes keeps you looking at the broad detail and not worried about all the intricacies on offer. Think of this build in the way a figurine would be assembled.


Collecting screen grabs and images from the net to build up a library to take the block bug and get it looking more like the film’s original bug, albeit, much, much lower res.

I kept the poly count low on the model, even with detail the bug is super light weight and perfect to animate with for visualisation. The UV map was laid out in the component parts and kept to one Udim tile for simplicity.
The bug would be exported to Houdini at some point for the crowd work so as a sanity check, I imported the bug, set up a simple scene to verify that the bug was one 2 one with it’s Maya counterpart and the geomentry was all water tight and nothing funky happening during the I/O between Maya and Houdini.
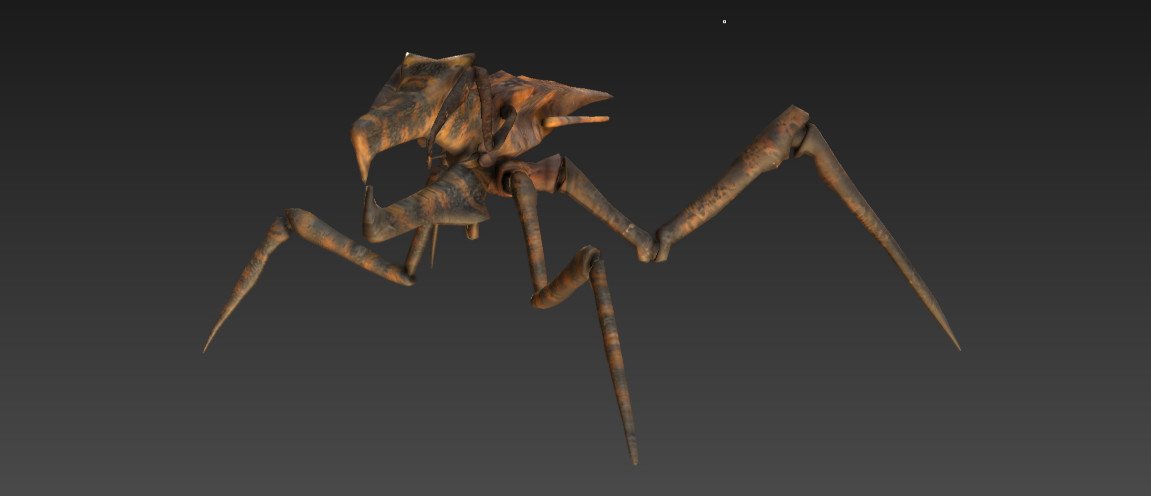
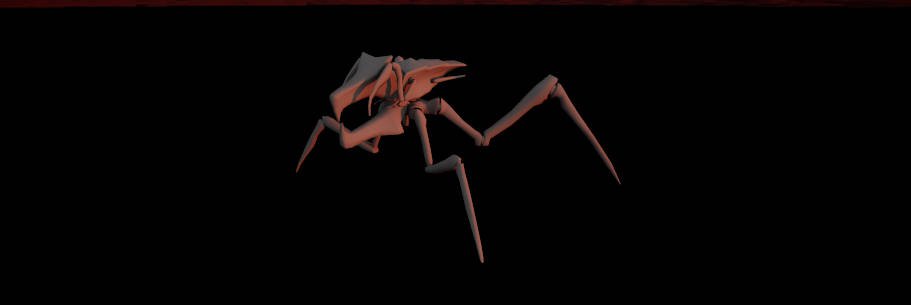
I still use Mudbox for the initial pass of textures in the visy workflow, I’m replacing some of this work with substance and Mari but here, it was all about speed. 30-45mins and I had a very simple texture. Perfect to start dropping the bug into shots and getting some light to react and to avoid the solid blinn I had in several of the edits prior to getting this texture pass completed.

The bug was textured in Mudbox, sadly I didn’t take any screen grabs of the texture process but it was about an hour projecting a few images I liked over a medium grey base coat, I had plans to further improve the bug in Zbrush and Mari but time got away from me - maybe for a separate portfolio piece. I used my old trick and generated the normal map using Gimp. I like to have placeholders when working and if time allows, I can iterate further.


A visual gag during the film, I wanted to have a go at creating a couple of variations of the Bug damage, this is the first, peppered with bullet holes from Nico’s rifle.


Another very simple variation, it was a 5 min job. It was pretty subtle and it was more for texture, no pun intended there.


The imported Bug in Unreal, basic material setup, and extra maps from Gimp. The foundation of which the textures will evolve from, to be honest, I’m pretty happy with this pass and it’s a CBB (could be better) and will come back around if I have the time. This is where a team would be great, someone could take this and run with it, but alas the solo ventures are all about what can be done.

Applying the textures is also a good first chance to see if the I/O from Maya to Unreal is working, another sanity pass if you like.

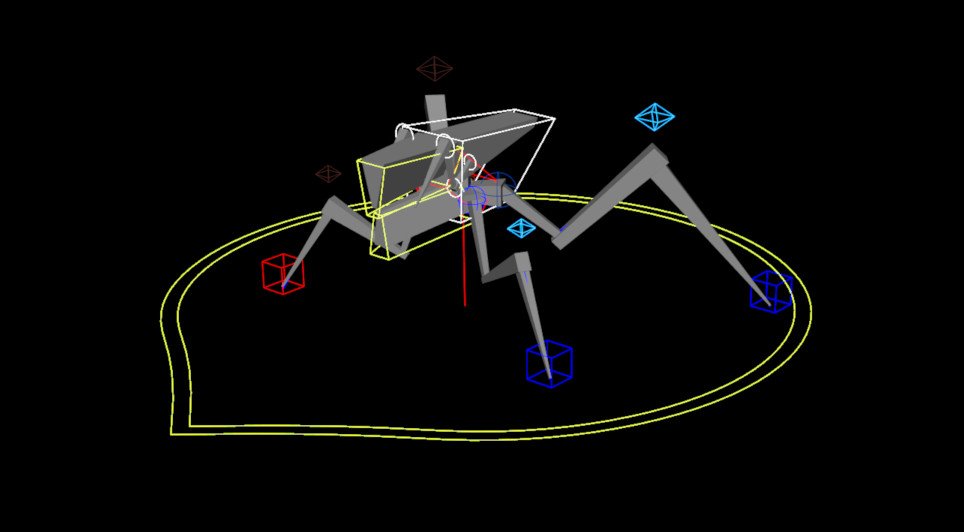
The rig was simple, I always do a quick draw over on the model to work out how my rig might look, it’s a 15-minute process before starting that helps me better understand what controller shapes I may need to build and the rough placement of the curves. I like to animate with rigs that feel like I’m almost manipulating a puppet, so if I can make it fast then I will, this was also a previs level rig, so almost no complexity to it.

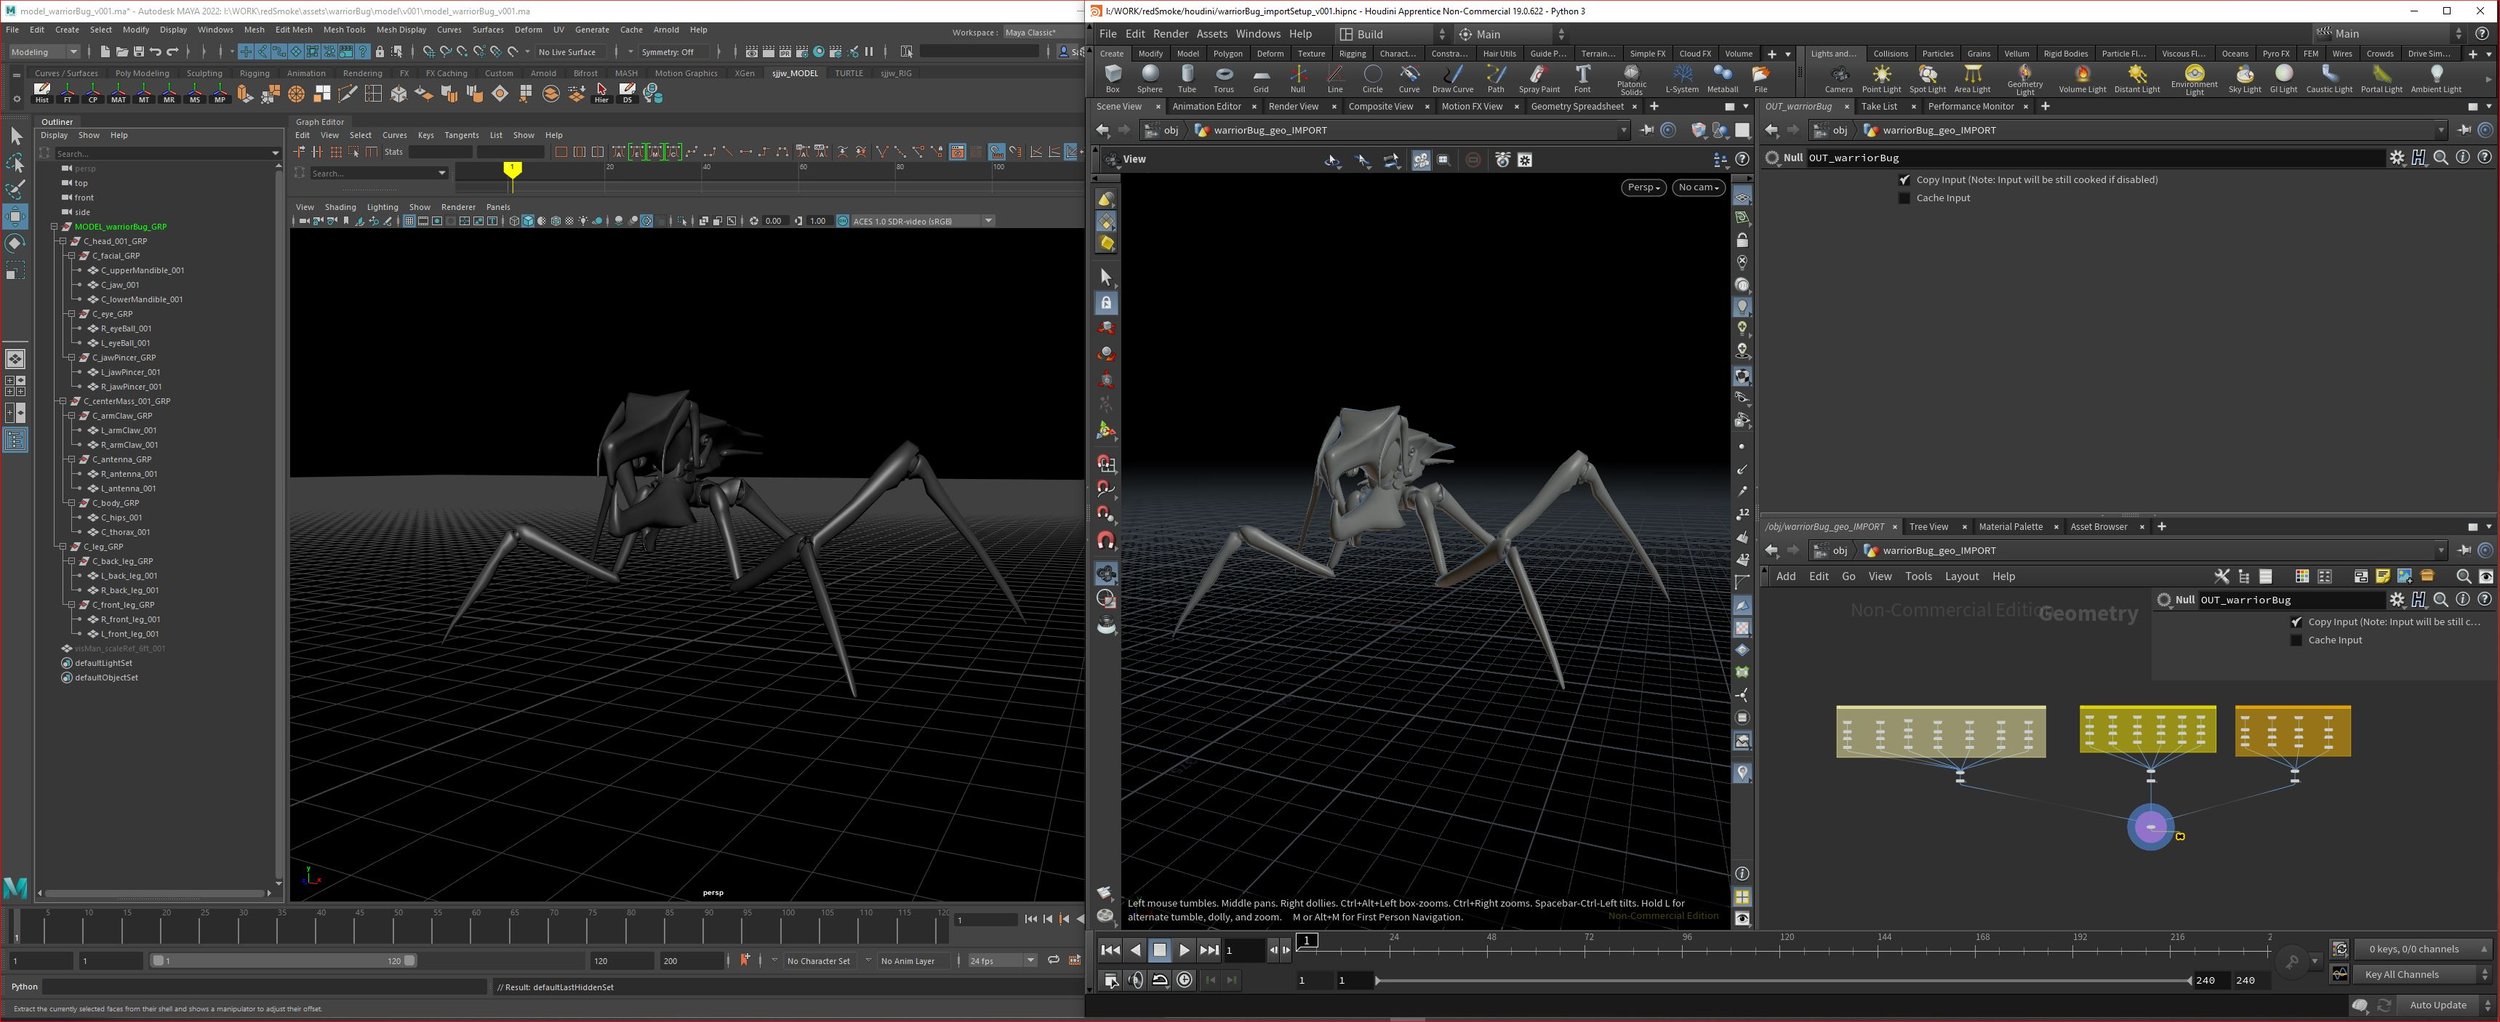
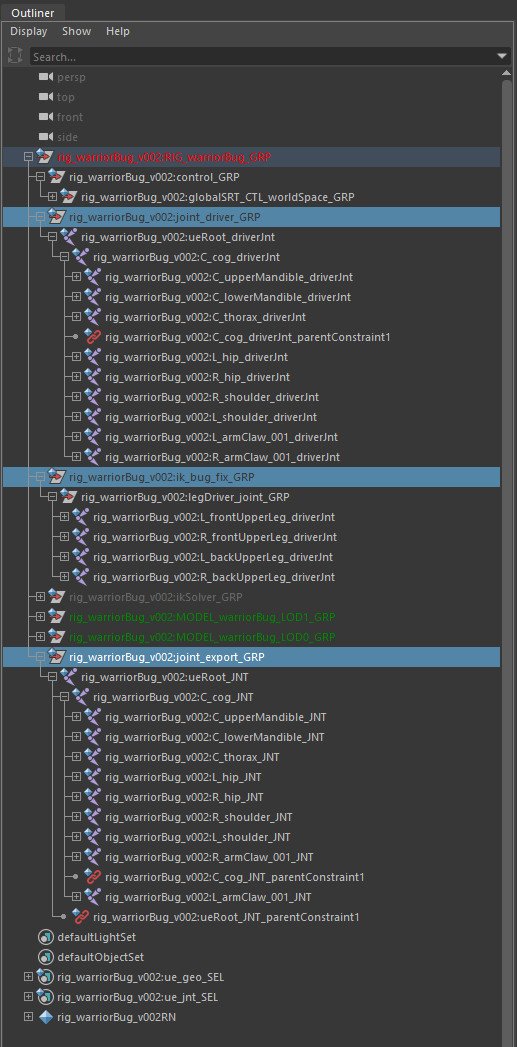
The rig changed little from the first build, mainly just ironing out some little quirks in the rig design and making some switches to lock the geo, turn joint visibility off, etc. I do make sure each of my rigs has a series of selection sets, this is particularly useful for the export process and generating FBX animations for Unreal. The bug will also be heading to Houdini for some crowd sims, so I wanted to get it over, and check it was importing correctly. The scale issue crops up fast, Houdini works in meters, I wedged a few versions of different scales, 1, 0.1 and 0.01 to further check the scale.


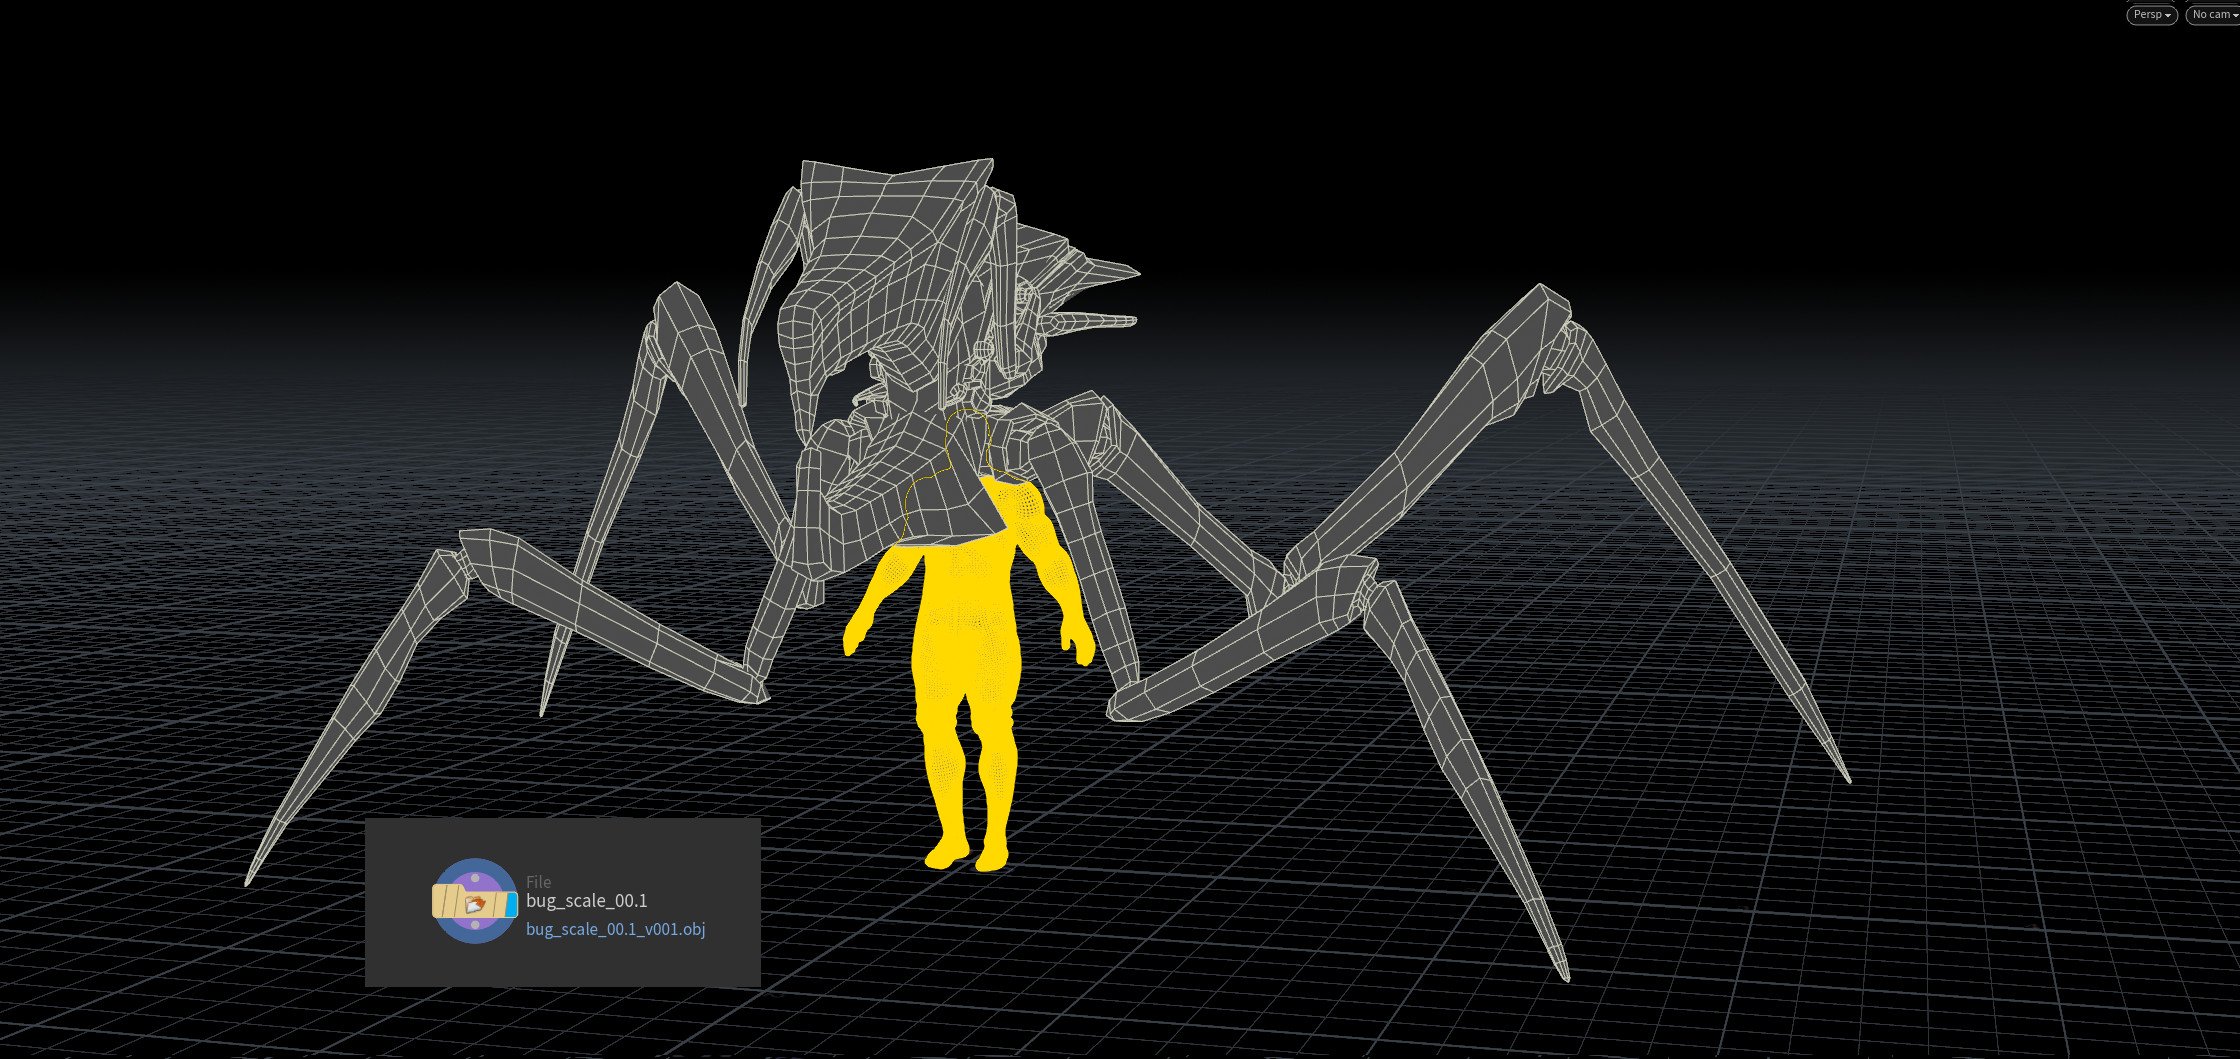
I exported a series of models from Maya at different scales. The little yellow object is the Tommy test object in Houdini, he’s 6ft so he becomes the perfect visual scale to make sure I’m setting up the sim with the correct bug size. Houdini is procedural so in theory you can always update the asset being used in the sim at any stage but scale will affect how the sim works, be careful.
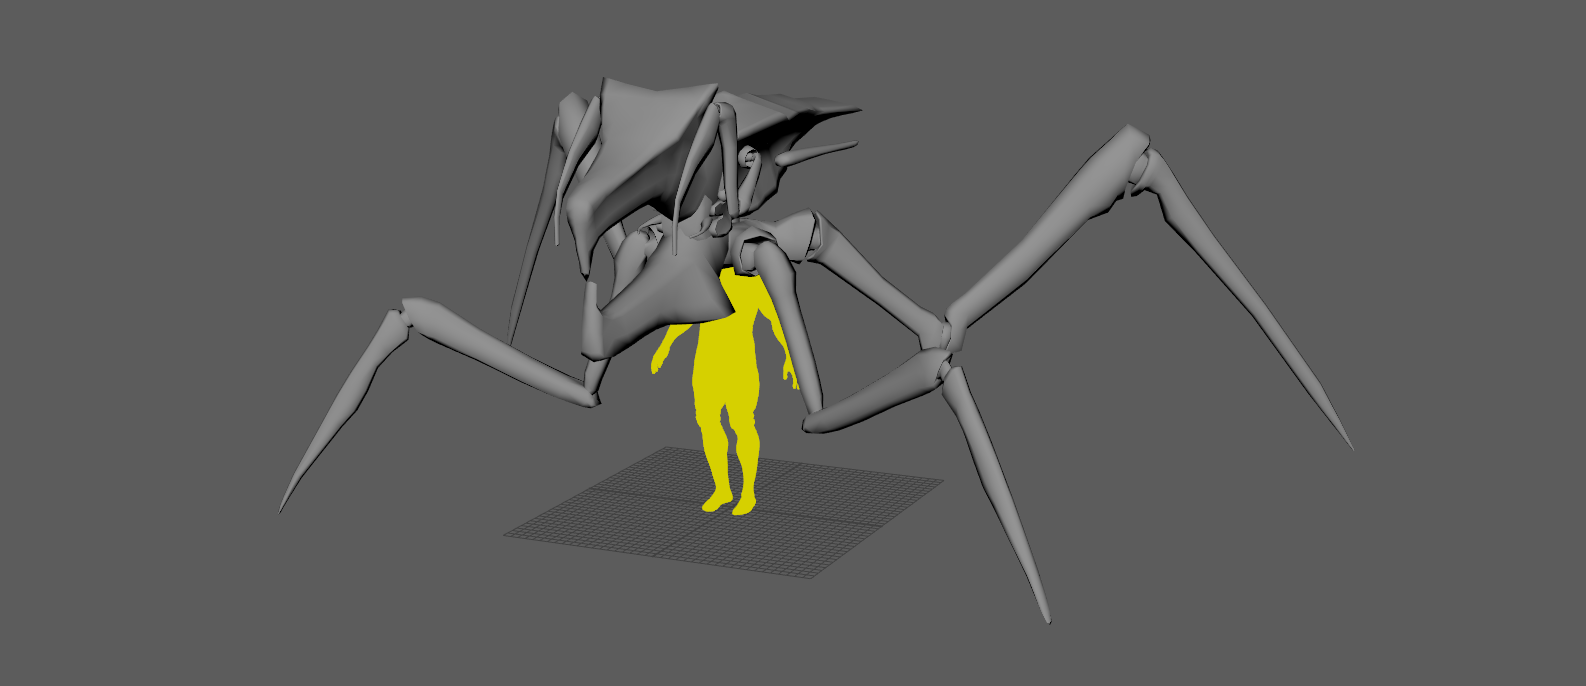
Sanity checking is always good, I kicked Tommy over from Houdini and imported into Maya. He’s scaled up to 100 to match the bug’s default size of 1 in my Maya scene.

I did make a small modification to the rig while I was animating, this was for the crowd build. After testing and Houdini throwing errors about the foot locking setup, I came up with a simple fix to help Houdini process the foot locking in chops. Simply put, I just added an extra joint, it was a passive joint and it followed the placement of the main foot joint - as the bug didn’t have traditional feet.


I made a series of LOD’s for the rig, nothing special just using the block bug and the refined render geo in case I wanted either but they were both very quick to animate with inside Maya, as you’d expect, there is almost no detail on the higher resolution mesh. I did make another LOD, the red bug was from Houdini, and it was essentially glue together, I thought this might help or come in handy for the crowd in either MASH or back inside Houdini.
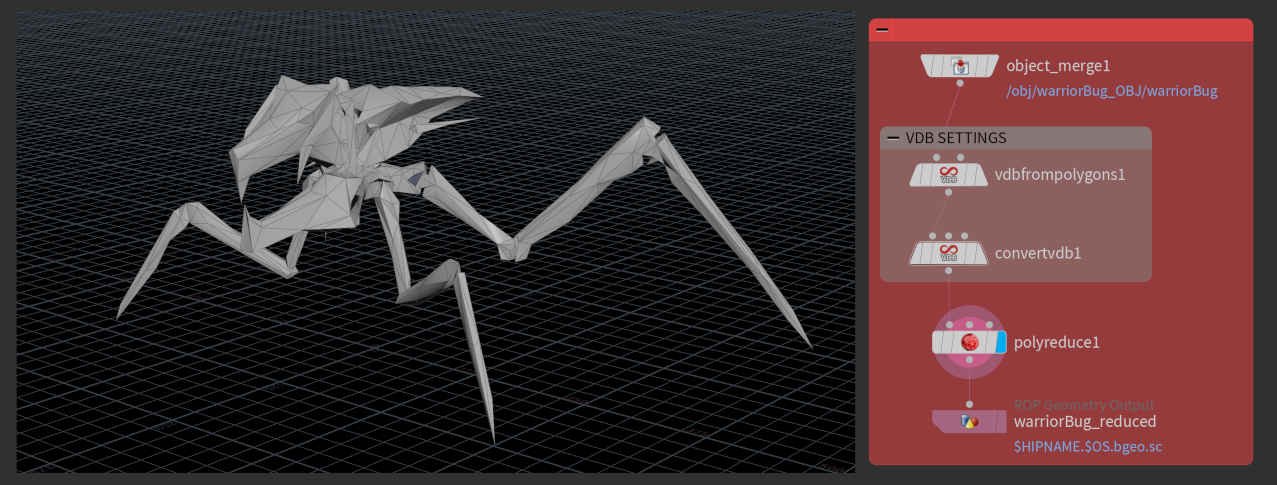
Once I had my model in Houdini, I thought I’d experiment with it. I figure that being able to create LODs could prove useful, especially if the crowd number gets pretty large. I was able to use VDB from Polygons and then a Poly Reduction to create a super low res version of the bug, I liked the result, it’s almost a stylised version. I’m currently using the ‘Non-Commerical’ edition of Houdini so exporting out geo is limited, For now, I’ll continue to try out things and get used to working in Houdini.
The initial rig build was super simple, the warrior bug is essentially a big insect so the legs are rigged using Maya’s built-in IK Spring solver.
It’s not loaded by default but it’s easy to get it, just type IKSpringSolver; into the MEL script line and hit enter, it will now be loaded in the current session and every time you load Maya, or at least until you have to blow away your preferences - not that you ever need to do that…
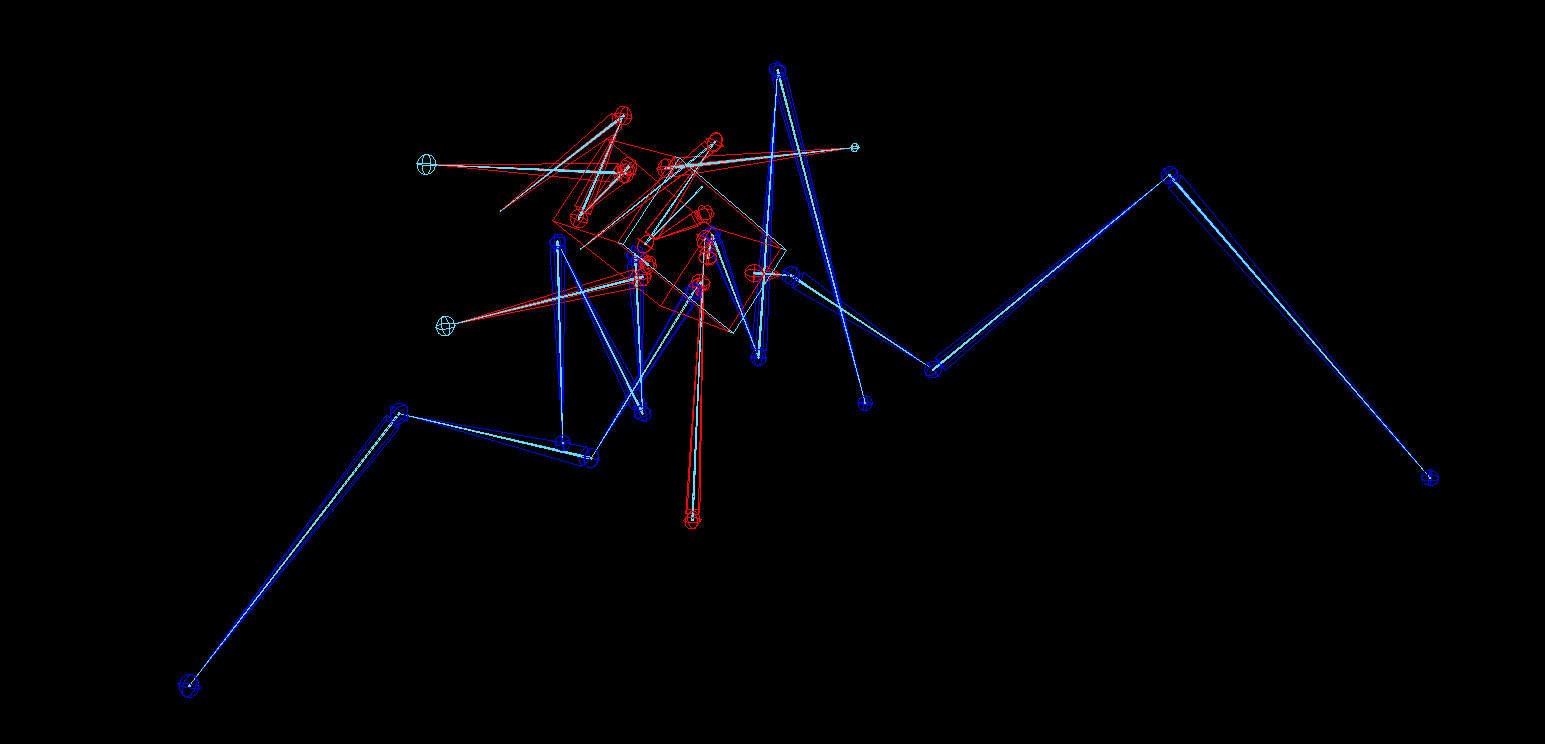
There were a couple of issues, one related to the IK Spring solver, due to a bug it wouldn’t scale correctly in the rig so the joints that are driven by the solver had to live in another group. This led to another design for the rig, from my past explorations into using Unreal I knew that for it to read FBX and skeleton animation, the joint hierarchy needed to be one single master hierarchy.
As a fix for the bug and also to keep the export clean, I made two joint chains in Maya, one would simply drive the other and the bug geometry would be skinned to the joints being driven.
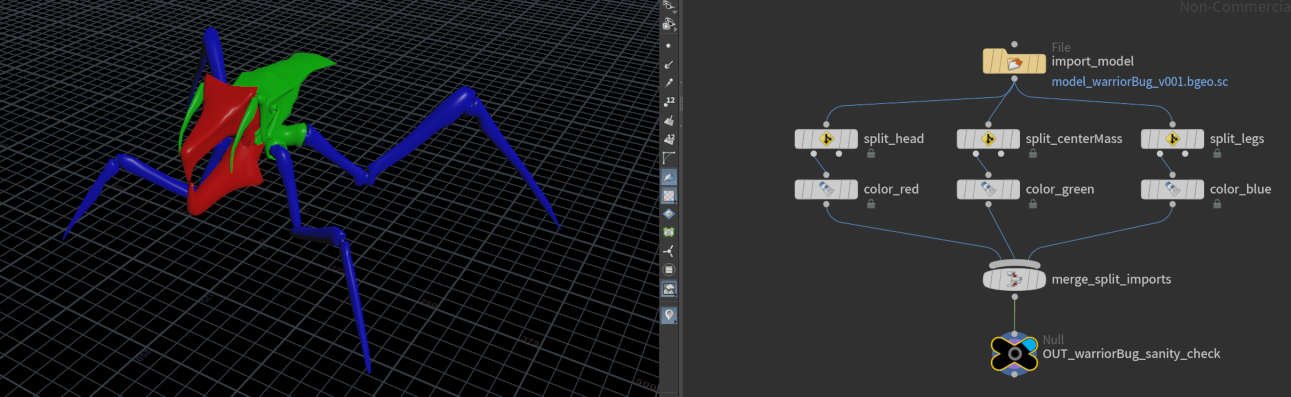
Something I enjoy about using Houdini is the ability to drop a node down with a file path import and have that exist in your file. One of the ways I like to work is to constantly check while I’m working how my exports or even imports are working and you can do it directly in Houdini. Inside a geometry node, I placed a file node which is pointed to the original model I imported and it’s read directly back in. I used the groups that I set up from Maya and therefore inherited by Houdini and used a split to separate the parts of the bug, added colours, and merged them to verify the integrity of the model.


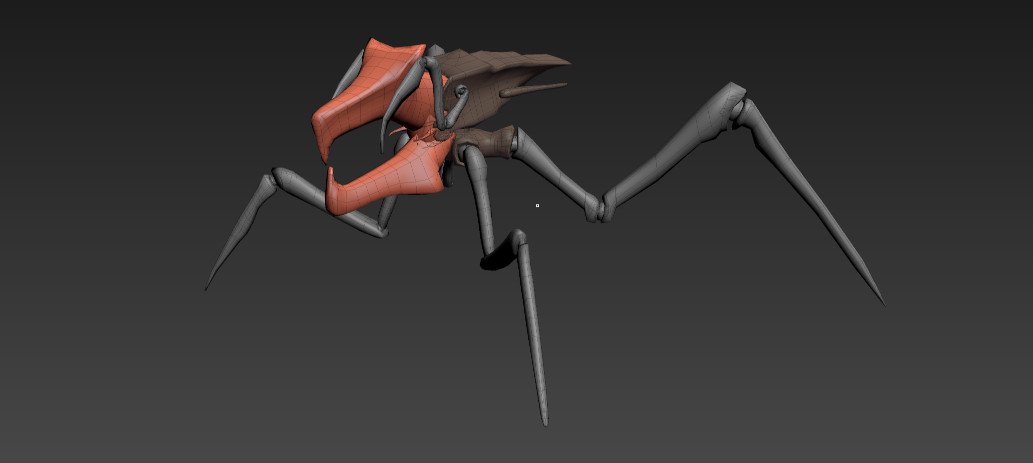
At one stage I dabbled with creating a brand new Bug, I was caught between wanting to make something original but also staying true to the source material. Ultimately I didn’t go any further with this design but it was a fun 30mins, taking the block bug and playing around with joint placement and anatomy design.