This is my workflow to help make sure all my shots in Maya are setup correctly by establishing a few global settings that I know I will inevitably tweak as I start working.
Hardware Fog
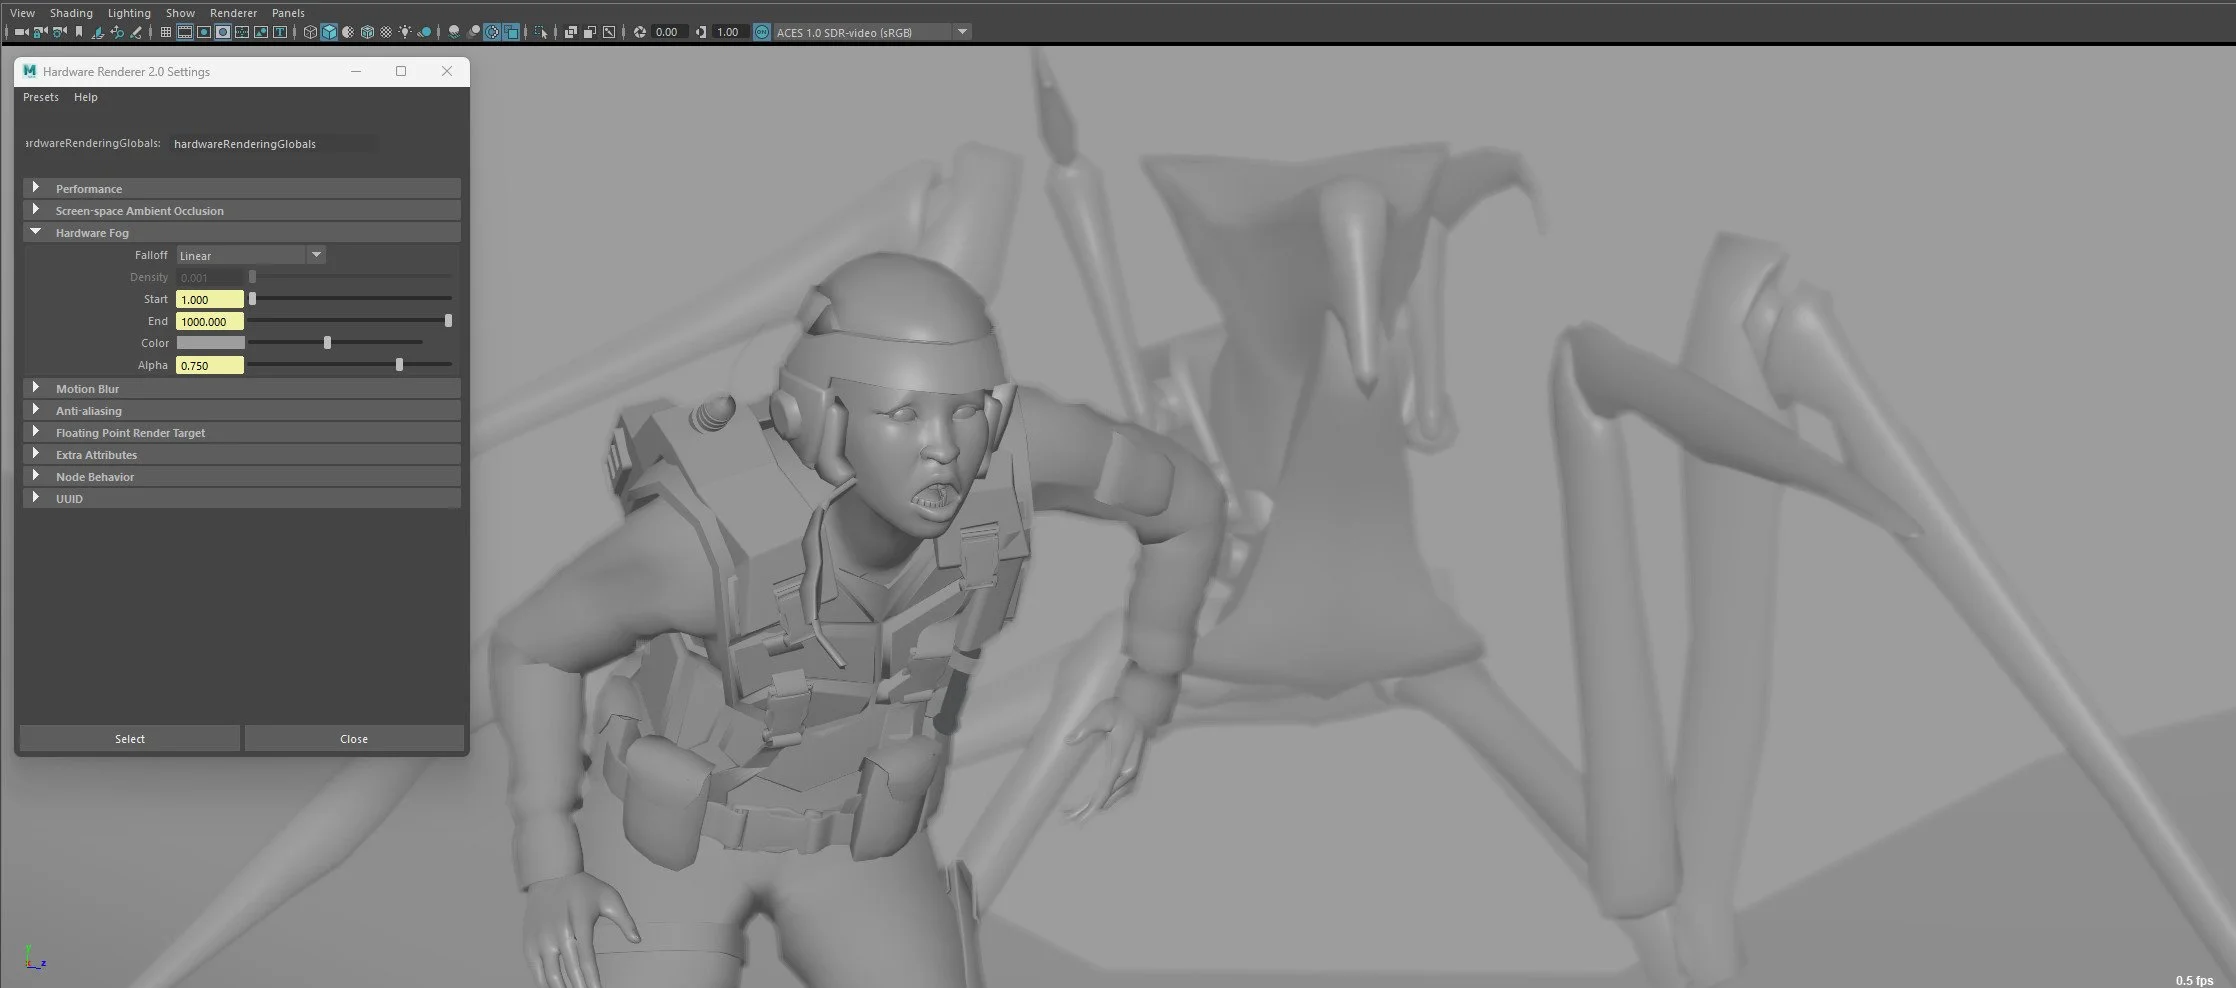
I use Maya’s viewport fog for my grey playblasts, I switch the shading mode to Use Default Material and blast for the edit. I made a simple tool to allow me to control the fog settings as well as setting a couple of other values. The fog here is set to a pleasing mid-grey value and I switch the falloff mode to Linear, out of preference really nothing else. I also set some default values so all my blasts are the same, at least for the version few versions before I begin to noodle.
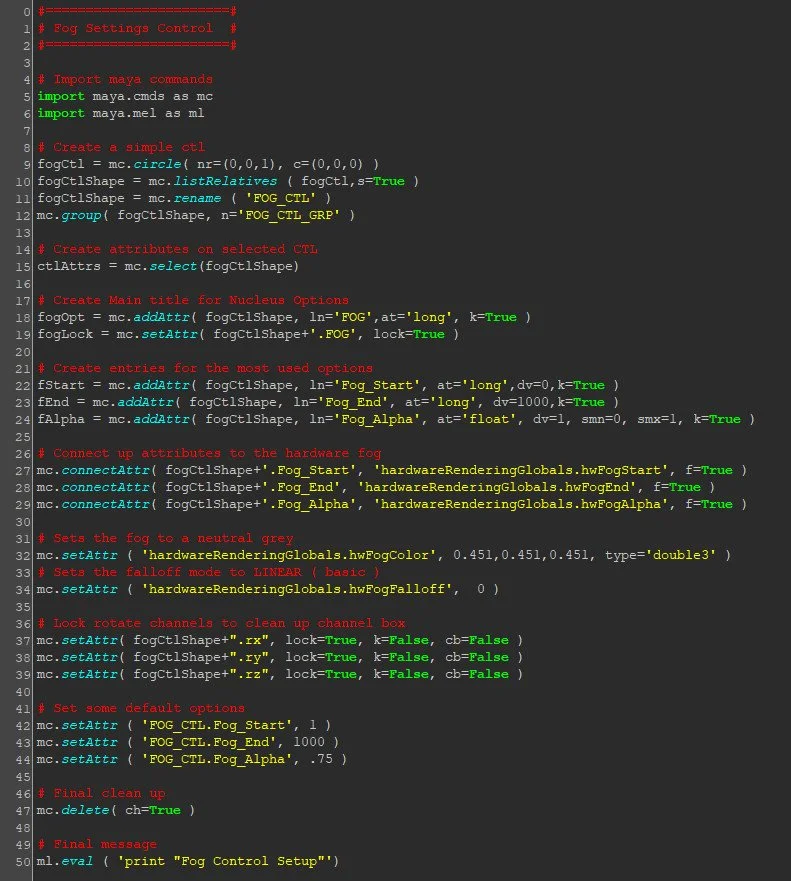
The script, which in order makes a control, pops it into a grp for housekeeping, makes a few attributes and connects them up. It also sets the global fog colour and the falloff mode as previously mentioned. I also added a few lines to set basic fog settings to start with. I had a lot of shots and this was a great way to quickly set them up.
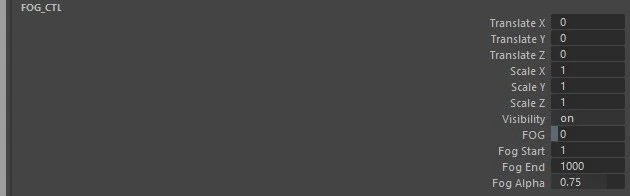
The fog control settings and how they looked when the fog control is selected. I planned on switching out the temp circle control shape for the word ‘FOG’ but I never got to it, something for my next film.

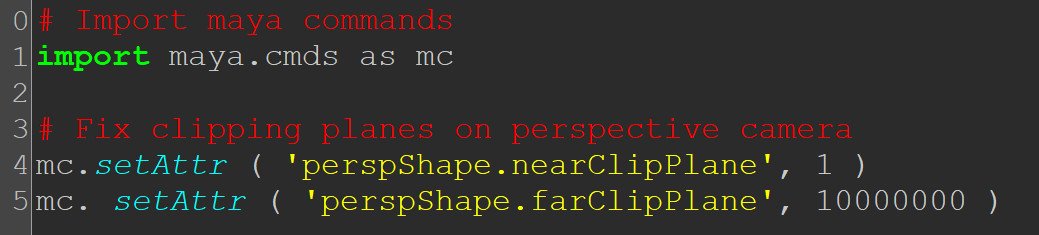
Clipping Planes
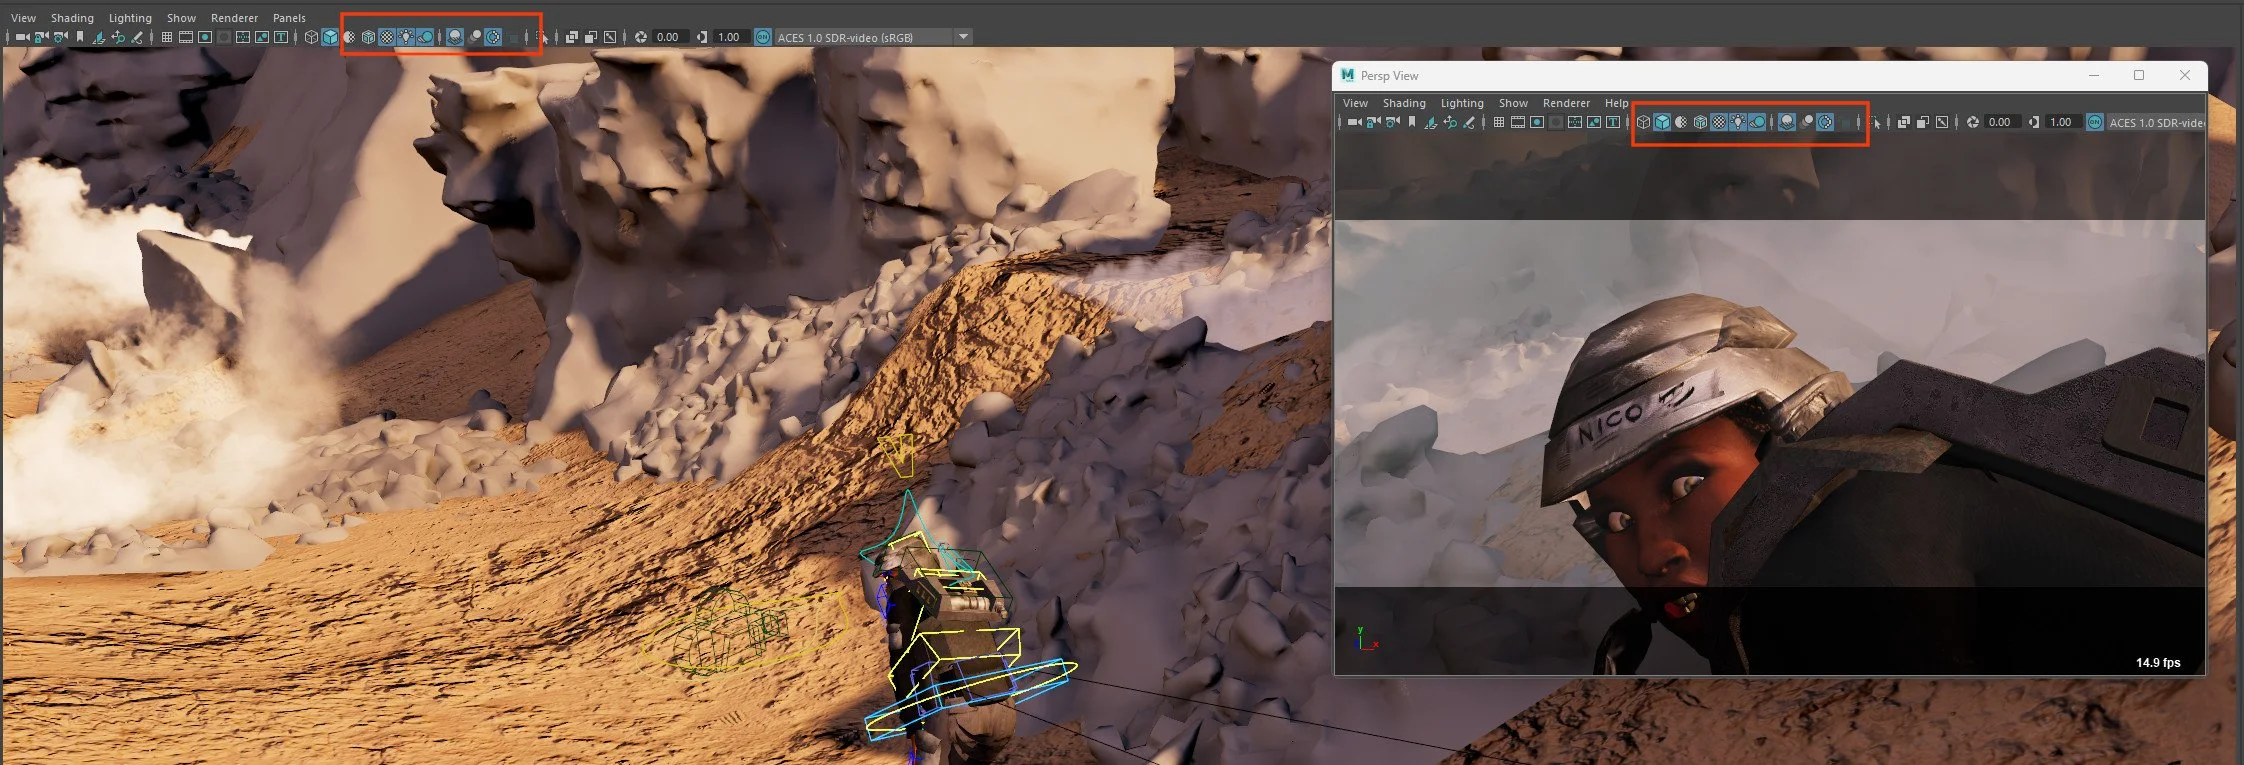
I tear off panels all the time, and I always tear a panel off for the shot camera. A very handy feature to enable is the Update View in the preferences, set it to All and you’ll be able to scrub and see all views updated at the same time.
Clipping planes, it’s something I feel I’m constantly having to change at start up. Again, simple code, added it to my shelf, I click it at the start of every shot build and forget about it.
Outliner Organisation
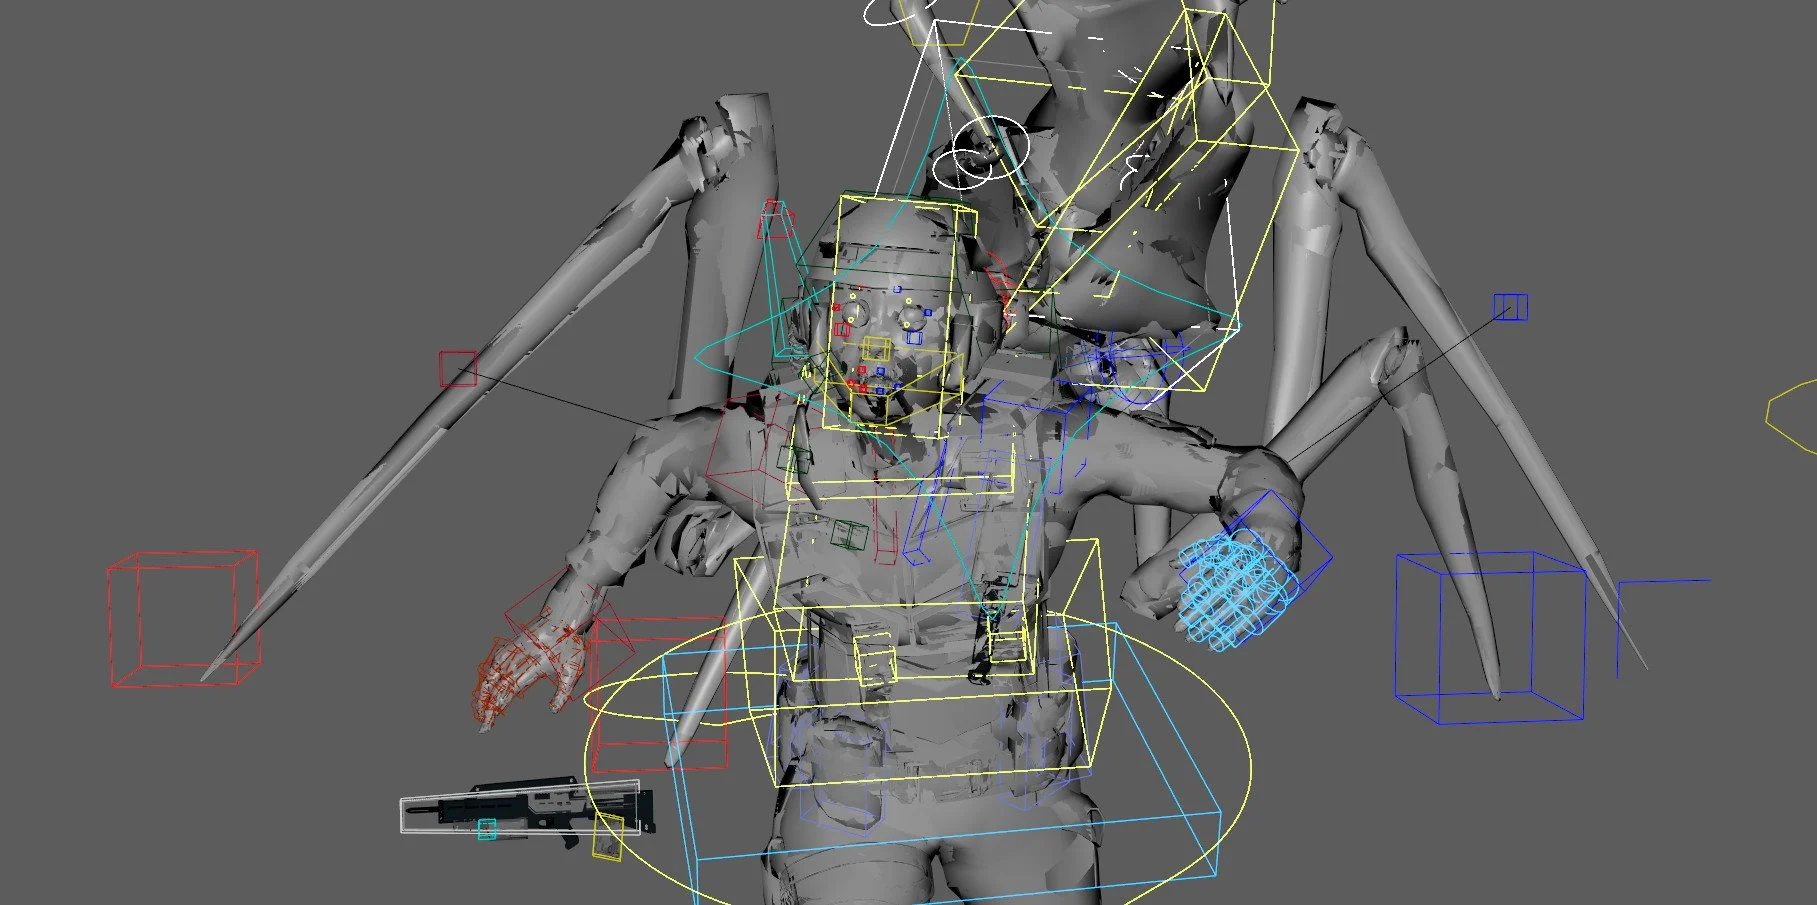
Anyone who has worked or currently working in vis will know how messy the Maya scenes can get. This is just a way to sweep up a lot of the mess into neat and tidy groups. The idea here is that you can still work fast, and messy but as long as you drop assets into their loose categories, like all character work lives in the CHR group it will help you and your fellow artist jumping into your scene.

This is how I setup my outliner when starting and working on a shot, the script makes these groups, I added more groups to the script as I progressed but these groups here were used most of the time.
Having a clean outliner which is organised means all of your scenes follow the same structure and when jumping in and out of shots, you have an idea where things are. I did a lot of the work on Red Smoke after work, so spending a little time on housekeeping pays dividens later on.


Not a complicated script but useful, one of the first things I wrote when starting work, I did improve it later on with a for loops to cycle through the lock and hide functions but I’m not a native Python coder, I just write things to speed up my workflow, I call these Click Reducers, just mini macros of things I do almost every Maya session.
This is a little sample of my bigger script to give you an idea of how straightforward it can be to have a small piece of code that helps automate certain aspects of your workflow. The script example here makes a CAM group, and sets the colour, I chose a light blue, which looked nice against Maya’s dark grey UI. The final piece of the script locks and hides the channel box transforms from the user, these groups are more like folders or nulls and are really just containers. This eliminates the worry of the group containing any hidden transforms that may affect the FBX export to Unreal.
Custom Viewer Playback
Fcheck is pretty crappy, I don’t think anyone wants to use it, it’s pretty archaic now. It’s best to use a different external player. I set my Maya up to open image sequences in Keyframe Pro but feel free to use any player you like, the process will be much the same.

Open up your Maya Preferences, and place the location to your custom player .exe into the boxes on the left. The box on the right of the image sequence is for the flags you can use. I set mine up as simple as possible, just used the %f flag, which means frame.
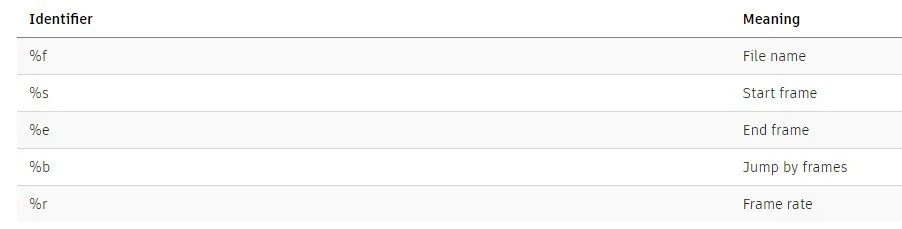
These are the flags you can use, this can be found on the Maya help website, I didn’t really experiment with using the additional flags.
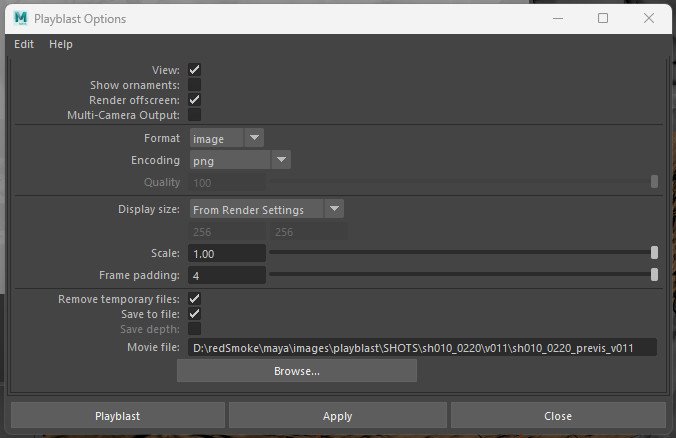
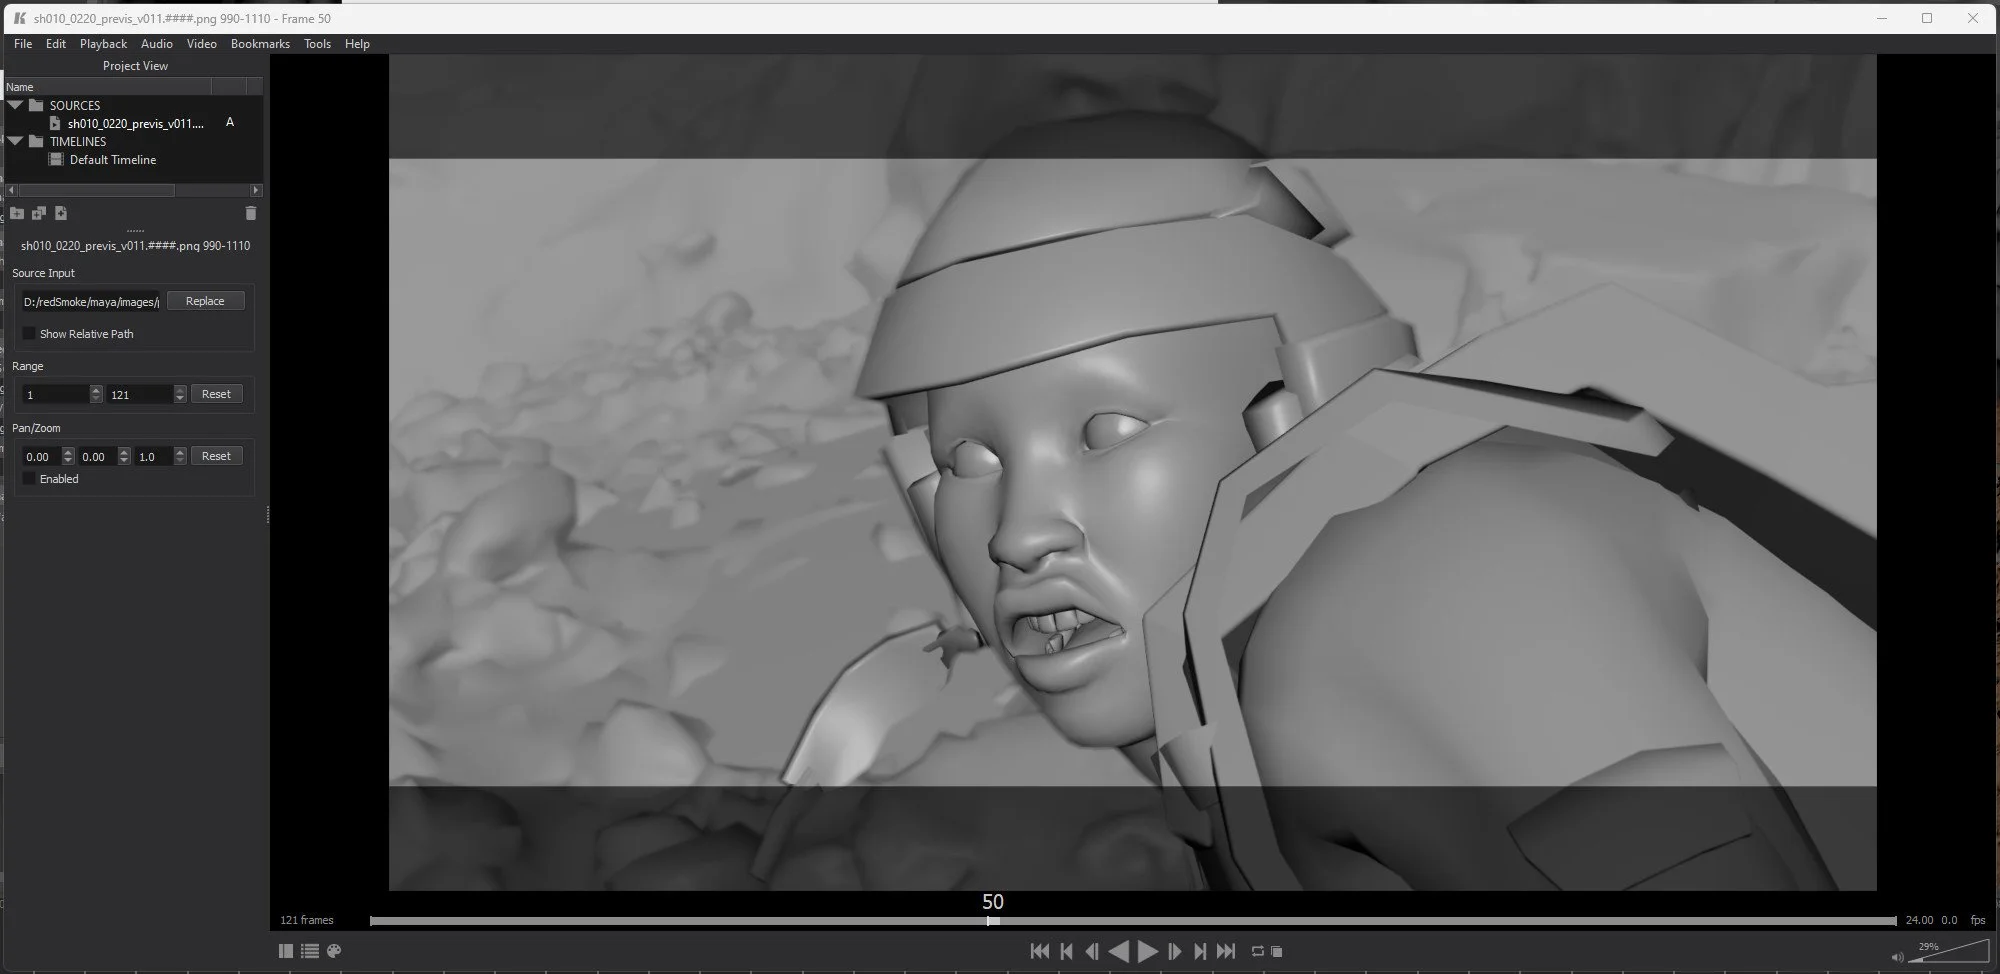
My preferred options for blasting my shots, it’s all to avoid having to use fcheck and I have a keyframePro license from when I took an iAnimate workshop when I first moved to the states. Well worth the $80 or so dollars, has a great export feature, very useful for making incredibly small files to send or upload. Turning Show Ornaments will remove any clutter from the image, display axis, camera names etc and Render Offscreen will remove the chances of accidentally including other windows on the playblast.
Global Mover Setup
Vis scenes can often and will often need some degree of conforming. It was easier for me to make sure scenes were orientated in the same way as this was a solo filmmaking venture but in a team having a way to globally and relatively non-destructively move aspects or the entire shot is very, very helpful.

Depending on your scene you may have lots or very little to conform. Here in sh010_0220, I have several assets, the camera, the character, the environment, the lights, and the fx cards. First to do is to make a locator, and name it. You can use any name but use something that makes sense, scene over, scene conform or in this case global mover. Next is to group all assets into a group, again calling that something logical, here I name it after the main group and add global mover.
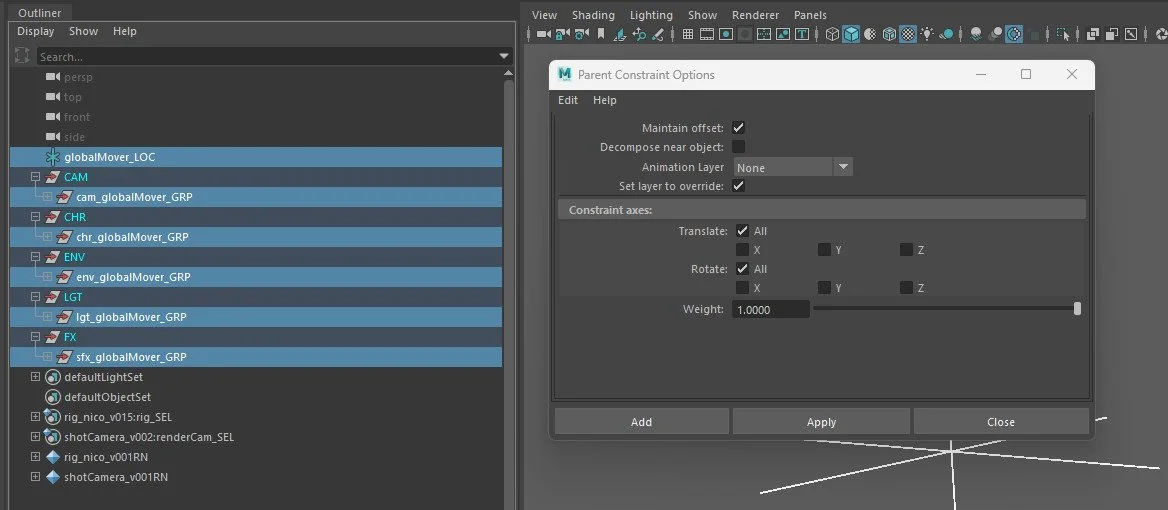
Use a parent constraint from the locator to the groups, make sure Maintain Offset is ticked, you want everything to stay put and then we can move everything as one unit to another part of the scene. Now you can reposition your shot, this can be helpful for when you accidently or suddenly the set changes and your hero needs to be running east rather than west. The extra groups can interfere with the FBX baking process but I’ll cover how to fix that in that wiki page.
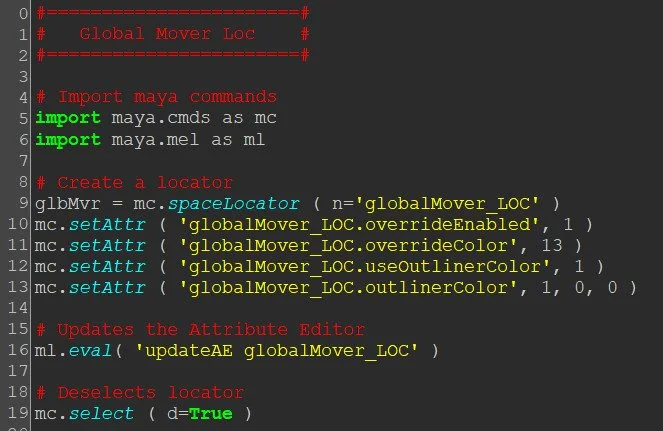
Here is the little snippet of code I used to make my global mover locator. I’ve lost count of how many times I’ve made a locator to do this so I figured again, let’s write some basic code and add it to the shelf, that why I have access to a nicely named locator whenever I need it, also, I can use that locator for other things.
The script has an extra mel command, I found that the attribute editor doesn’t always update when using outliner colour so adding the Mel at the end, forces Maya to refresh.
I made my locator red as it was a nice contrast to the blue groups, again, all about pretty visuals when I work but feel free to use any colour or the standard when making your movers.
Safer Saves and Faster Scene Loads
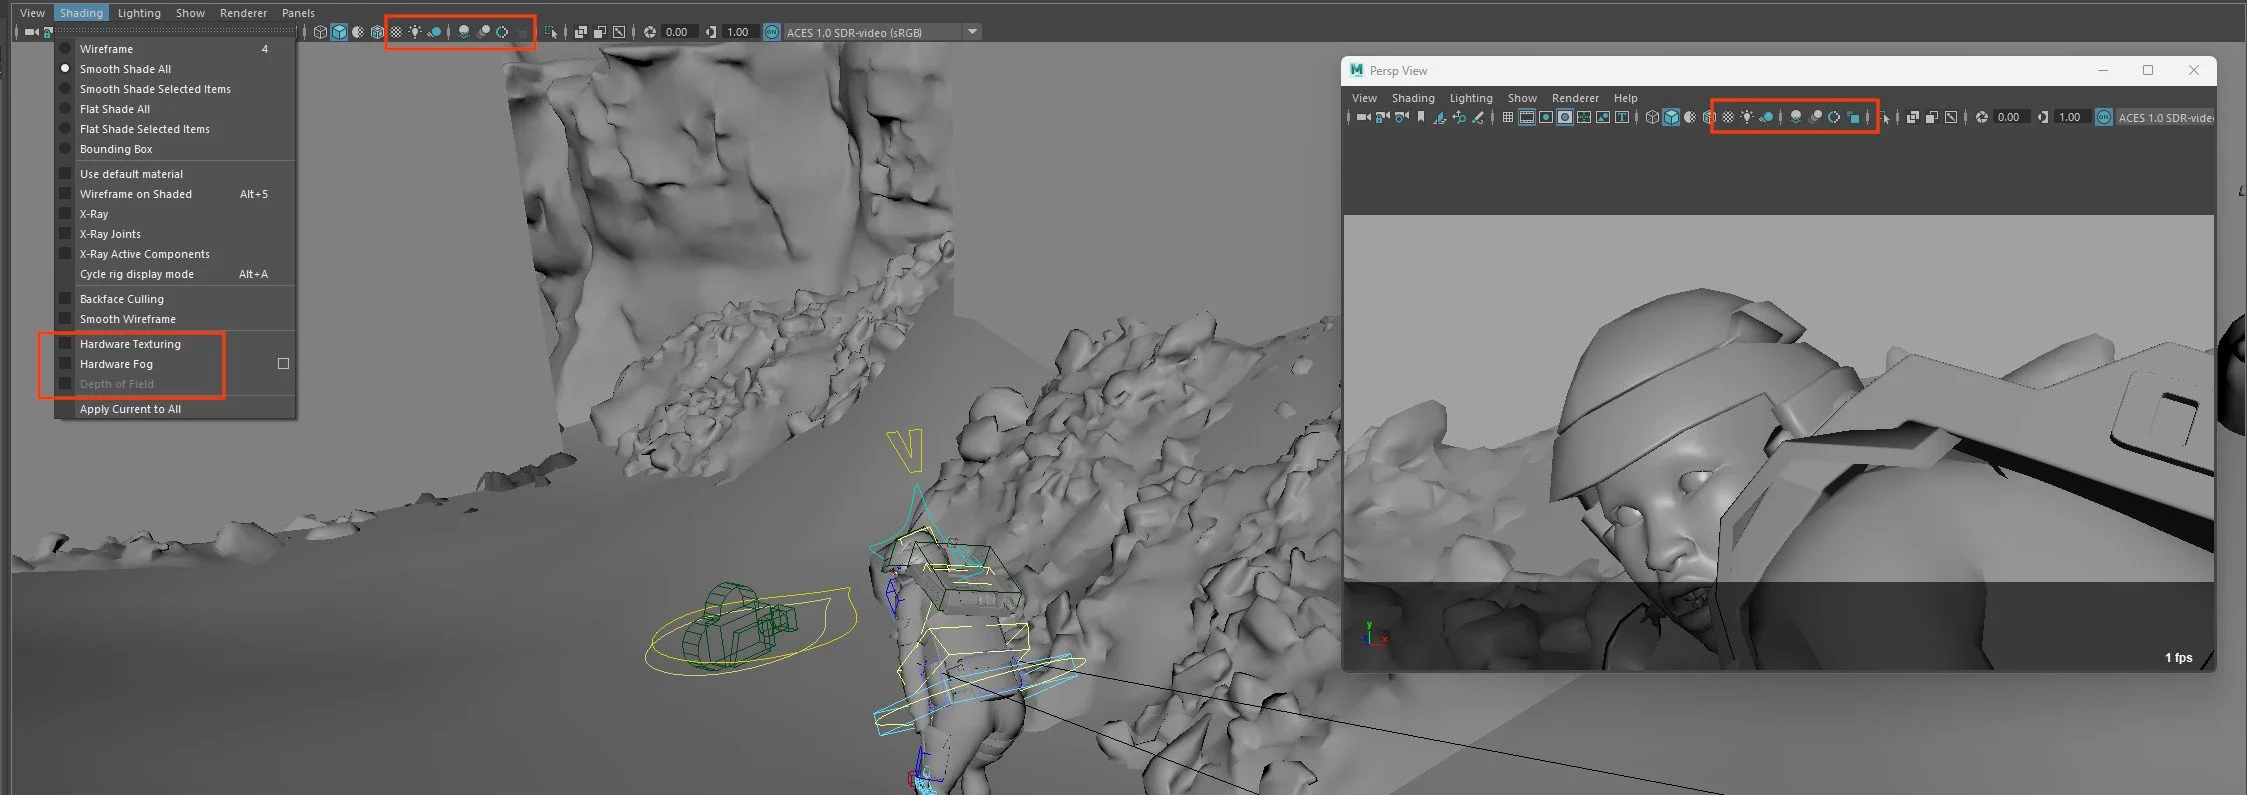
Maya crashes, we are used to that. In visy land the scenes can get large, buggy, and bloated. To help yourself when saving and opening shots. It’s a good idea to turn everything off when saving. Things like Fog, lights, anti-aliasing and AO can really cause Maya to have to do a lot of heavy lifting when saving and loading. It’s not feasible every time but if you know you are closing your shot down and moving on, turn it all off, your fellow artists will be happy.
Make sure to turn off the fog and the depth of field in the shading menu. Your scenes will now load pretty quickly and you can turn the settings back on one by one when either you are ready to blast or render and when you are seeing how your shot looks.