
You want to get to the process of building shots as quickly as you can in Visualisation, so I knew I needed to bash out a character asset for our hero. I took my visMan asset that from my film Dogfight and used that as my jumping-off point.


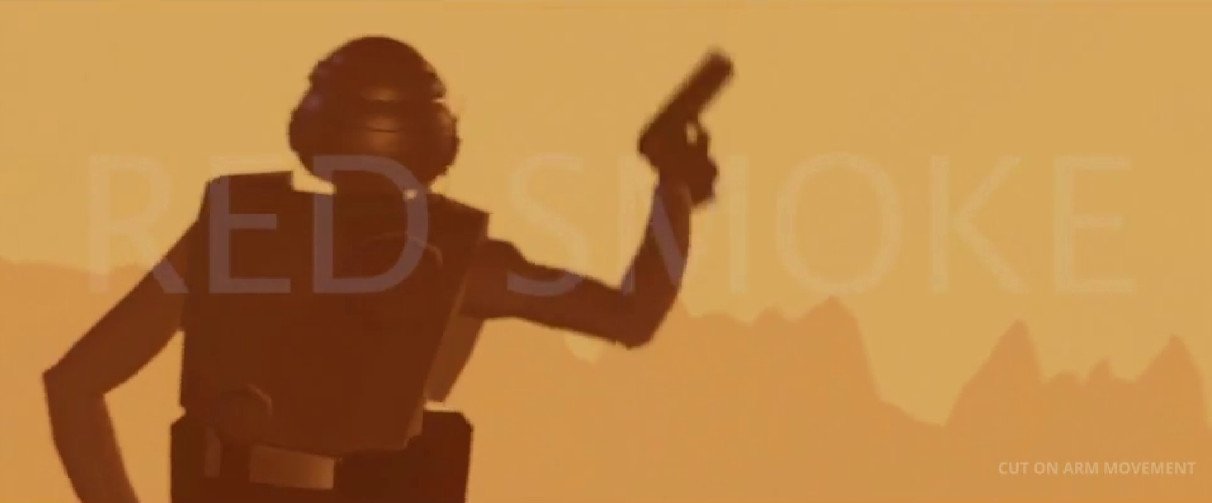
The first build didn’t need to be detailed, you just want the broad stroke ideas, a little appeal and the basic functionality. This asset didn’t take very long to build, the segmented body was tweaked to feel like the original film. The colours were sampled from an image, a series of muted colours. The main take away here is that it looked like a trooper from the film, the silhouette felt correct and it was ready to animate.
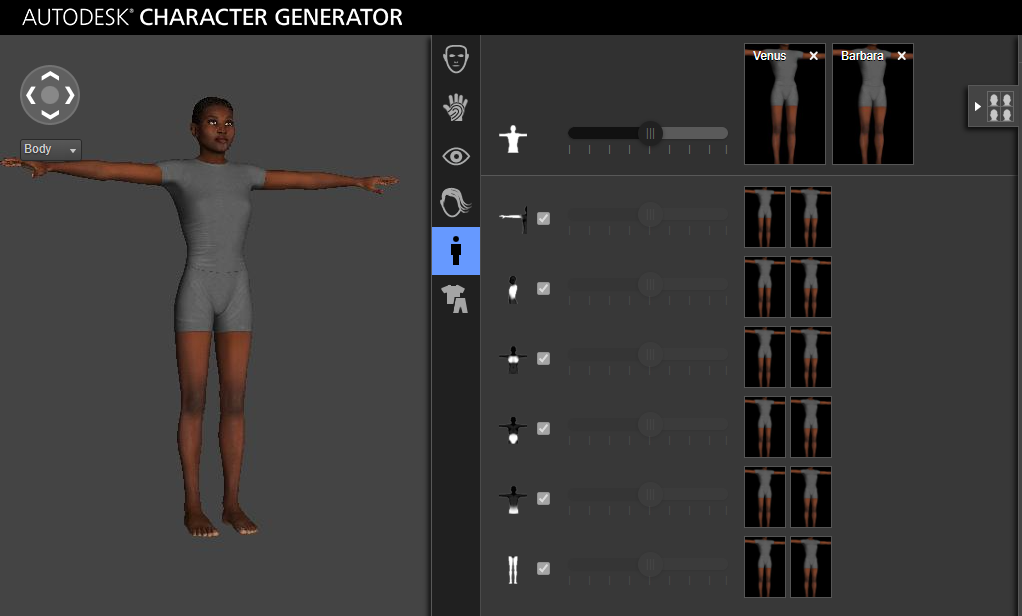
After animating and creating shots, I began to feel the need to have something a little more human to look at. I’m a huge fan of the character creator from Autodesk, it’s old as hell now but it’s essentially the PS2 version of Epic’s Meta Human creator. I have a Maya indie license and it’s one of the perks. I made a quick version of Nico, did very minor modifications to her, and then sent it to export. I opted for a joint-based facial setup, I find in previs, it’s much easier to manage a rig with limited meshes, and for previs, joints are quick and easy to set up.


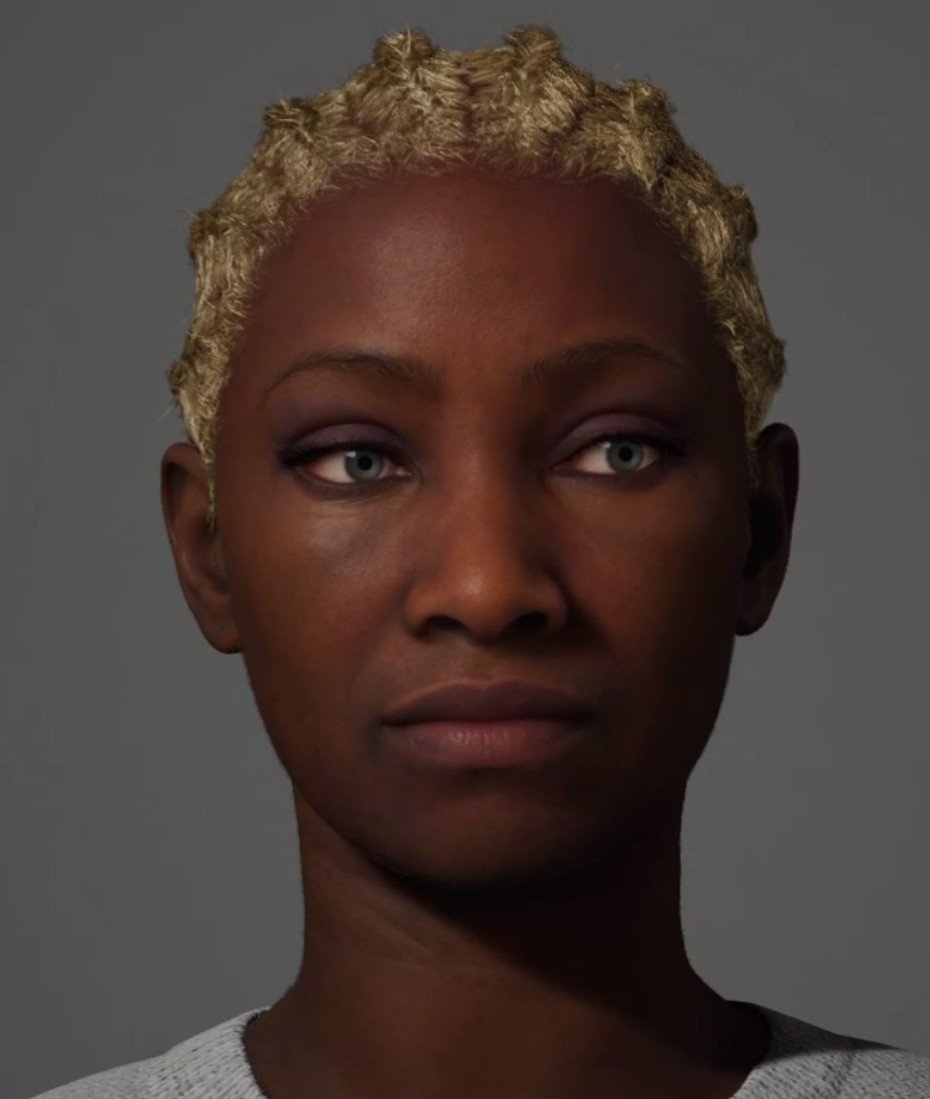
The face that comes out of the creator is perfect previs level, textures are solid and you also get teeth and a tongue. Making something super human quickly is difficult so this is one area that I wanted to get right quickly and not waste time. The original idea was to use a MetaHuman but those plans changed so I felt that using this model was a good compromise.
The skeleton gives you a very simplistic joint layout for the face, I made a few custom controls and rigged it up. I also updated the rig to include a Nico Face Cam which I could use on a torn off panel to work on her facial performance, not essential but very handy to have it built into the rig.
I ended up only using her head and hands from this mesh.


I had to play around with Epic’s MetaHuman creator, now that I finally had a workstation capable of playing with this new technology. I spent a few hours making a version of Nico. I pulled on my character and actor inspiration. I did end up making an asset for Nico and used Advanced Skeleton to rig up the MetaHuman body. Ultimately I decided against this workflow for this film, the next project will be utilising the MetaHumans.

When I started to play around with the MetaHuman, I started to think about scrapping the Starship Troopers idea and making something totally original. The idea was original but it was set in a universe with existing IP. I started to customise the Nico MetaHuman, removed the tracers of the IP, and made a generic-looking scout asset - keeping ideas like the backpack radio and the lone female soldier. I opted to stay with Starship Troopers, I’d done a huge amount of research, and the reason I started this was the bug swarms, the next thing I make, it can be totally original.

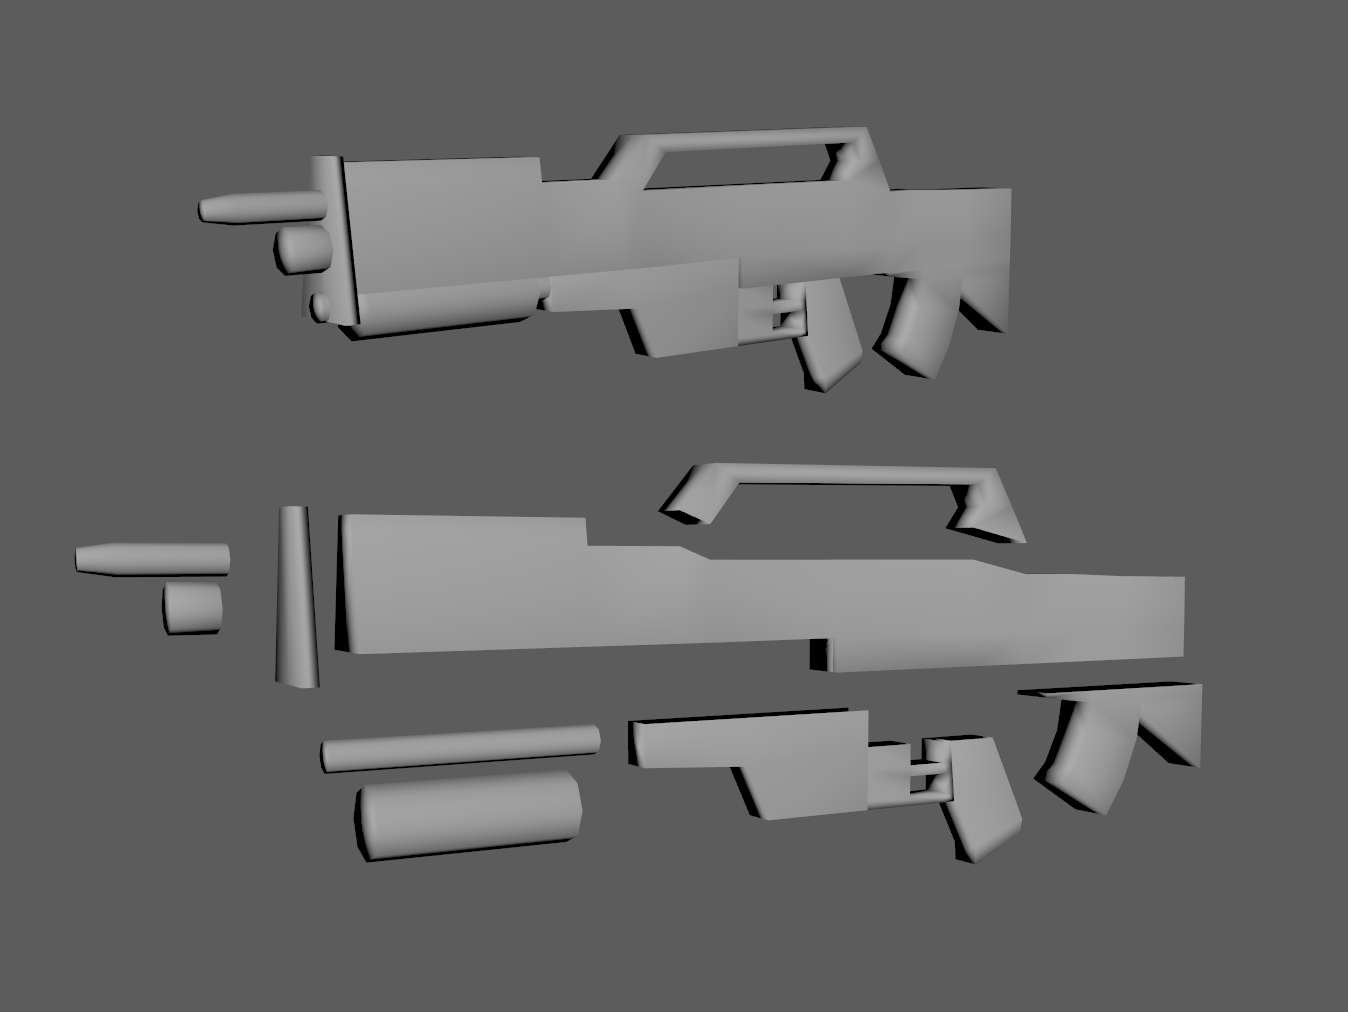
The kit, it’s an iconic design, I split it out into its most basic shapes, roughed it out, and combined it to make the first assets. they didn’t need to be any more complicated than that, I just needed something that felt like the Morita rifle, I probably spent a couple of hours putting them together.
I’m a big believer in low poly assets in visy land, simple, blocky shapes to define the volume and then drive the detail with textures and a good, solid normal map. The idea behind this is that it’s all about iteration, assets can be continually updated but having a base, and something in each hole, means as a previs artist, we can just start making shots. It’s better to build in a way that you can improve and update as you go.


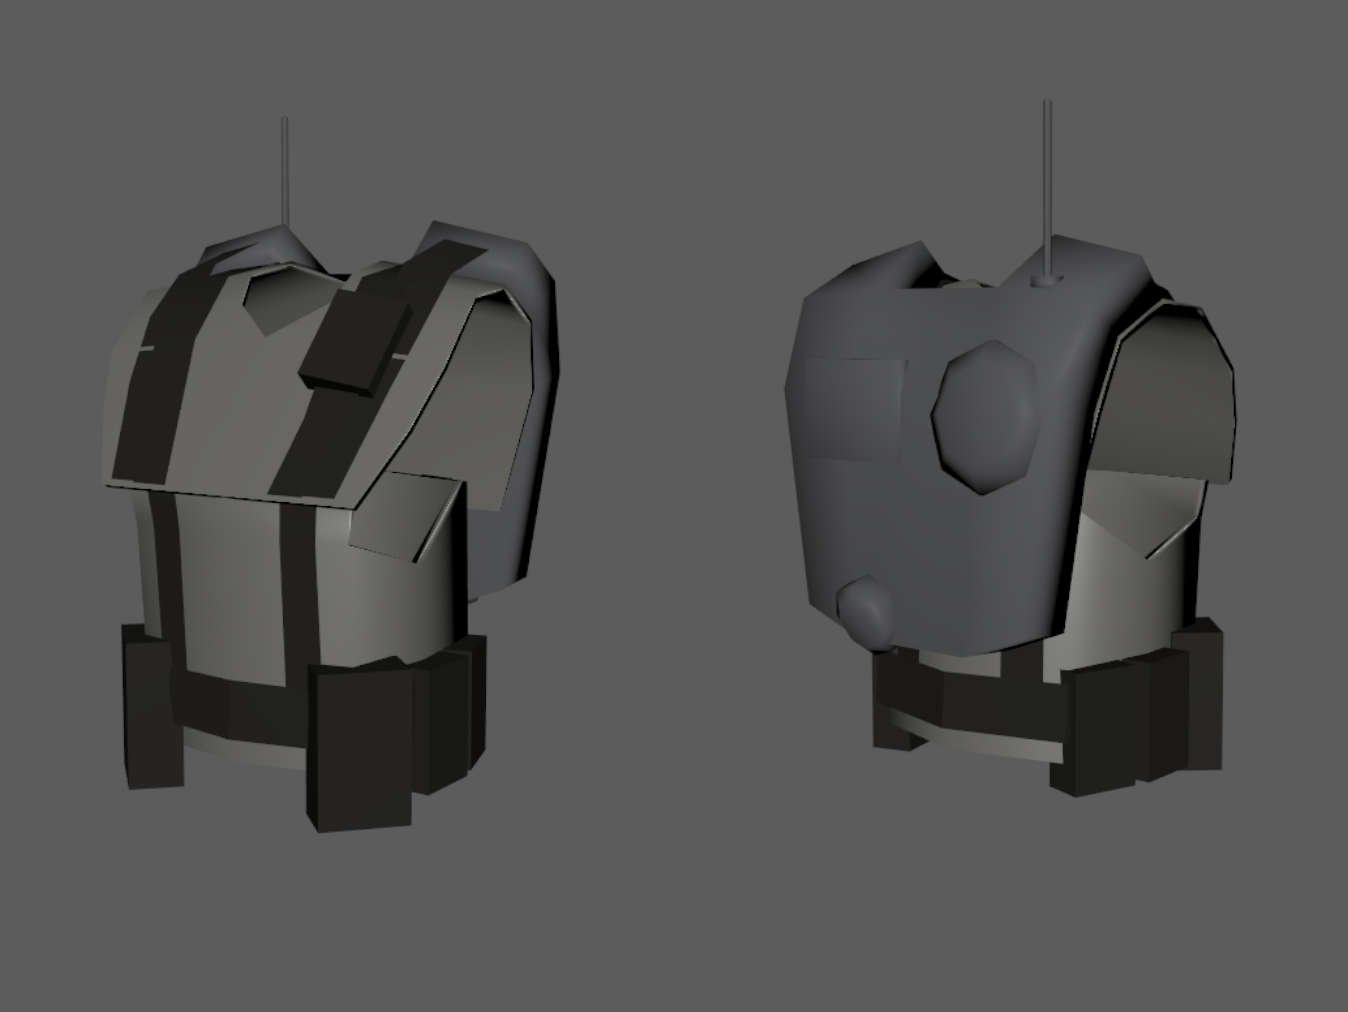
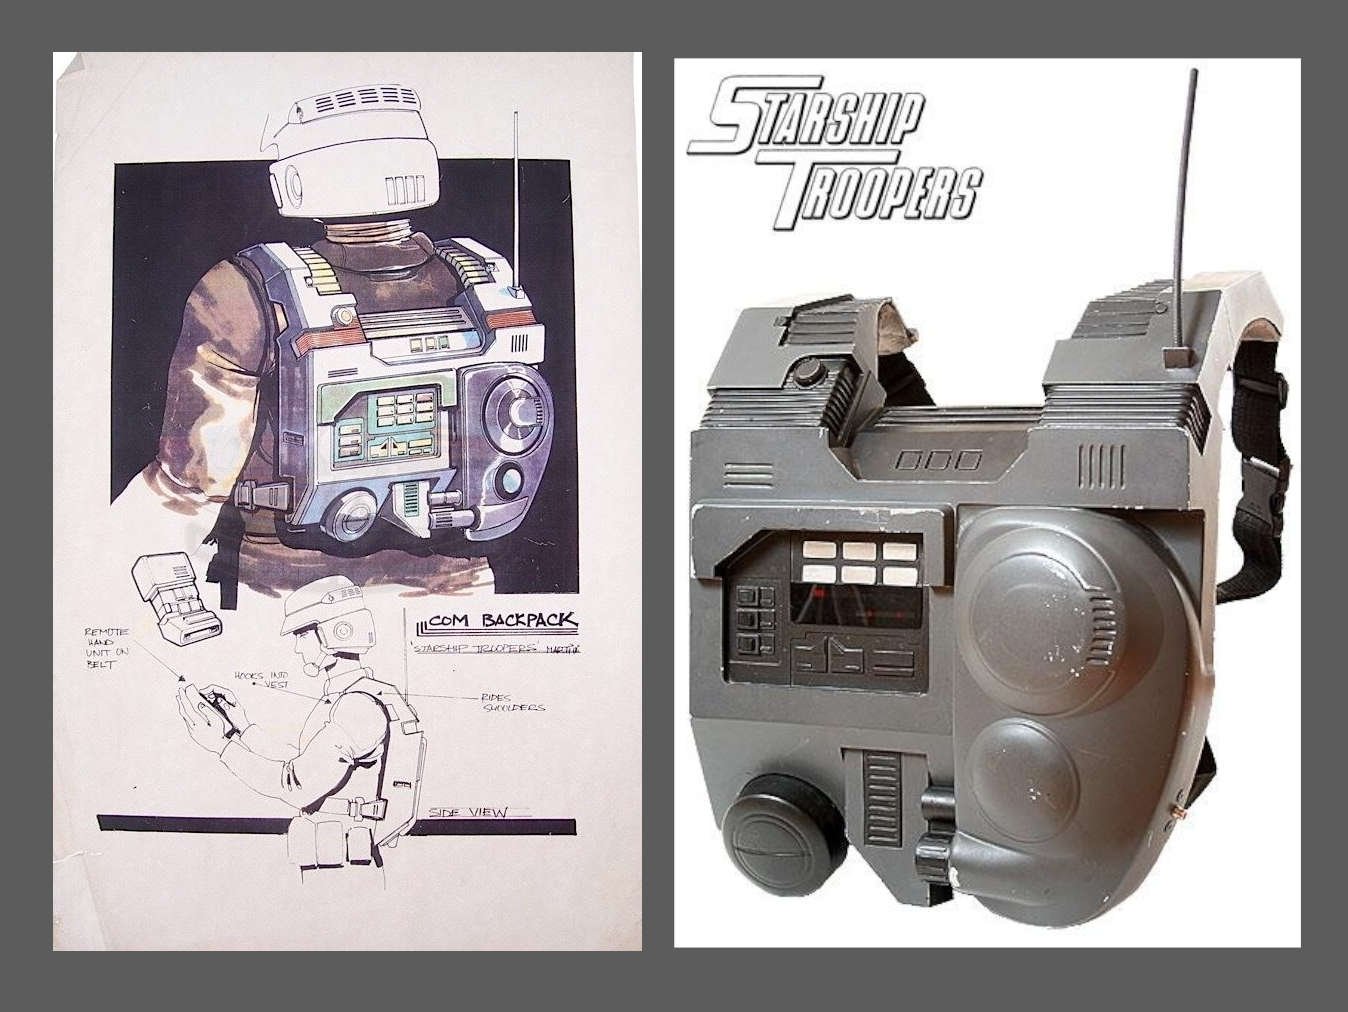
The idea for Nico in my script was for her to separate from her squad and be a communications specialist or maybe a medic. I couldn’t decide but I did want her to be wearing some kind of back pack, I found some of the film’s concept art and images of the prop and made a super crude version, cylinders, and a box.


Nico was the asset as you can imagine, and had the most updates and by far the most iterations of the film. Her rifle was one asset that you can see the iterative process at work, started basic and when I had some time, I went in and remodeled it to better match the source material.


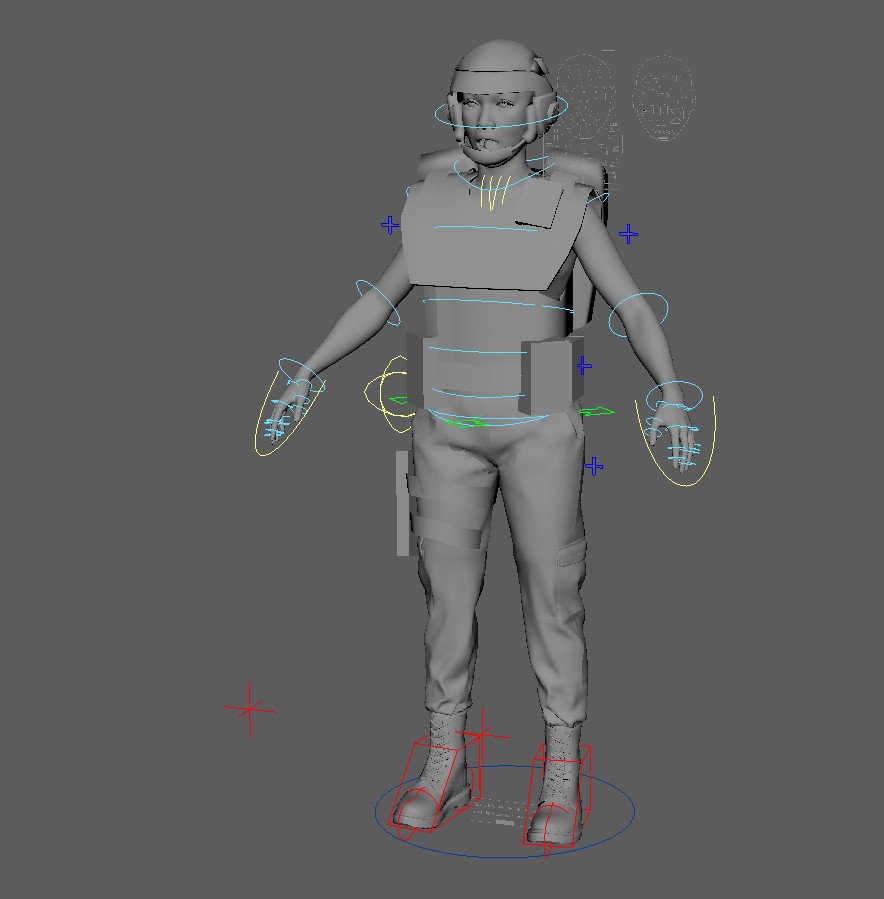
The final rigs, mostly small tweaks to her body mesh and some internal rig settings such as space switching on her arms and a couple of tweakers to quickly and crudely reduce strap penetrations in certain poses.

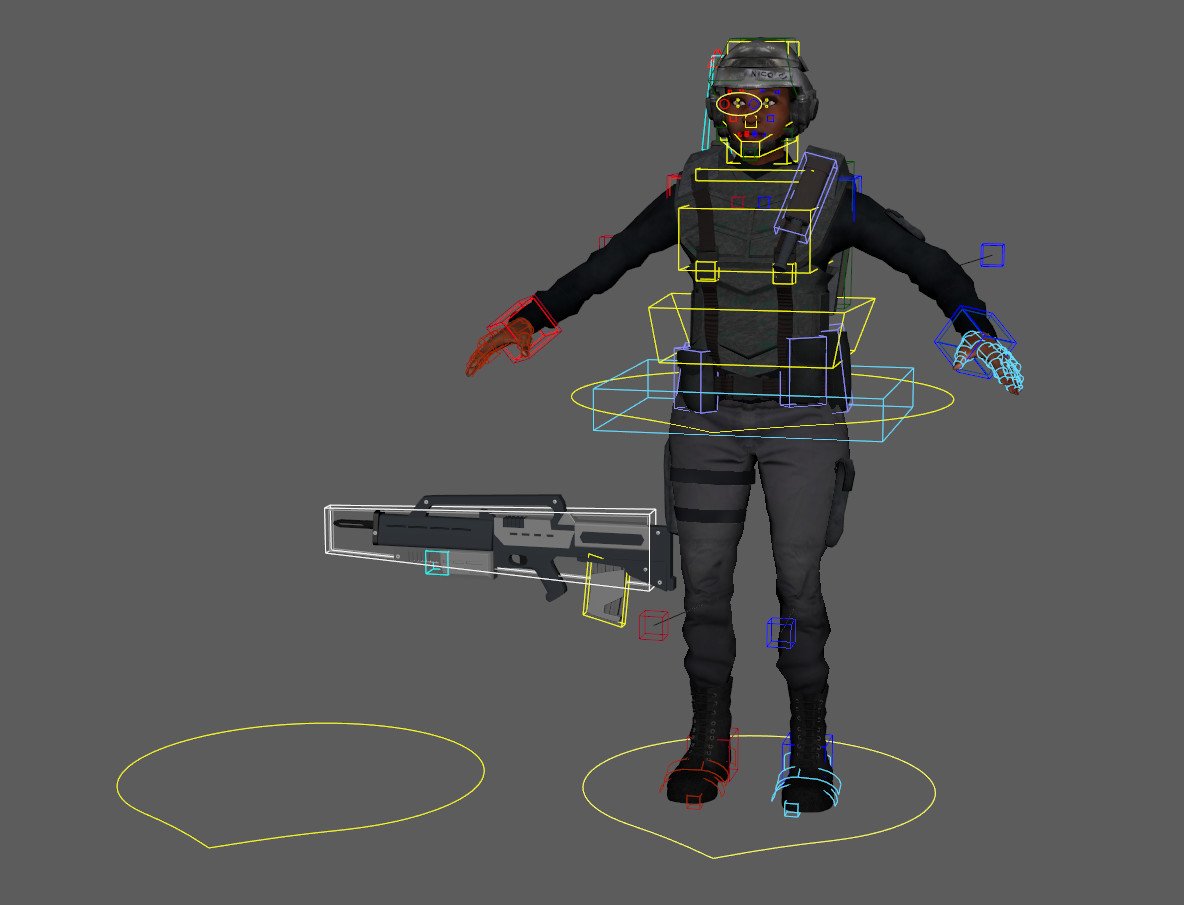
The skeletal design of Nico, it was based on my visMan auto rigger and modified as I went. The chain has to be a single chain with any leaf nodes parented right back into the main hierarchy. The head rig came from the character creator and I aligned it and parented it to my existing head setup. The rifle was also part of the character rig and that was parented to the root joint.

Super useful is to make sure your rig has offsets. In previs, you are almost certainly going to be parenting lots of objects together and offsets come in very handy to be able to parent but also then be able to continue you to animate the child. Having the main global control built with an offset is particularly useful if you plan on using motion paths. You can set it up on one and then refine and reorient it on the other.

Often when importing your FBX’s from Maya to Unreal you’ll see some errors, mostly cautionary but still a complaint from Unreal. I investigated it and because we work so quickly in vis, making, removing, and reskinning in our rigs, I had inadvertently published my rig with several bind poses. It’s an easy fix, go to the outliner, and uncheck display dag objects only in the display panel. Search for the bind poses by wildcarding *bind and then deleting all the bindPoses. This starts you off clean and you can then create a single, clean bindPose and publish.

I went through Maya’s command library and made a note of which commands would be useful. The highlighted line of the code allows you to create a new bind pose. All you need to do is select all the joints that you need included for the pose and run. Having the code means you can quickly clean up your rig going forward.


Texturing was treated to my iterative approach, I brought it my models and dropped some of the many smart materials in substance, tweaked if needed but mostly just to have maps to plug in when building the materials in Unreal. Some aspects received additional passes but most didn’t ever see substance again - Red Smoke was all about story and narrative.


The flare was sourced from sketchfab as free model. I tweaked the textures and rigged it using a little prop script to quickly set up a prop rig, before making something bespoke.
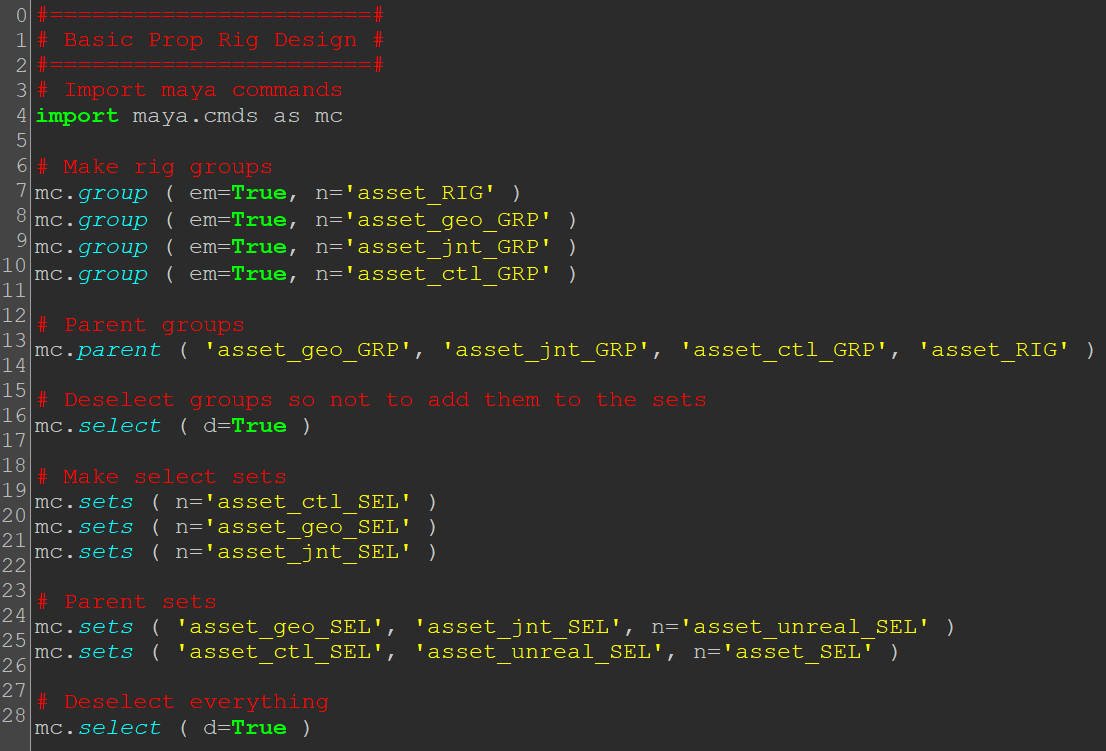
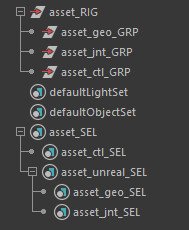
I try to script up aspects of the rig builds, so each rig is similar in structure so when I’m in the shots animating, I know where things will be should I need to tweak something on the fly. This is an early script to make the rig layout, I would swap asset for the name of the prop. Later on I used a selection based approach to pull the name.

The original flare gun model, super basic but served as a placeholder and took maybe 10 minutes to model and rig up to be used in the vis.

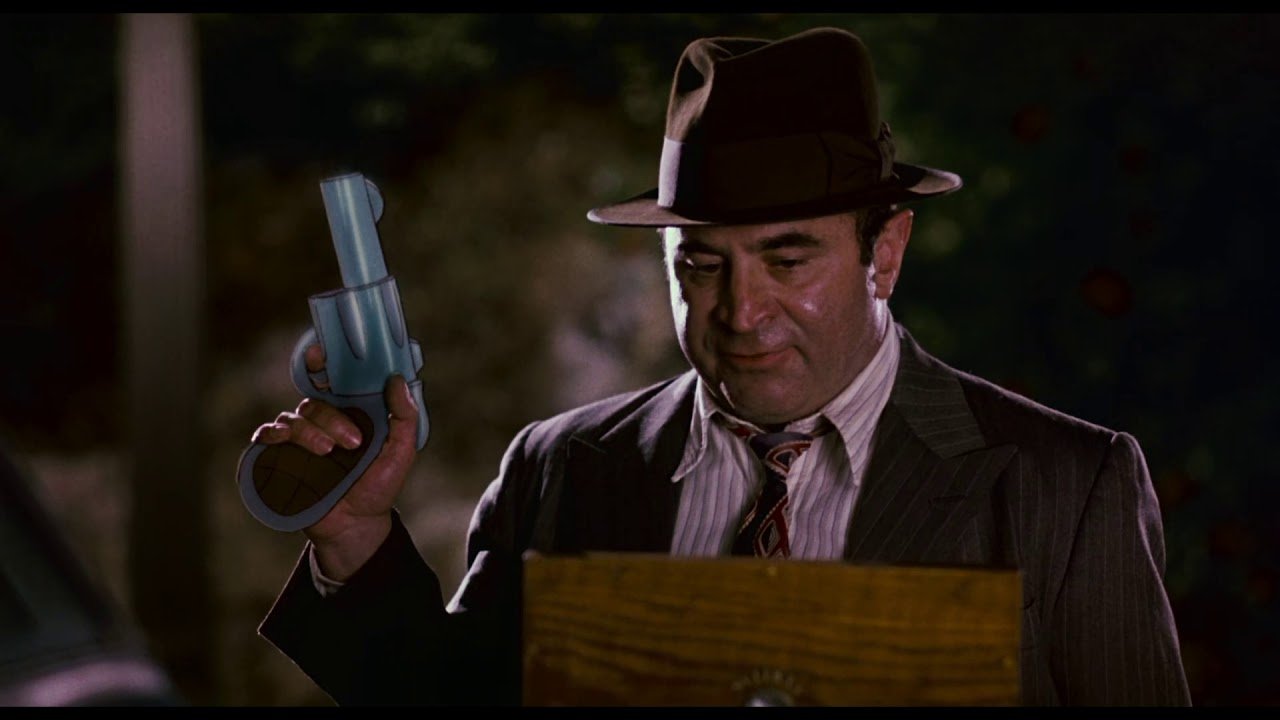
Before settling on a handheld emergency flare for the final moments of the film, I had previs’ed out the orginal idea of a flare gun and that was based on the toon gun from Roger Rabit, One of cinema’s great guns.


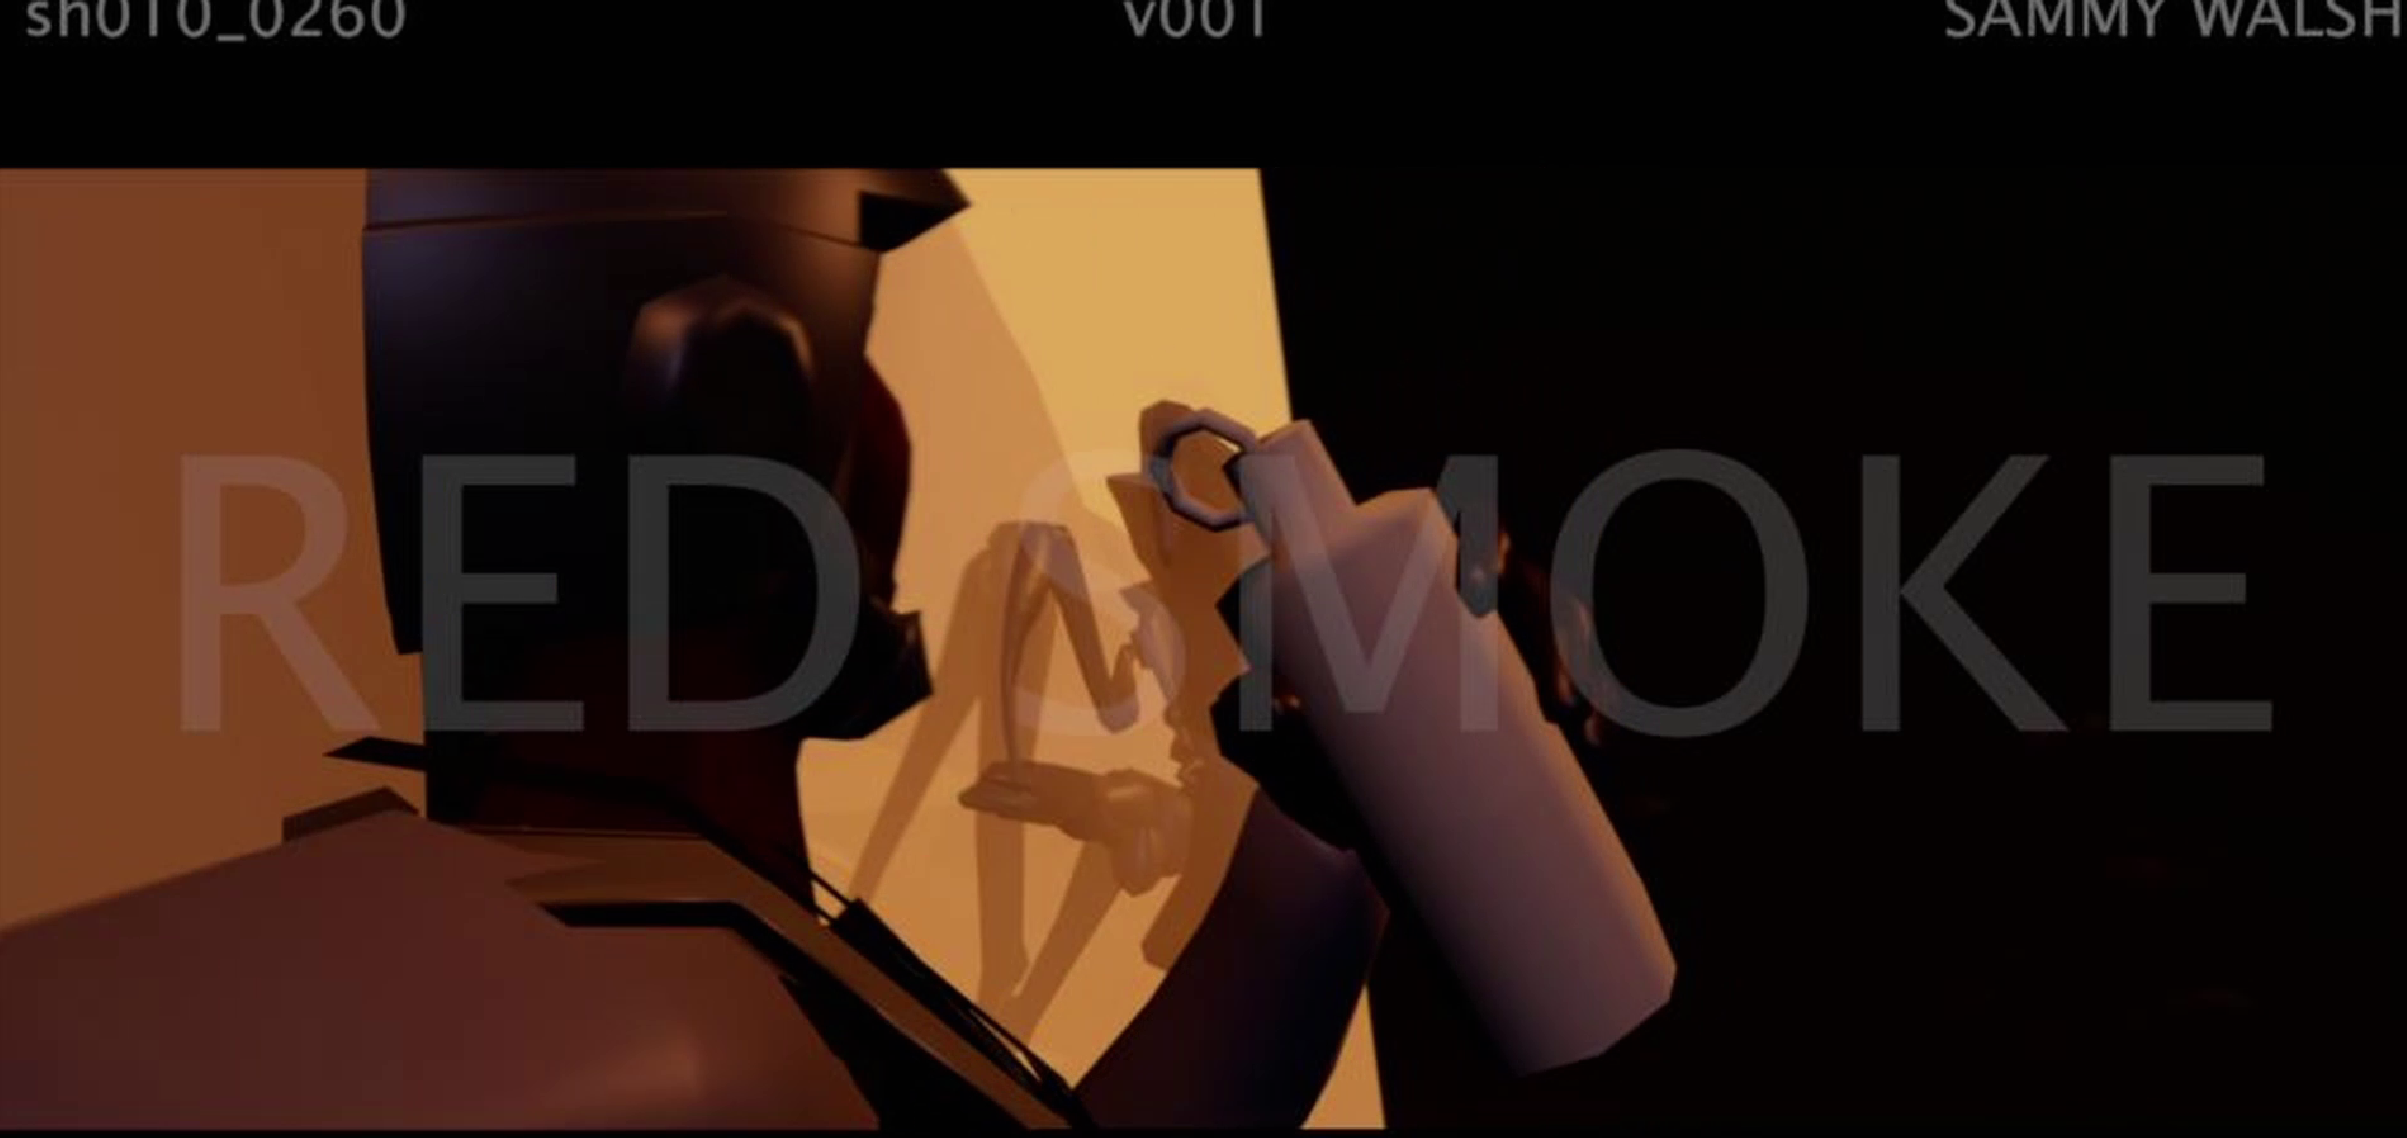
The grenade started as a very simple bottle shape, something akin to a gas grenade. I didn’t want a traditional grenade but again, a basic placeholder, rigged and placed in the shot allowed me to lens the action and have something to point the camera at. This cylinder was in the film as is for the longest time, further proof of when and where to use your resources.


I wanted something mechanical for the grenade gag. I wanted Nico to have to prime it before throwing it. The winding nature of an egg timer seemed to fit the mold and helped add some danger to the moment as she primes and then ultimately scrambles away from it (no pun intended) before it detonates.
