Wanting to learn more about Houdini and the crowd tools specifcially is where Red Smoke started. This is my workflow, the houdini setup and the process to create the Bug swarms at the end of the short.


I updated the Bug run cycle when I purchased my Houdini Indie License. I had previously developed the crowd workflow and tests using the free Apprentice edition. Now I needed to get these wonderful sims into Unreal. Having the Houdini license also allowed me to add some much-needed FX work to the cave sequence and I’ll go over that in another wiki page.


The Houdini crowds are referred to as Agents and almost all of the possibilities can be found when using Tab and typing Agent. Getting the FBX from Maya into Houdini is quick and relatively painless. Drop down an Agent node, name it and point it to your Maya FBX cycle. Everything from Maya is in CMs and Houdini works in Meters, so I used Convert Units in the options. The Bug run cycle was animated moving forward but loopable, this is done to take advantage of the locomotion features in the crowd system.

The Apply Locomotion uses the forward trajectory of the run and applies it to the agents and uses that for the foot locking and general movement further into the crowd build. I used the C_Cog_JNT to designate the locomotion joint in the system. Make sure that you export both your Rest Pose and the Run Animation with the same names, namespaces can affect this and Houdini will complain of a miss match. Adding an AgentDefinitonCache node saves the setup up to this point to disk, faster sims.


When I started the crowd system I was on limited hardware and I also wasn’t sure how Unreal would ultimately handle hundreds of agents so I added a switch node which allowed me to either work with my nice Bug model or the Block Bug. This was also helpful when testing out the simulation as the block bug was super lightweight. Thankfully, Unreal was able to process the number of agents I exported.


The footlocking set up is based on your skeleton, you have to assign the joints into the right place and Houdini will automatically setup the footlocking via a CHOP network.
I played around with the transition graph a little, at the start I had a walk and then added a run and explored how Houdini sets up up the blends between states. It’s something that I need to dig into more but I managed to get the Rest, blended to the Walk and then into the Run clips working. The footlocking on testing node always gave me issues.

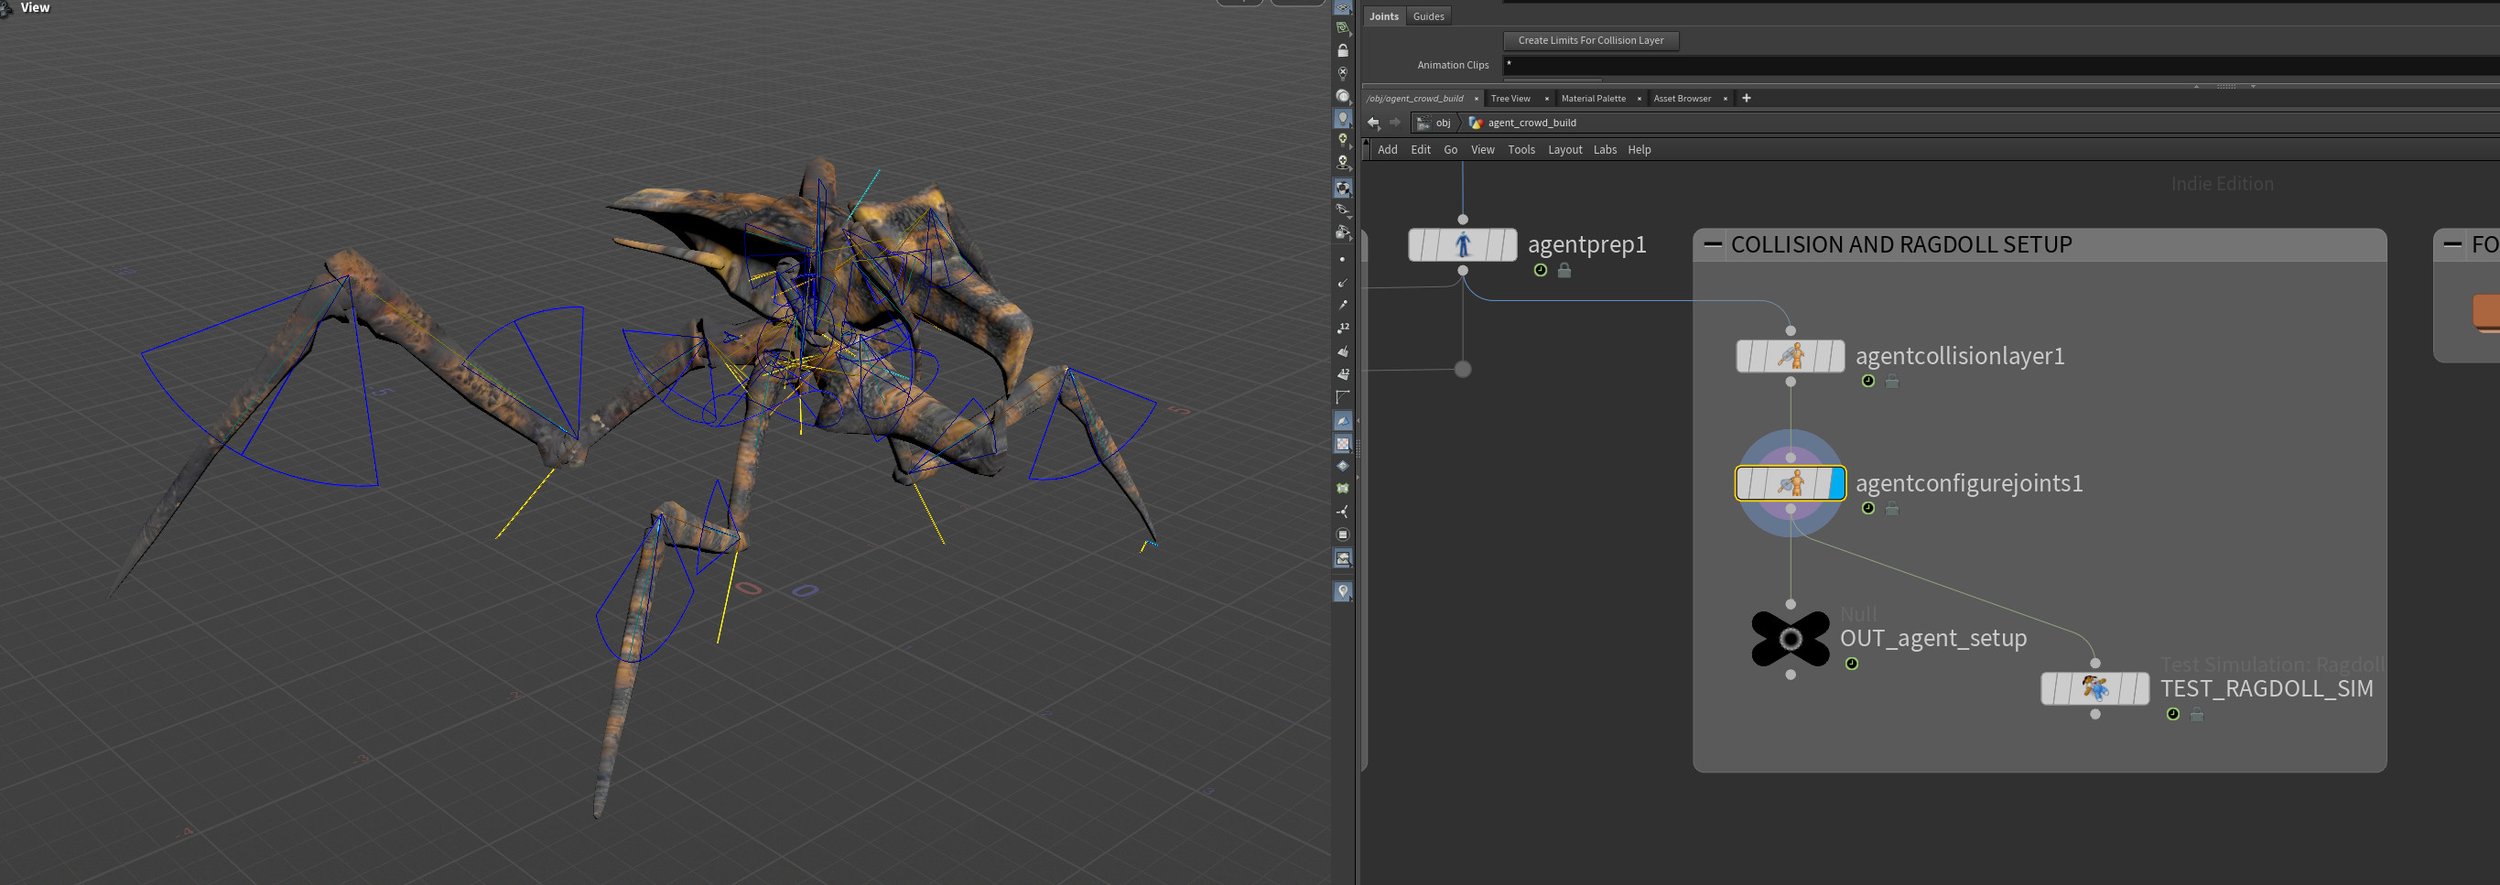
I did run tests with the ragdoll setup working in a couple of sims as one of my ideas is that Nico is saved via an airstrike and the bugs are mowed down but it didn’t make it into my film. I went through the motions of setting up the collision capsules with the AgentCollsionLayer node, then set up the joint limits with the AgentConfigureJoints. Both took a little time as I had to experiment with the angles and sizes to get the best and most stable ragdoll sim.

In Houdini, several nodes allow you to test a setup before running the main sim. I used the TestSimulation: Ragdoll node to see how the capsules and joint limiters were working. Once all that was working I dropped down a null node and called that OUT_agent_setup. Using nulls is the established workflow, you’ll see on the grabs at almost every stage there is a null, it works like an end effector, which you can use to reference in the information at other stages of the sim and in other contexts.
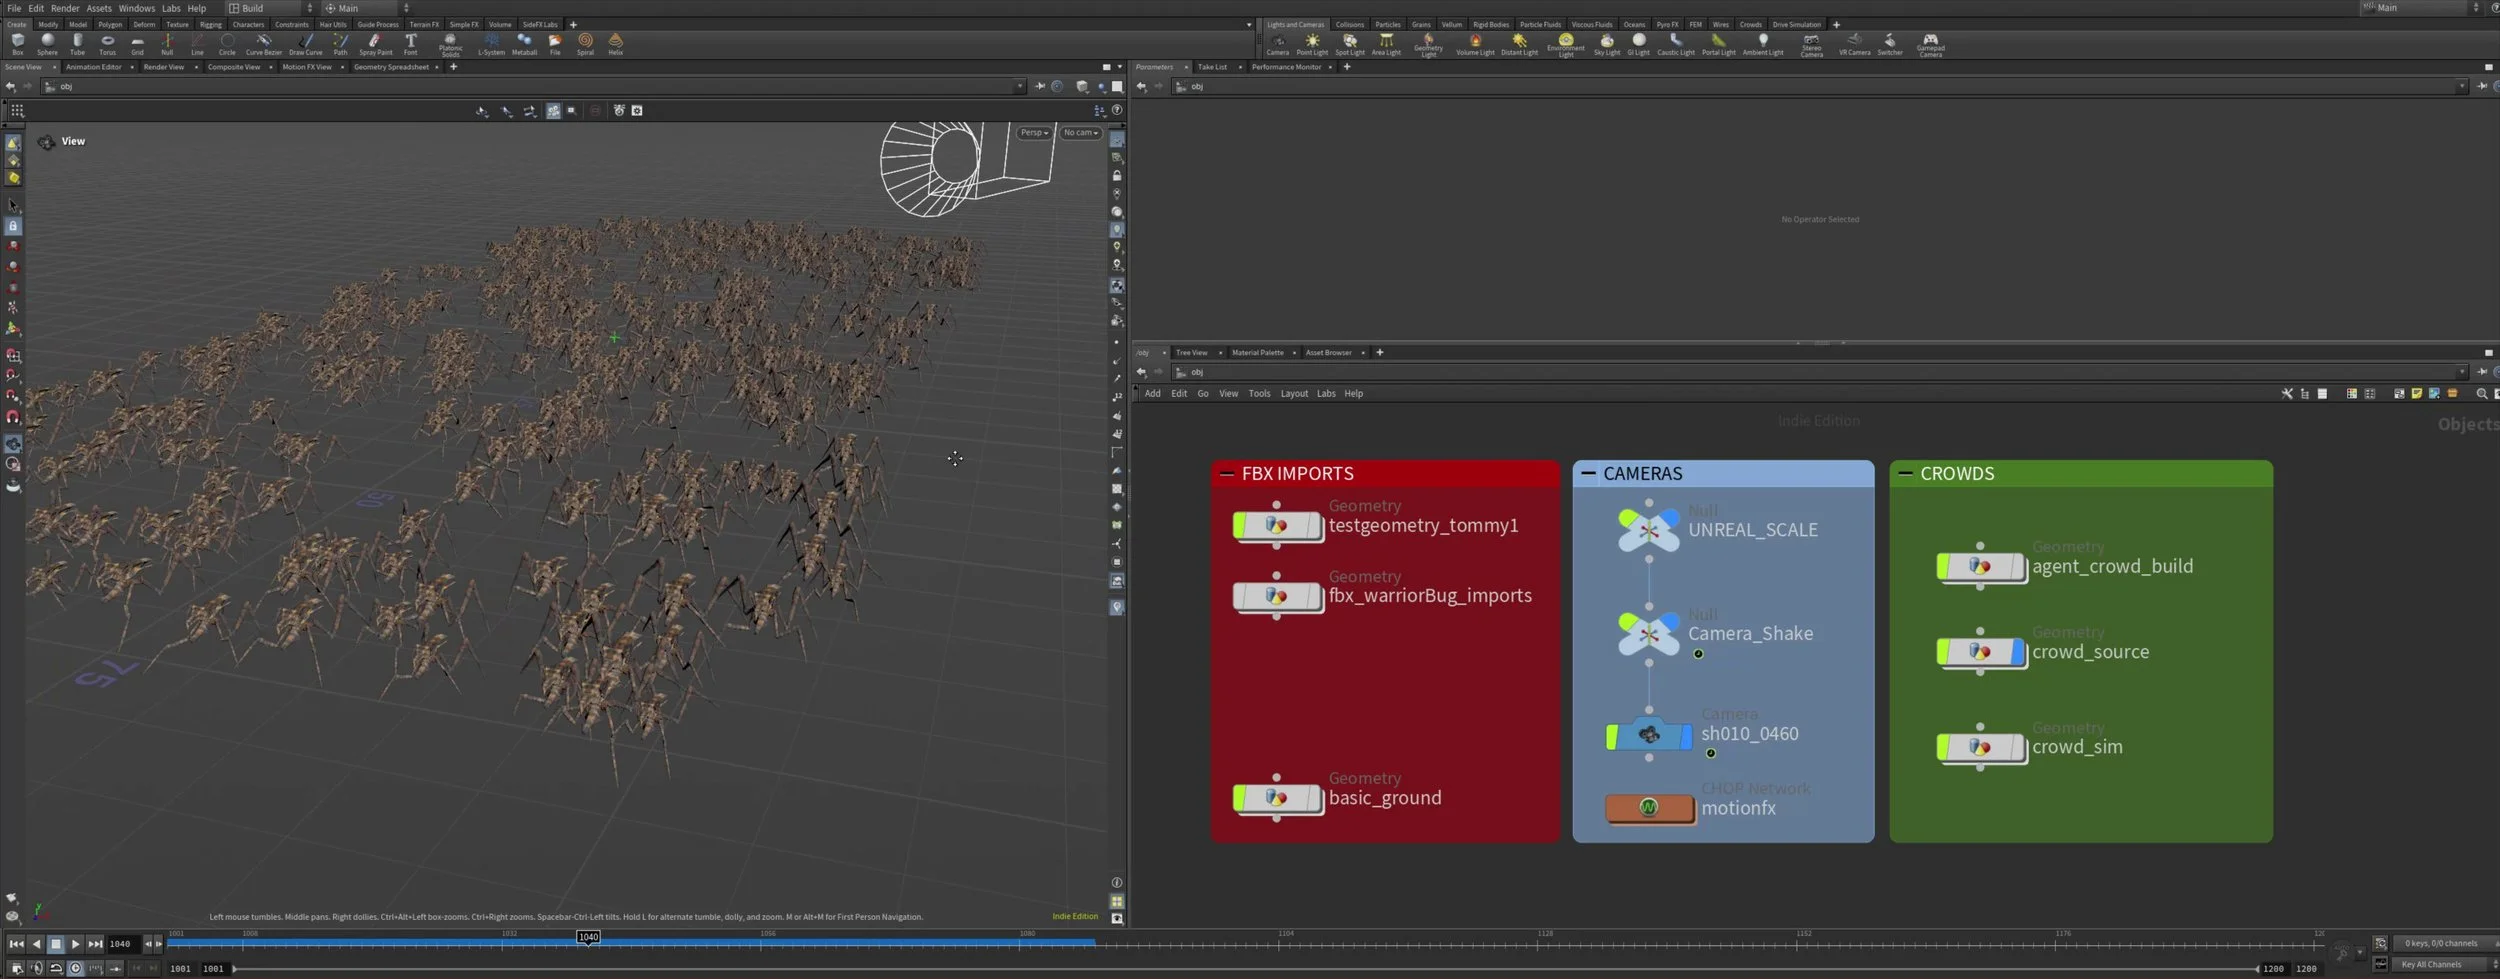
The crowdsource setup is where the sim came alive. Pretty simple, I source in the agents via an Object Merge and use the OUT_agents_setup null and the CrowdSource node to add the number, layout, and randomise settings. The Yellow node is a transform that positions the sim, this was helpful to set dress the sim to the camera and a way to use fewer agents and still have the shot feel like there are a ton of Bugs.
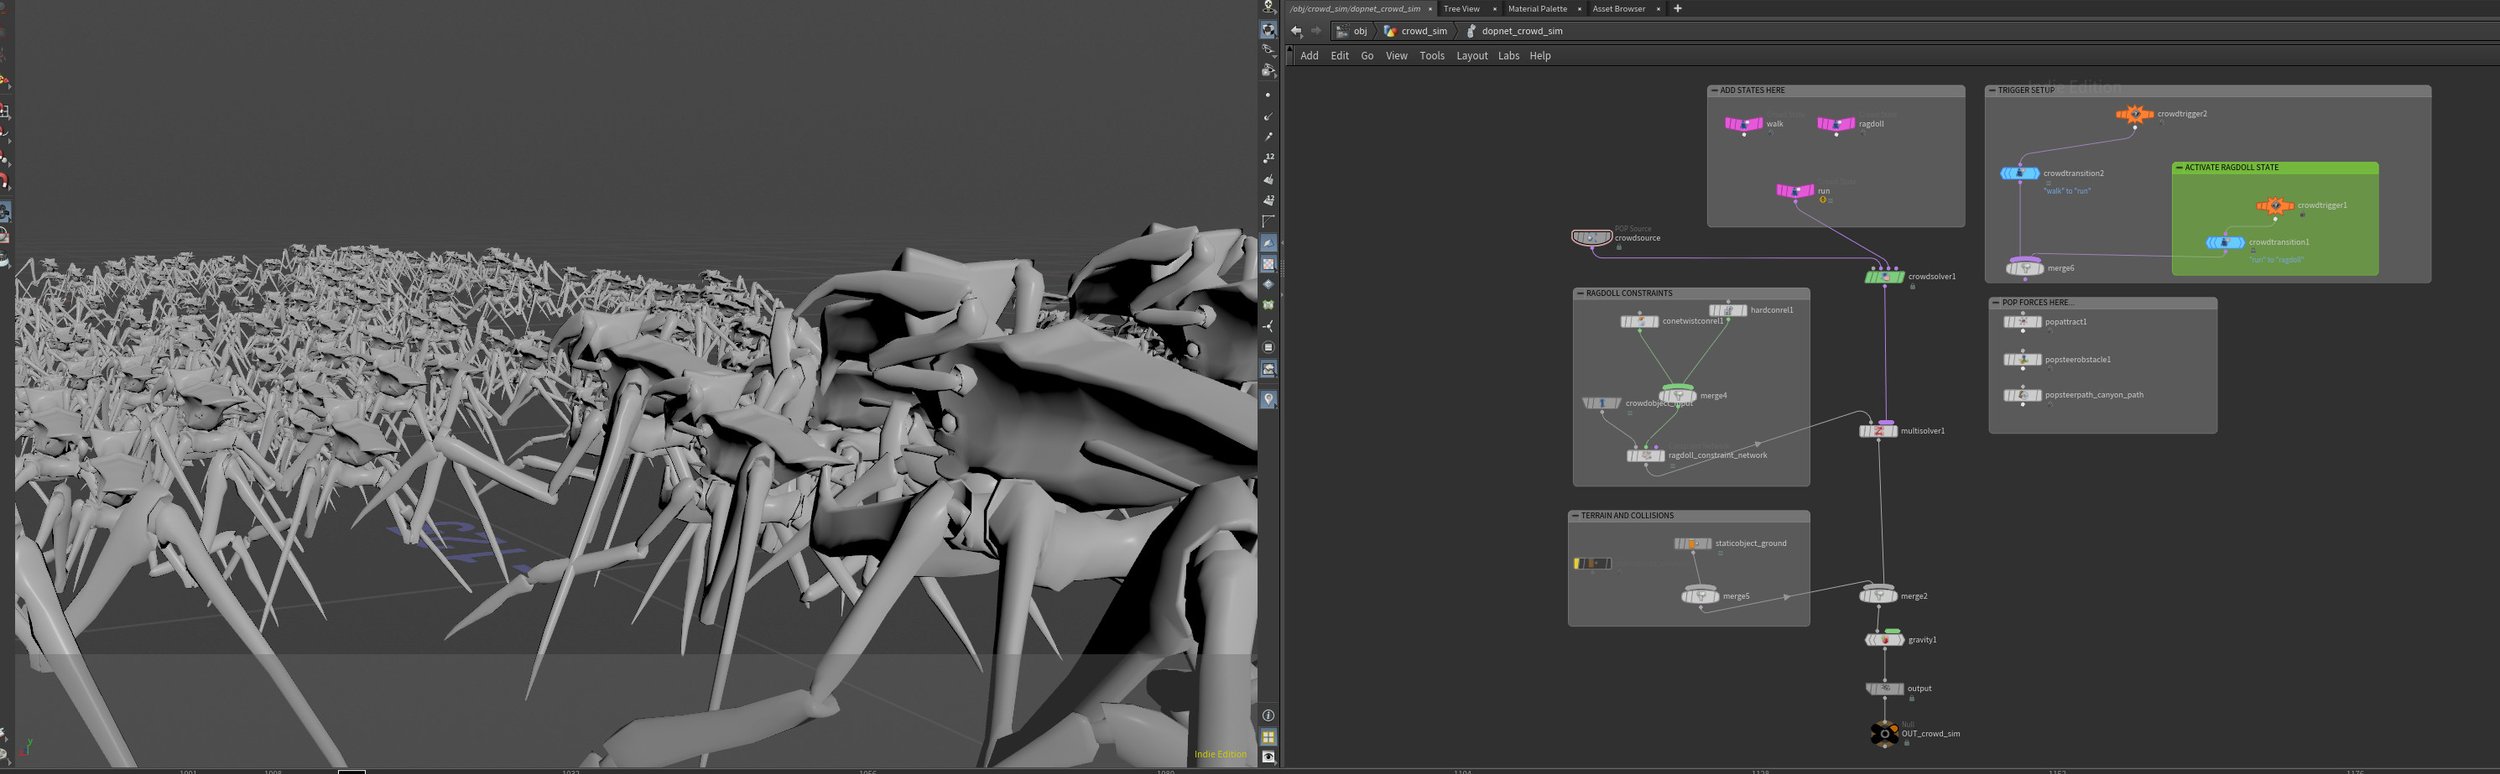
The crowd sim, was all simulated inside a Dopnet, and it’s where the meat of this simulation comes together and you can start to see your agents traverse the terrain and doing their thing in the shot. It took me a while to get this all working, various tutorials and lots of the docs read. This is probably as simple as you can get for a crowd sim but with this, I was about to simulate my bugs and get them ready for export to Unreal.


As the crowd shots were set up in their entirety in Houdini, I figured animating the cameras in here would not only expose me to more of Houdini’s animation toolset but it would minimise the number of software I would have to I/O the camera. To deal with the scale issue, I used a master null at the start of the node tree and would scale up to 100 when exporting the camera and set it to 1 when animating. I took advantage of Houdini’s CHOP network to add procedural noise to the camera to add cam shake. That was also added through a null, and if I didn’t like it, I could disable the null, then reexport the camera clean and add a camera shake inside Unreal instead.
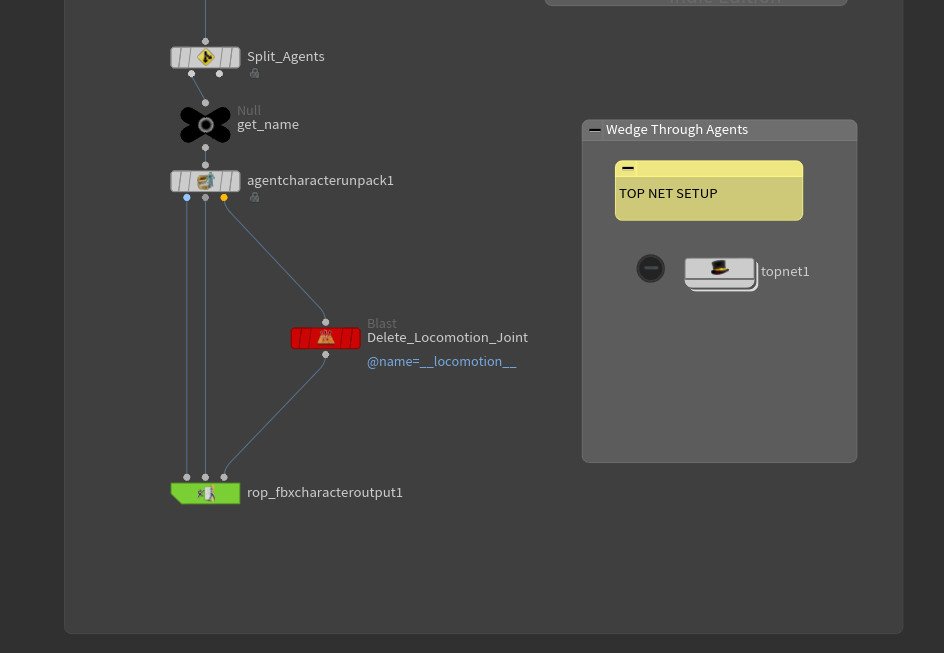

During the research, I found this awesome tutorial from Thomas Klyhn Christensen showing a robust way to get your sims from Houdini into the engine. I followed that to the letter and was able to get the agents into Unreal. The only issue I ran into was Unreal would complain about having multiple roots when I first tried to import the FBXs. The original export setup worked as in the correct number of agents exported correctly and would import into Maya but not Unreal. I discovered when looking at the FBX in Maya that it also contained a joint called __locomotion__ which Unreal was reading as another root joint and therefore unable to import the agent FBX.


The __locomotion__ present in the Maya FBX I was checking and the error I would get when I tried to import the FBX into Unreal. The answer to this was to remove that joint before running the Top net and when it looped through each agent, the __locomotion__ would be removed and leave the expected skeletal joint chain and the geometry.


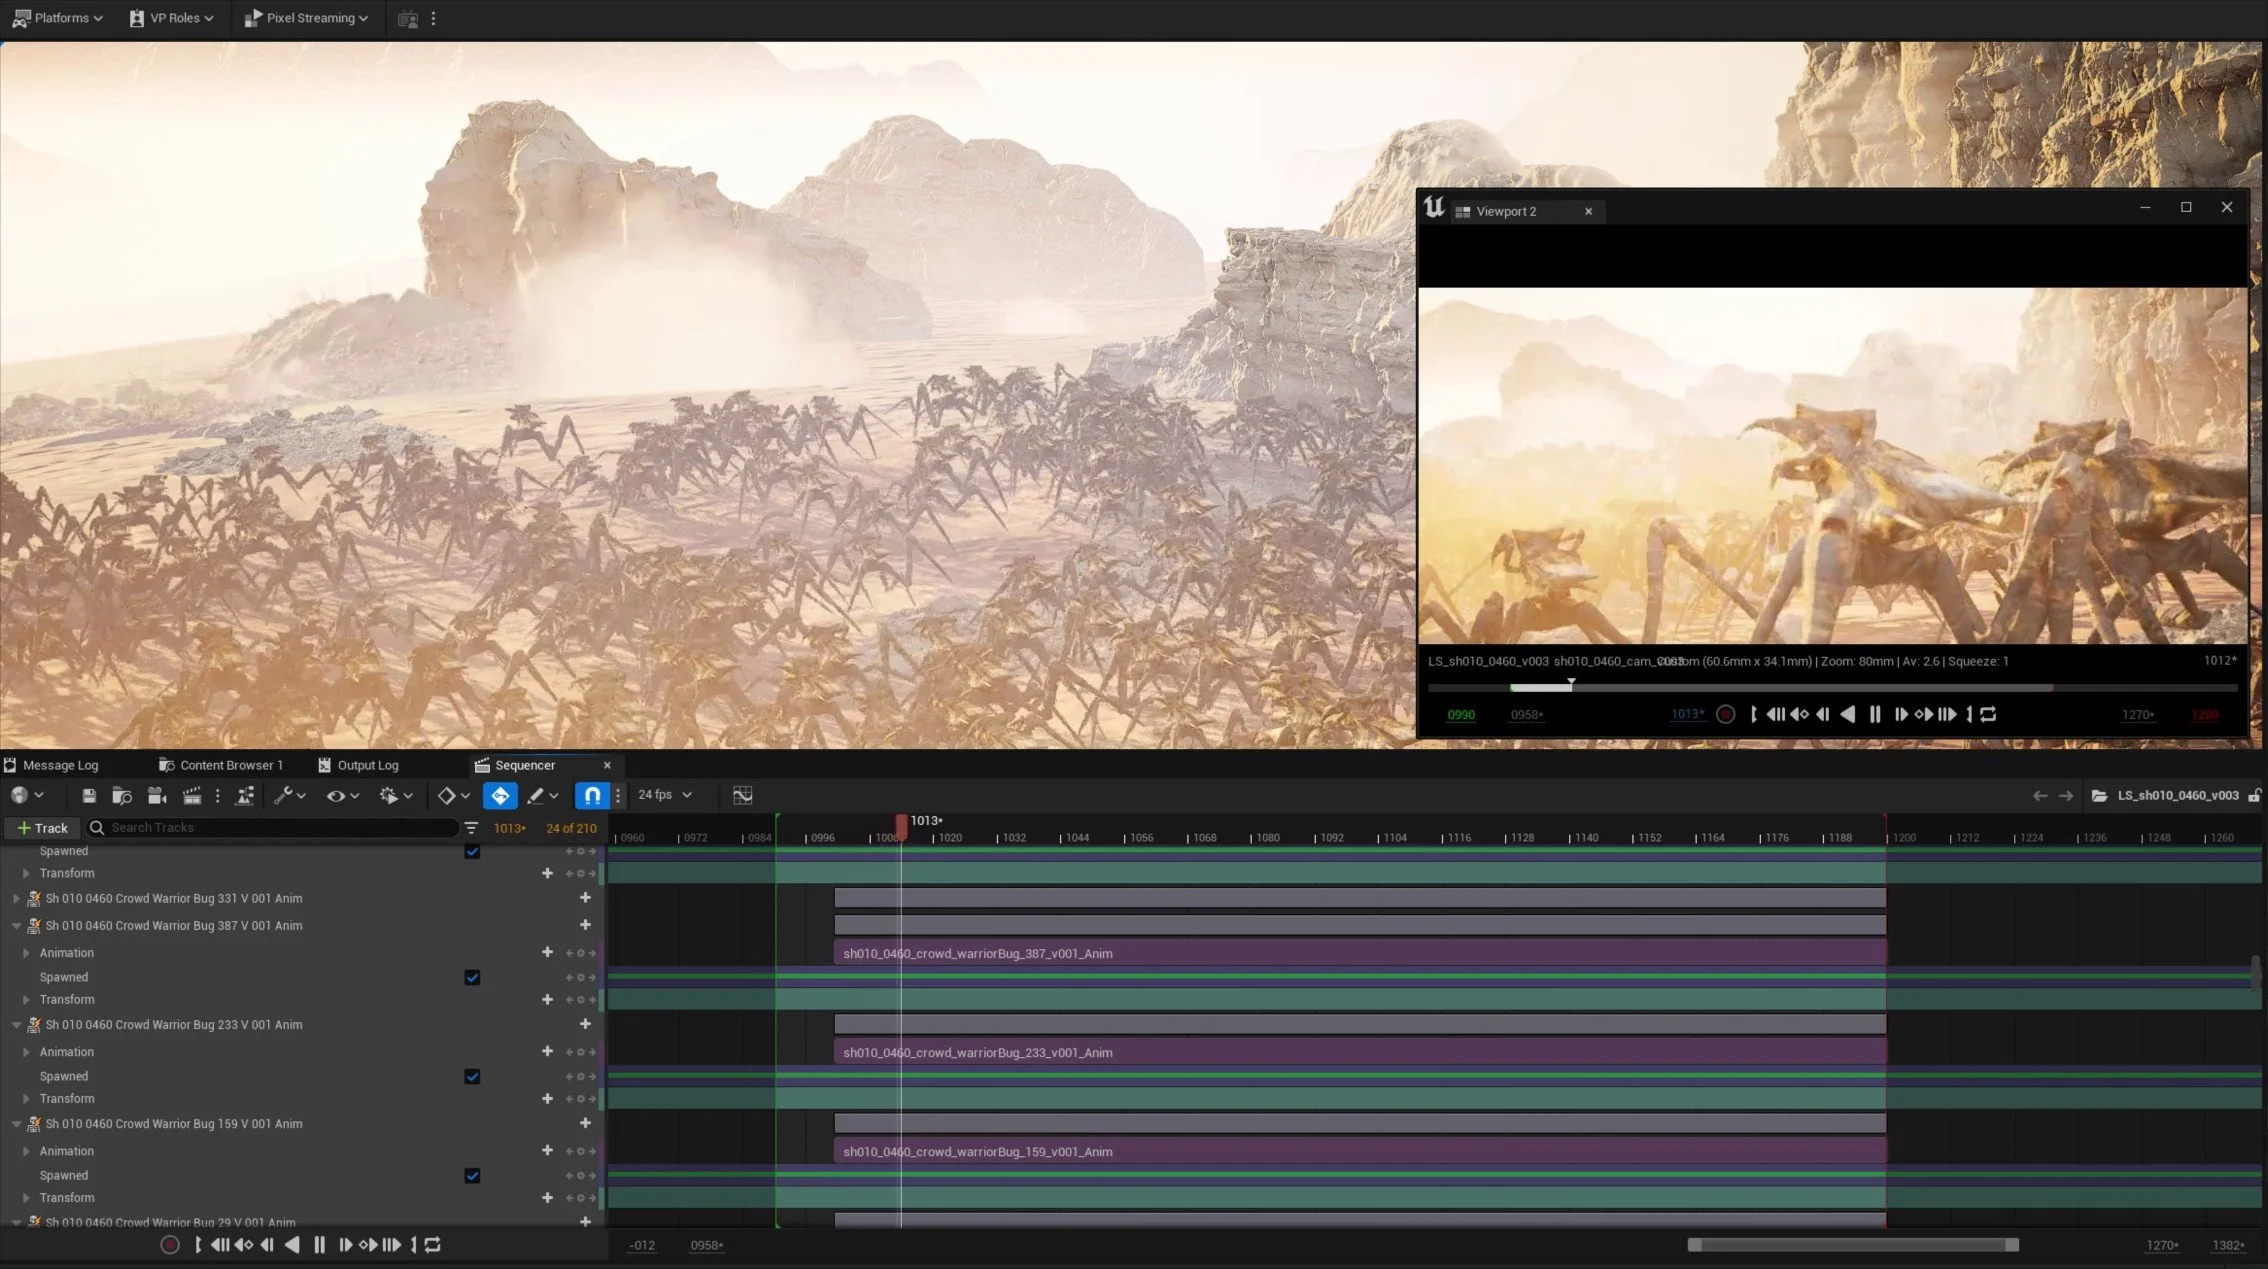
The final part to this was to import the crowd into Unreal. The main drawback to using many agents, I averaged between 200 and 400 for my shots, is that each skeletal mesh needed an animation sequence assigned. It was one of those things where I had to bite the bullet, make a cup of tea, and start assigning. Thankfully each agent could only have its associated animation assigned so I didn’t have to go searching, simply click + and then pick the only animation available in the list. Probably took me about 20 mins for the shot with 400. Once it’s set up, you are free to noodle the sim in Houdini and re-export. Just remember to re-import the FBXs, which I have to say can take a little time.

Here is the sim for sh010_0460 running in the engine. It was pretty real-time and it also rendered very quickly. That was 400 agents all moving and doing their thing and it turned out to be one of my favourite shots in the film really added that gravitas to the end and it felt like way more bugs were heading toward Nico.