Sequencer and Cameras
The sequencer is where the animation really begins to feel like we are making a film. This was the area where it could become tricky if you worked out of order. I found that each new sequencer would react in odd ways if you tried to import the camera before you altered the frame rate.

This is a finished sequence setup. This is the order to change the attributes and import the assets.
Change the frame rate, defaults to 30fps. The film was 24fps. If you tried to import a camera with a frame rate of 24fps into 30fps the camera would jump to a different point on the timeline. Something at first seemed like an export error. Once I started to change the frame rate first, the camera import became very straight forward.
In the Playback Options change the Start and End values to match your shot.
In Playback Options, check Lock Frame Range and Keep Cursor in Playback Range.
Alter the Working Range and View Range to match your shot, I didn’t work with handles so I modified both simultaneously to read the same.
Save your changes using the old disc icon.
Once this little check list is completed we can start to import the camera and shot specif assets. There are still a few things to be aware of here. When making a new sequencer.

In order to see the animation we need a Camera Cuts track and a Camera. Once we have those we can Import the animation shot camera into the CineCameraActor. I found that unchecking all options gave me the best result, I had baked my camera from Maya so reducing Keys seemed a little strange and I had a certain naming convention in mind so I didn’t need to match the camera names from Maya to Unreal.

We can now bring in the assets by adding Actor to Sequence. This can be done using the +Track button or dragging the asset from the World Outliner into the sequencer stack. Then we can assign the animation, every animation available can be found by clicking the +Animation button, this will bring up a list of all imported animations associated with the asset. Once added it will appear on the time line, from here you can slip animation, retime or edit.
You should also make sure you have a Playstart in the world outliner at all times, this will prevent Unreal adding a temp object to your sequencer render. You can simply move it out of shot.

Camera shake for the majority of the shots in the film were achieved using blueprints in Unreal. Adding camera shake was incredibly intuitive and straight forward to get results. I made a couple for the film and would alter them if necessary. Certain shots require a bespoke touch and so that was animated in Maya. Once the blueprint is made it can be added to the camera in the sequencer.

Maya’s viewport has improved over the years but one feature that can really wreak havoc with the scene’s stability is Depth of Field. This is handled much better in Unreal, when making the film I decided to abandon the viewport 2.0 during the animation and leave it until I arrived in Unreal.


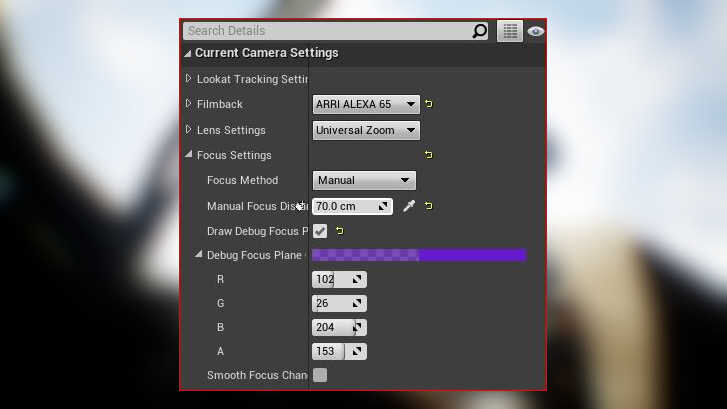
To alter the camera’s focus you can go to the Current Camera Settings in the Details panel, turn on Draw Debug Focus and use Manual Focus Distance to pull focus. Unreal’s camera gives a phenomenally good CG focus and combined with the bloom and bokeh attributes and you’ll have a camera that feels real and filmic.

The cinematic feel was partly obtained through trying to simulate a real world camera, I chose to use two of Arri’s Alexa cameras, The Alexa 65 and the Alexa LF. Setting up cameras in Maya is straight forward and the camera ctrl rig I scripted contained the film backs as default. I wanted to make sure the camera attributes translated into Unreal. At first I was manually updating but I found that through a little Config file manipulation it was possible to bundle the cameras with the scene at start up, then simple import the FBX camera and select the desired film back.

In order to get the custom cameras to appear in the Current Camera Settings, you need to do a simple modification to the Default Engine file which is located in the Config folder of the Unreal Project, here it’s DogFight. Open up the Default Engine file in notepad, find a space and paste the information in and then save and restart the engine.