Materials and Textures
There is a lot of work to do in Unreal before we can start to craft the visuals. After the asset imports we can move onto bringing in our textures and setting up the materials. We are also going to look at creating instances which gives us the ability to make super fast tweaks to the look in real time, another excellent strength to Unreal.

Bringing in textures is really simple, navigate to where they are saved on your system and drag them into the folder in Unreal. Although this doesn’t always work. A restart of the engine fixes this and you can use the regular Import and add the chosen textures from there. I would add all the textures at first, create the materials and go back and clean up the unneeded versions.

The way in which I imported the textures meant I was able to create each Material from scratch, this was a great learning opportunity. A lot of my knowledge was obtain through Zoom lectures with the Epic Team during this awful Pandemic. Once they become wildly available I would highly recommend taking a few of the courses. Through the lectures I was able to obtain a much greater sense of what was needed to create materials in a way that gave me the most control to tweak once I converted them to Parameters.
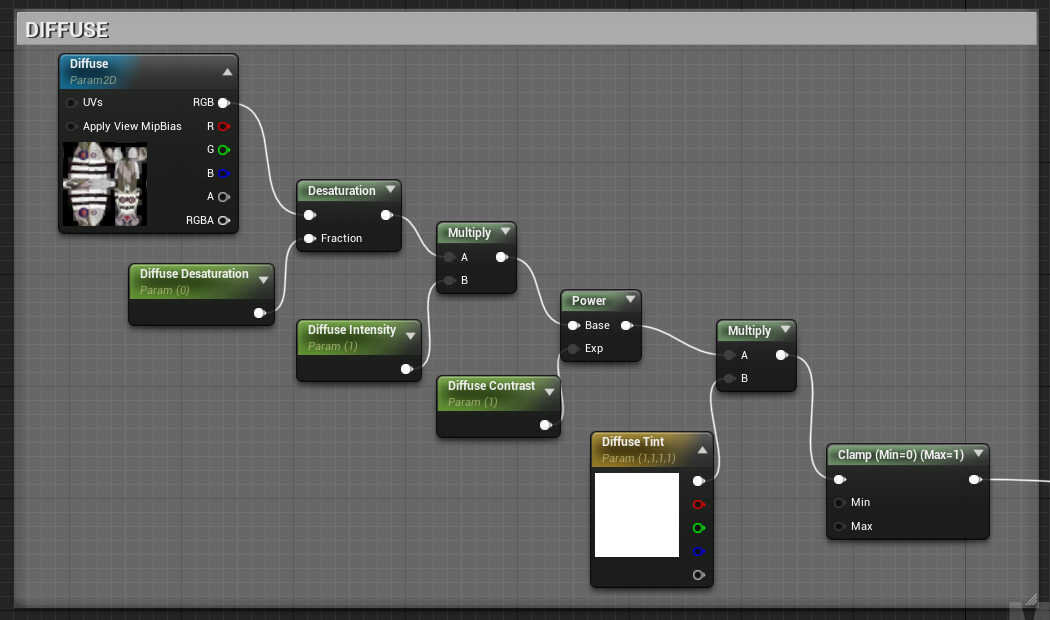
A closer look at the DIffuse material setup. Starting with a Texture Sample node which contains our DIffuse texture from Mudbox. I created a series of Constant 3 Vectors to control the Desaturation, Intensity, Contrast and Tint. Each of these are converted to Parameters by right clicking and using Convert to Parameter. These are then picked up and read when converting this material to a Material Instance.
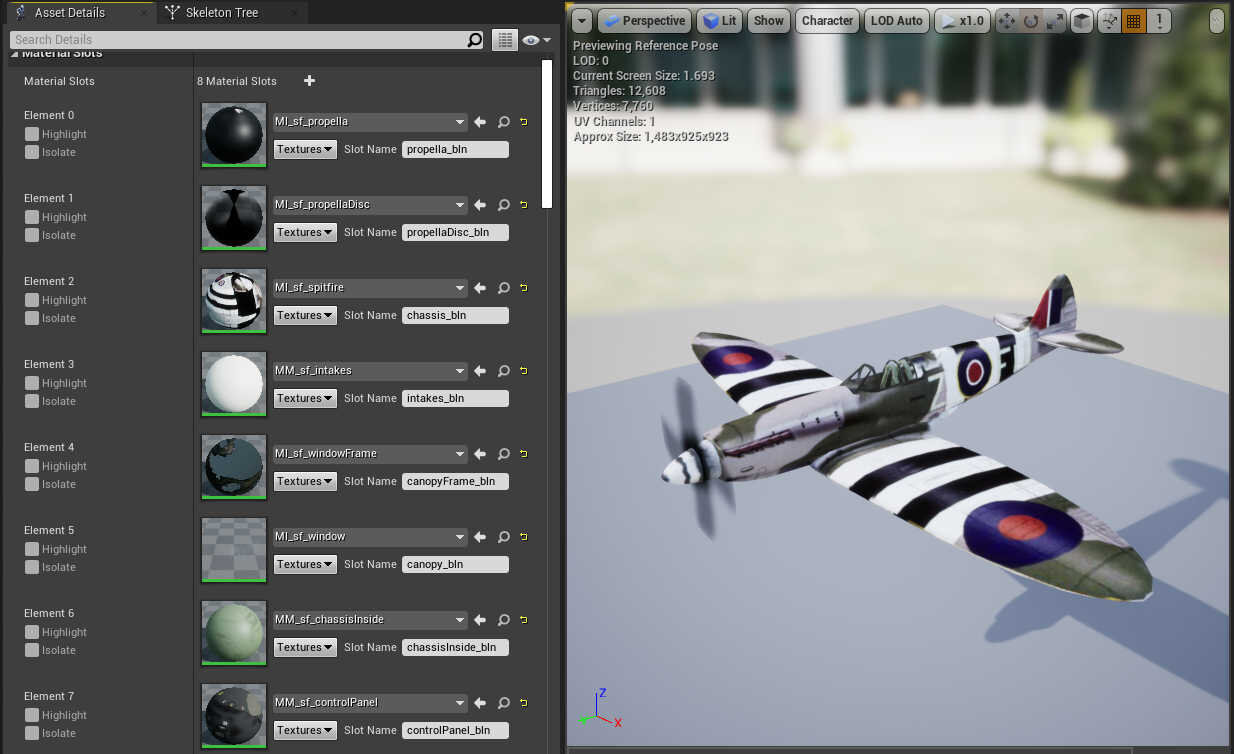
Once I was happy with the master material setup for each part of the asset I would convert the material into a Material Instance. Each part, the chassis, interior, control panel had it’s own material and therefore it’s own instance. As mentioned earlier, when building the assets I assigned a number of shaders, here they are appear on the left and Unreal sees them as Elements. You can use the Material Slot to assign the instance. If for some reason you are unsure of what each element is on the asset, you can click the Highlight check box and it will display in the viewport, very handy.

The converted parameters appear on the instance which give you instant control to change the look of the material. I also converted the Texture Sample, this allowed me to change the texture in the Instance if I needed to update the look.