Importing Assets
With our Unreal project setup we can start to bring in the assets. First we bring in the rig export which contains the model. Once that has been imported successfully we can bring in the textures, setup the materials and the instances then finally bring in the animation assets and dive into the sequencer.
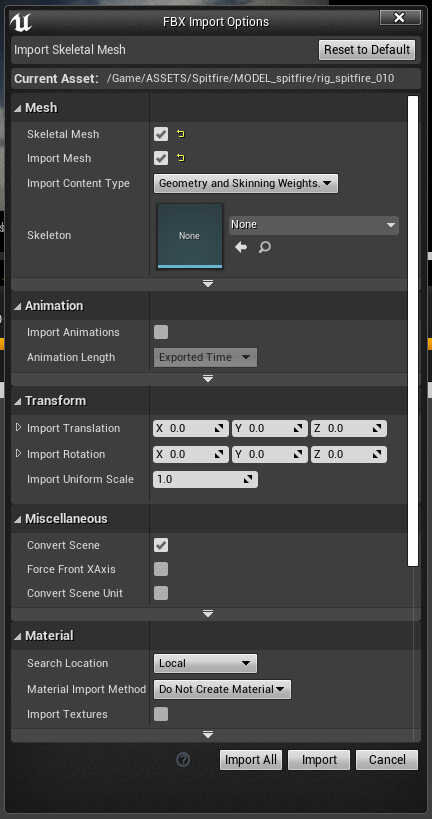
When importing the rig, all we want imported is the model and skeleton data. Nothing else. You can import textures and materials with the initial import but I found this to be a little messy. I preferred to build my materials and textures later.
Check Skeletal and Import Mesh.
Make sure Skeleton is set to None.
Import Animations should be unchecked
Import Method switch it to Do Not Create Material.
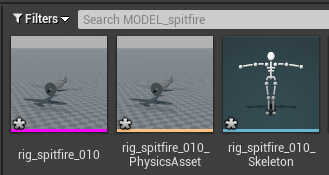
Once the asset has been imported you will have something similar to this. The Physics Asset is a collision mesh, this is generated automatically, you can opt to not create this.
I also moved the Skeleton object to the SKEL_asset folder.
The asterisk symbol in the lower left corner means the asset requires saving.
The Assets are all imported with no animation. All we want is the Model (Mesh, in Unreal) and the Skeleton. To bring in the animated version of the asset is very similar but with a few differences.

The way Unreal handles animation is very cool, you can essentially import the animation via the baked skeleton from Maya and uses it to drive the rigged asset.
Unreal uses this new skeletal data and applies it to the asset in question and we can ignore bringing in the skinned mesh for every animation. This keeps everything very light.
Uncheck Import Mesh, we just want the skeleton data
The Skeleton should be switched to match the assets skeleton, here it’s the Spitfire_Skeleton.
When confirming use Import. We don’t want any extras to be imported, just single skeletal data for the asset.
Import All is helpful if you are bringing in a number of assets that are all using the same skeleton asset.
One thing to be on the look out for is scale and bounds. Every asset imported into Unreal has a scale. Unreal uses a 1to1 scale, meaning 1 unit in Unreal is the equivalent to 1 cm in the real world. Often in VFX we work at 10th scale, useful for keeping very large scenes under control. I often work on personal projects the same way as my everyday. I did some of my initial tests at 10th scale and ran into a series of errors, odd lighting effects, terrible navigation and found out about the collision bounds.

You can increase the bounds scale by selecting the actor in the world outliner and typing in bounds in the details panel. The default value is always low, increase until the asset/actor stays visible in the viewport when either scrubbing the sequencer timeline or navigating in the viewport.