Image Planes
In Maya, playblasting with a backplate is simple and easy to setup. Unreal is comparatively straight forward once I had worked out the steps. Here is my workflow for getting a backplate into the engine.

As normal in Unreal, most features have been added via a plugin, you want to load if they’re not already loaded the ‘Image Plate’ and ‘Image Sequence Media Player’. These are considered BETA so they can change or stop working entirely, although as this is a pretty normal VFX use, I can see it staying around.

I found that referencing an image sequence from outside the Unreal project structure lead to errors so to combat this, you can copy the files into the desired folder in your project. I rendered out a super low-resolution sequence for my backplate as it was really to help match the lighting positions and check all the assets and the camera were exported correctly.
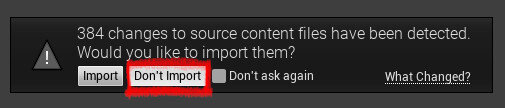
Once the image sequence has been copied into the Unreal project, you’ll be greeted with this message when next opening the project. Select ‘Don’t Import’, the images will still be in the project but not in the content browser.
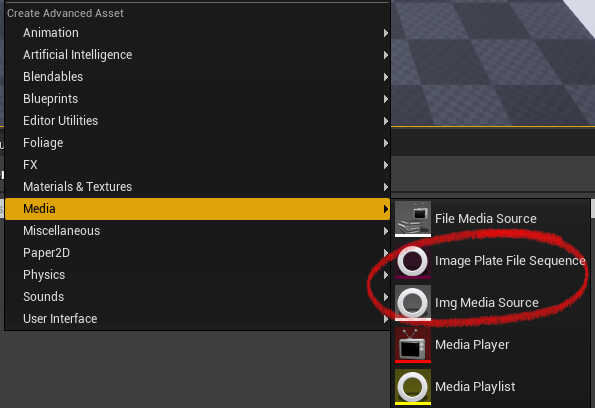
Next, bring in an ‘Image Plate File Sequence’ and an ‘Image Source’. I rename them to have the shot code so I know which plate to attach to the shot camera in the sequencer.
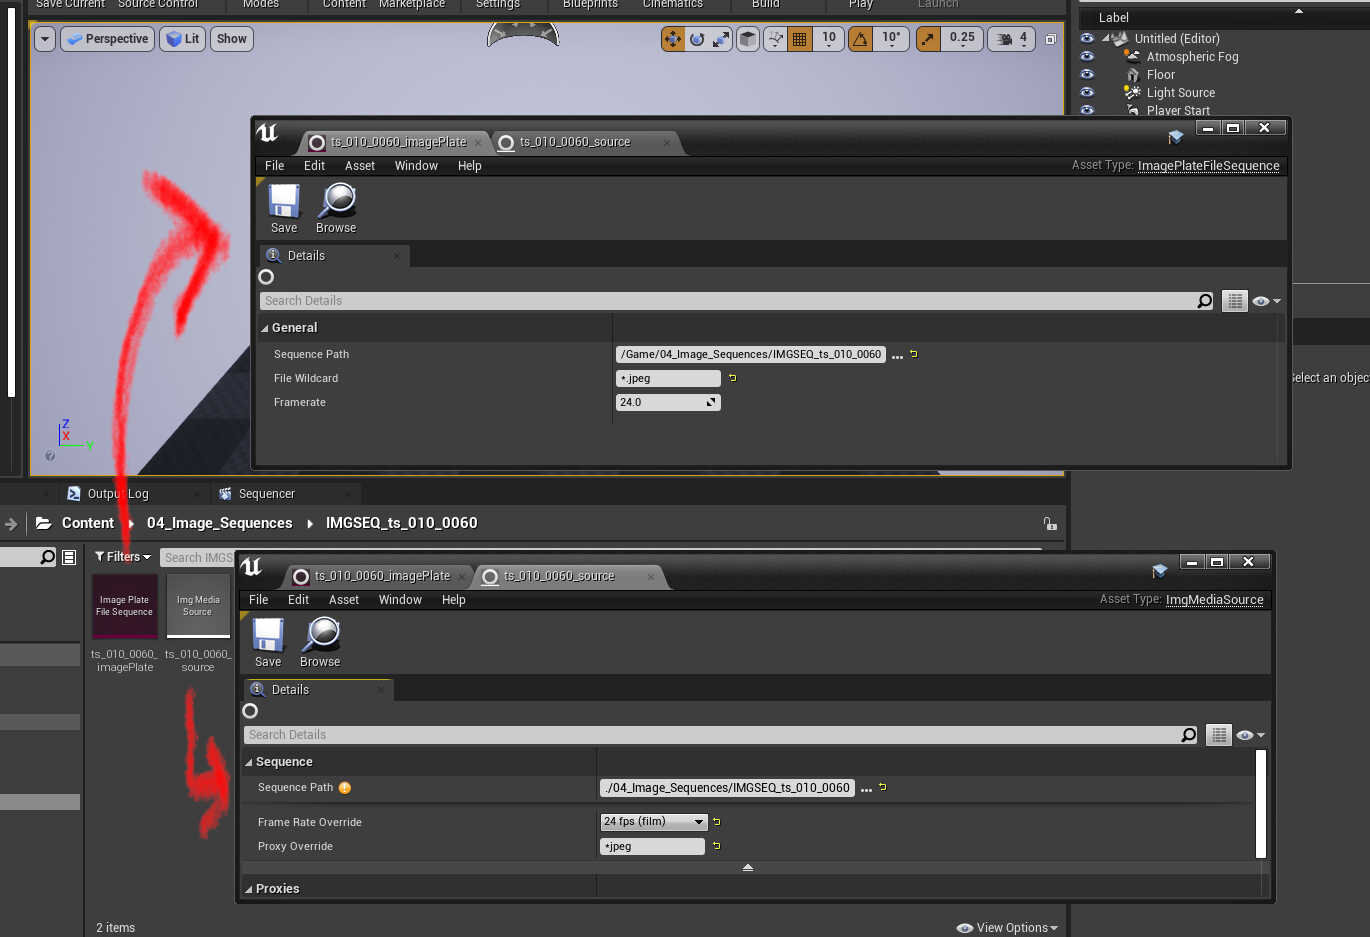
Use the ‘Image Plate’ to source the footage that we copied to the content folder and point the ‘Source’ back to the ‘Image Plate’ so Unreal can read it into the sequencer. If you have multiple extensions use the wildcard to filter the sequence you need, this can be useful for swapping between proxies and high-quality backplates.
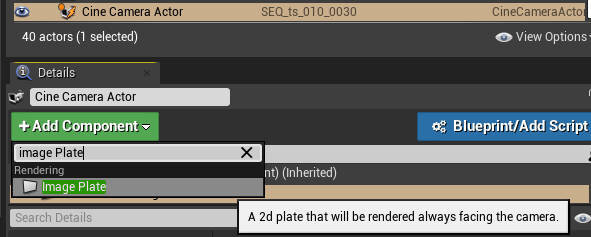
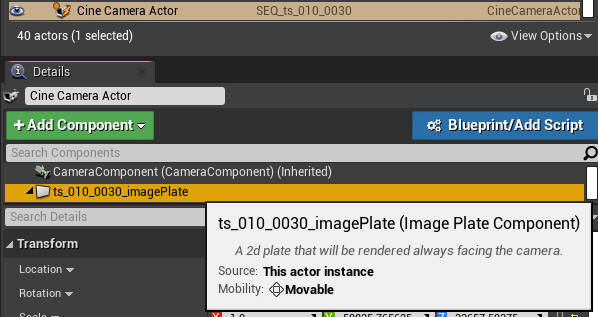
In order to use the ‘Image Plate’ on the camera, it needs to be added. We can do this by selecting the camera in either the world outliner or from the sequencer. Click ‘+Add Component’ and search for ‘Image Plate’. It’s also a good idea to name the new component after the plate, here it’s ‘ts_010_0030_imagePlate’, the naming convention helps to organise and search later on.
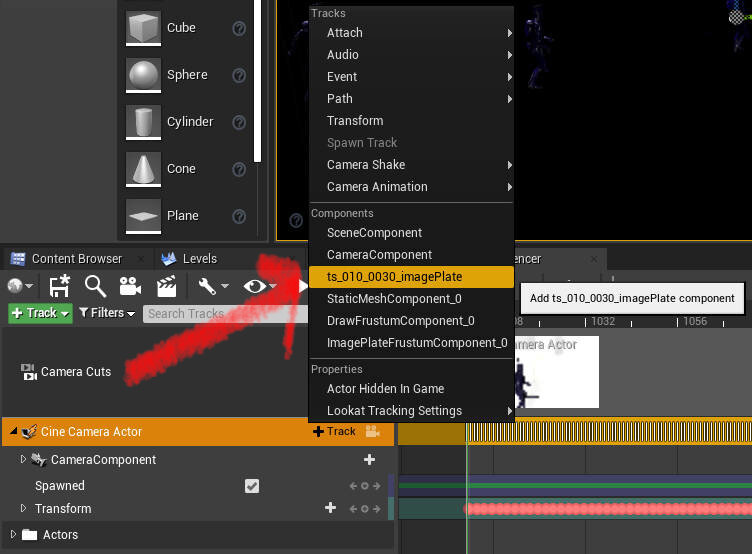
Now all that’s needed is to add this to our shot camera in the sequencer. Click the ‘+ icon’ on your ‘Cine Camera Actor’ in the sequencer and in the component section, select ‘ts_010_0030_imagePlate’ and it will be added to your shot camera.
Once the ‘Image Plate’ has been added as a new component we can add a new track that will contain the plate. Unreal calls this a ‘Render Texture’.
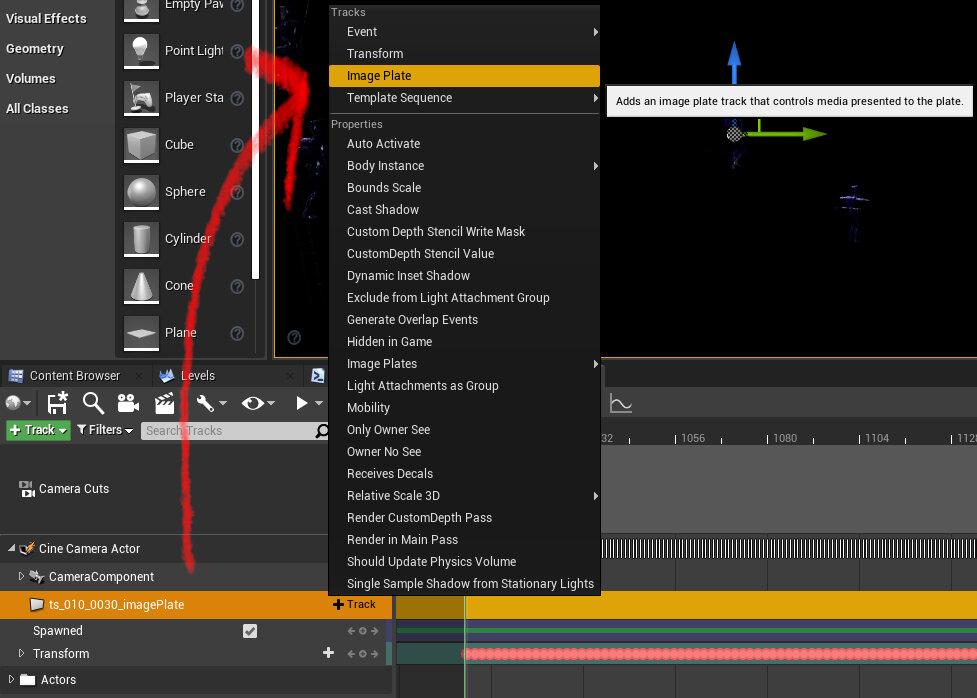
The ‘Render Texture’ component essentially allows us to connect the referenced image sequenced we sourced and play it in the engines viewport using the sequencer.
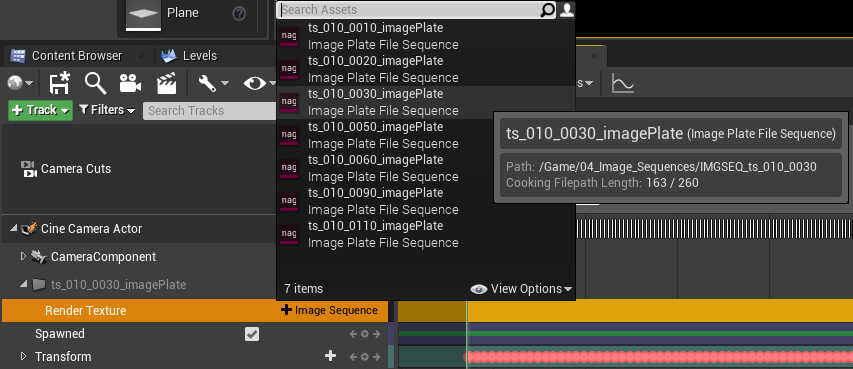
Click the ‘+ Image Sequence’ and load the desired ‘Image Plate File Sequence’.
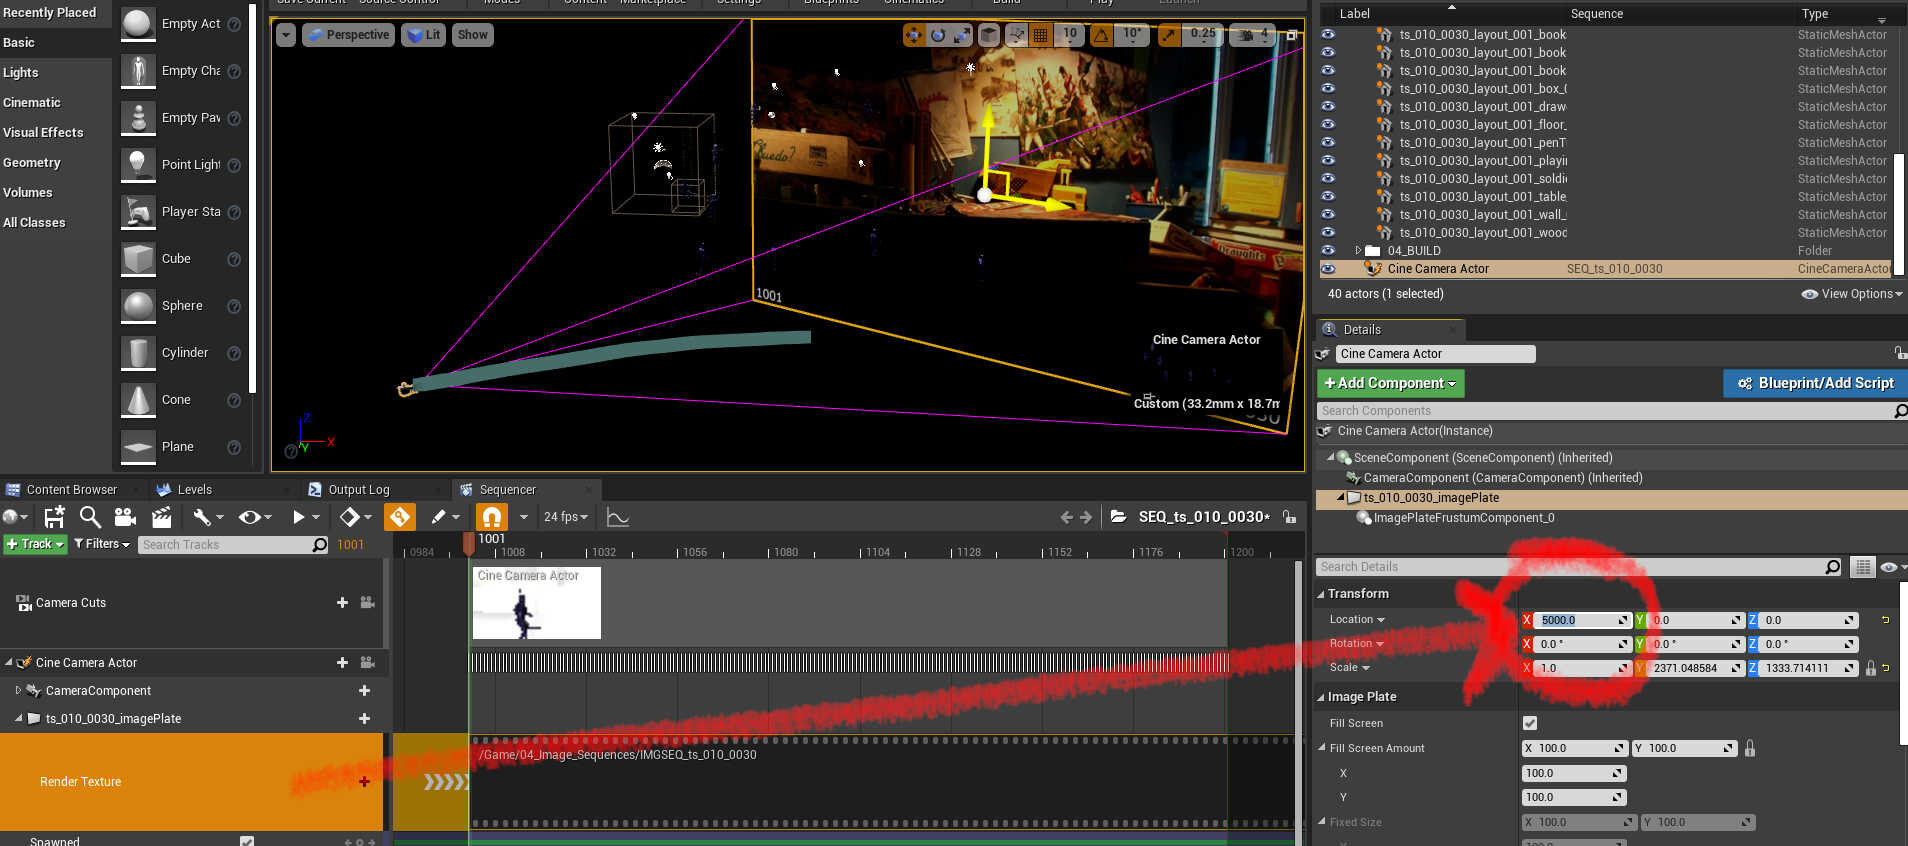
You may need to move the plate in 3d space in order to see it. Select the ‘Render Texture’ track in the sequencer and use the translation X value to move it to somewhere that works for your animation, here I pushed it back by 5000.