Combine Static Actors to Blueprints
An easy way to manipulate a number of static meshes that gives you a lot of freedom when places or arranging objects in your projects.

This is a small set decoration from my short film, it’s a couple of the assets placed for decoration and exported as individual static meshes via FBX to Unreal.

Here is the result of importing all the FBXs, a series of static meshes that make up our little set decoration prop.
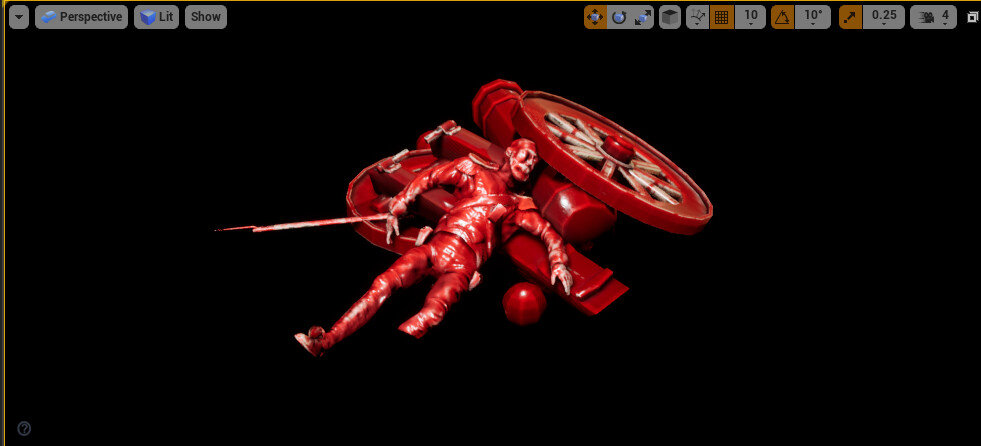
The set decoration with the materials reapplied and brought into the viewport. Repositioning this set dec asset becomes difficult now as each part is selectable and has its own pivot and transforms.
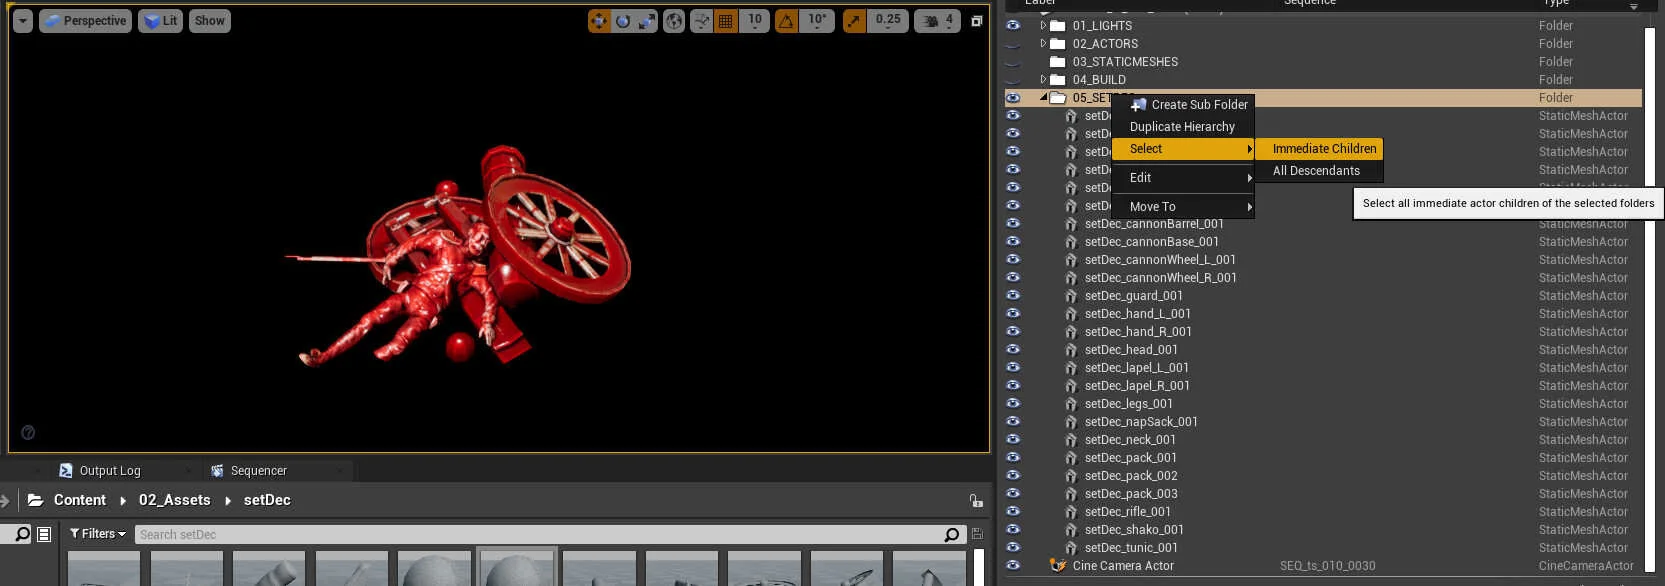
We can put all the meshes into a group and use the ‘Select Immediate Children’ option and then move the set dec around in the level. This is good but using a ‘Blueprint’ makes life a little easier.
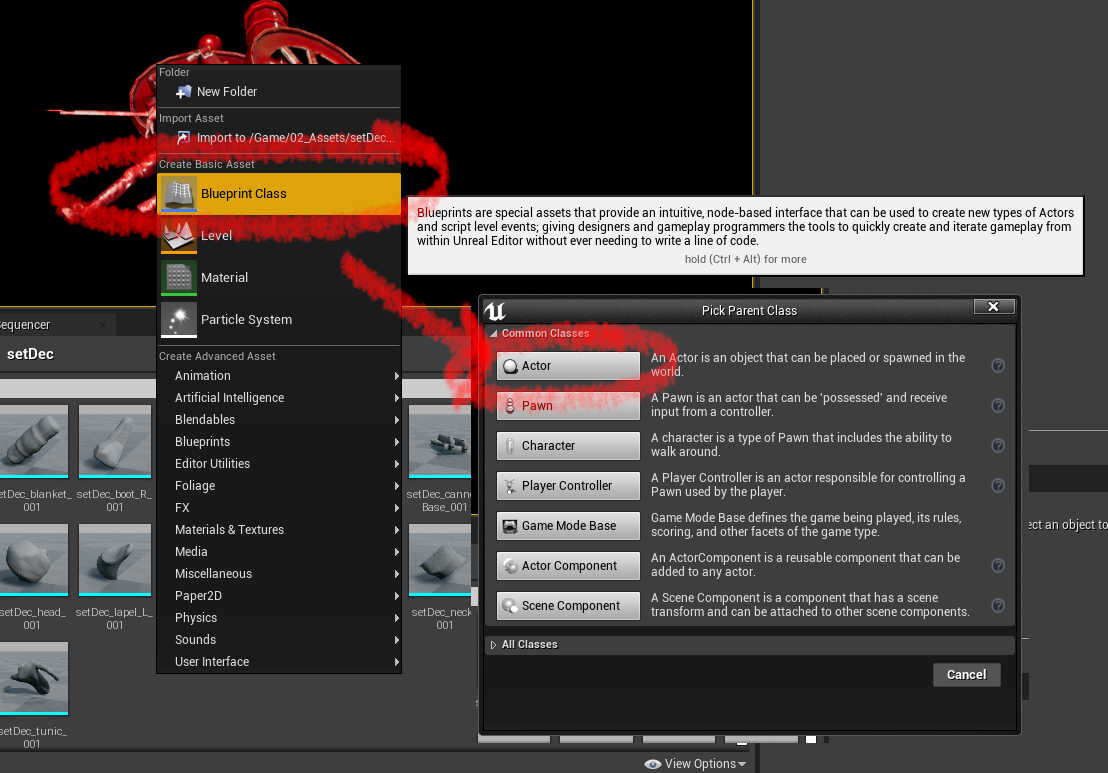
Make a new ‘Blueprint Class’ and select ‘Actor’ as the parent class. I often create the blueprint inside the same folder as all the static mesh pieces. I use ‘BP_ for the prefix for all my blueprints, it makes it easy to find in the project at a later time.

Open the new blueprint, select all the static meshes and drag into the ‘+ Add Component’ section. Then hit ‘Compile’ and finally ‘Save’ the blueprint. You will need to connect the materials to the static meshes. You can now drag the blueprint into the scene and freely move it around.

Once the blueprint has been made, you can make custom changes to it, great for quickly iterating options, it’s a really flexible workflow, just remember to ‘Save’ after you’ve made your changes.