Image Plate Gamma Hack
After setting up the image plates in the engine, I quickly noticed that the plates were always pretty dark inside the sequencer. The workflow was to match the original levels but sometimes I needed to see more details in the plate. There wasn’t an immediate answer for this so I hacked the default image plate material.
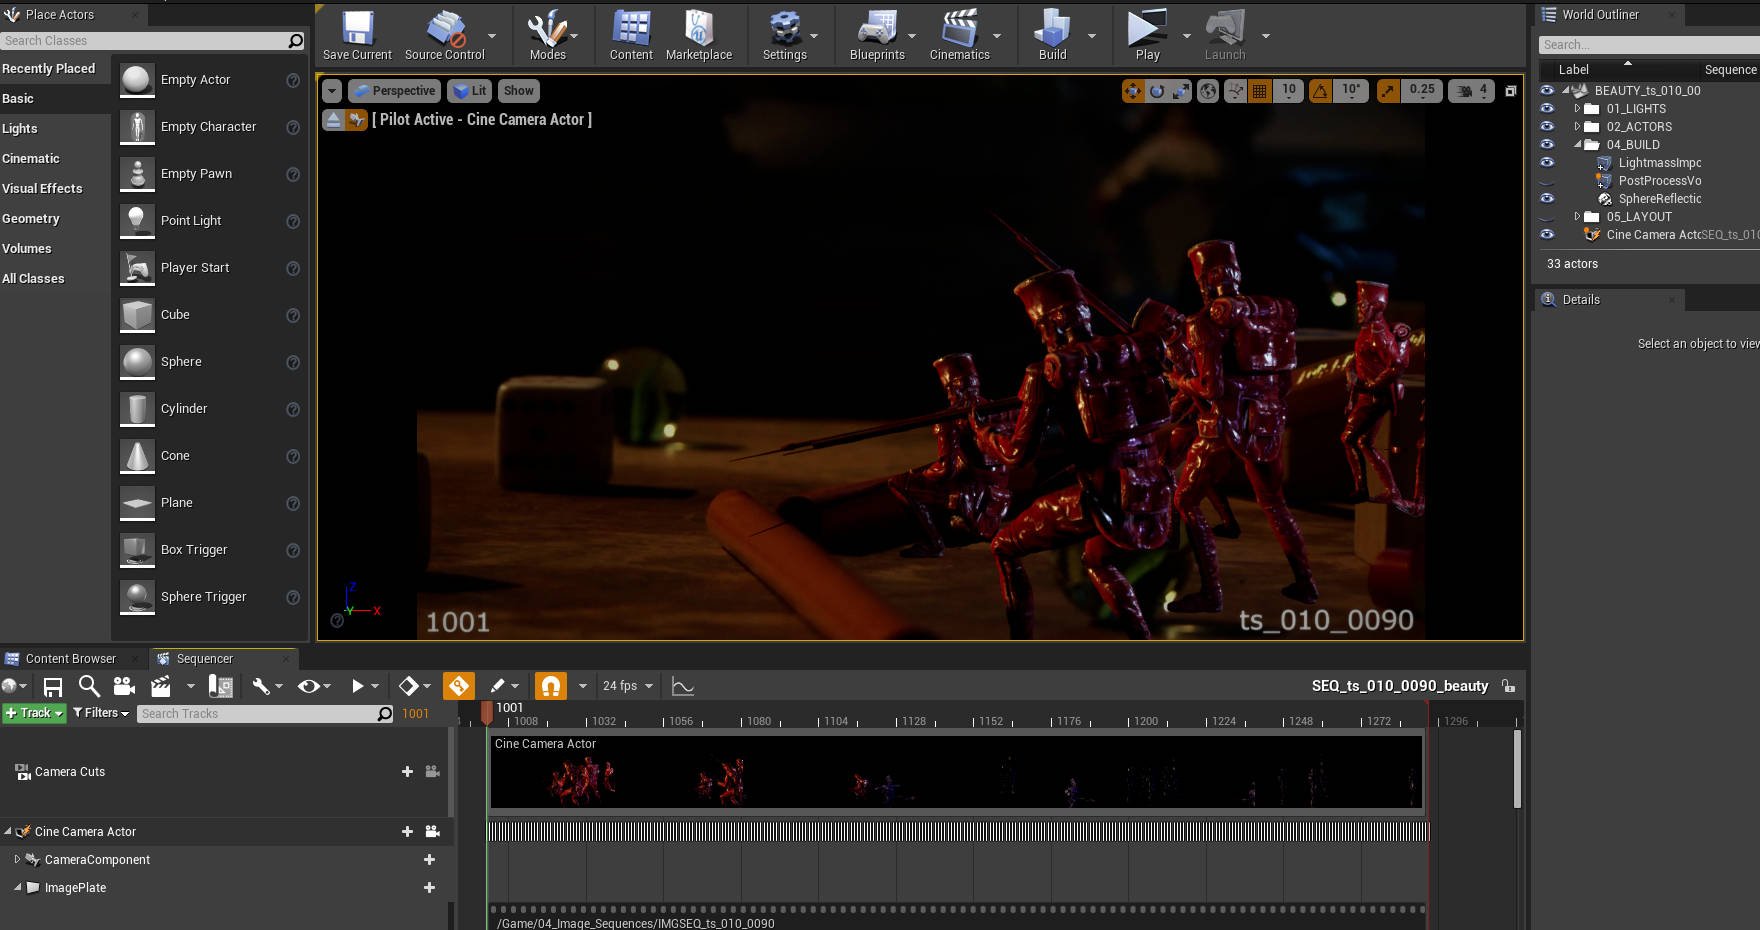
This is how sh010_0090 looked during the lighting pass, the plate is just appears very dark. This is great way to check the levels on the CG soldiers but sometimes I wanted to see some more, and maybe sample some more colours to add to my lights.
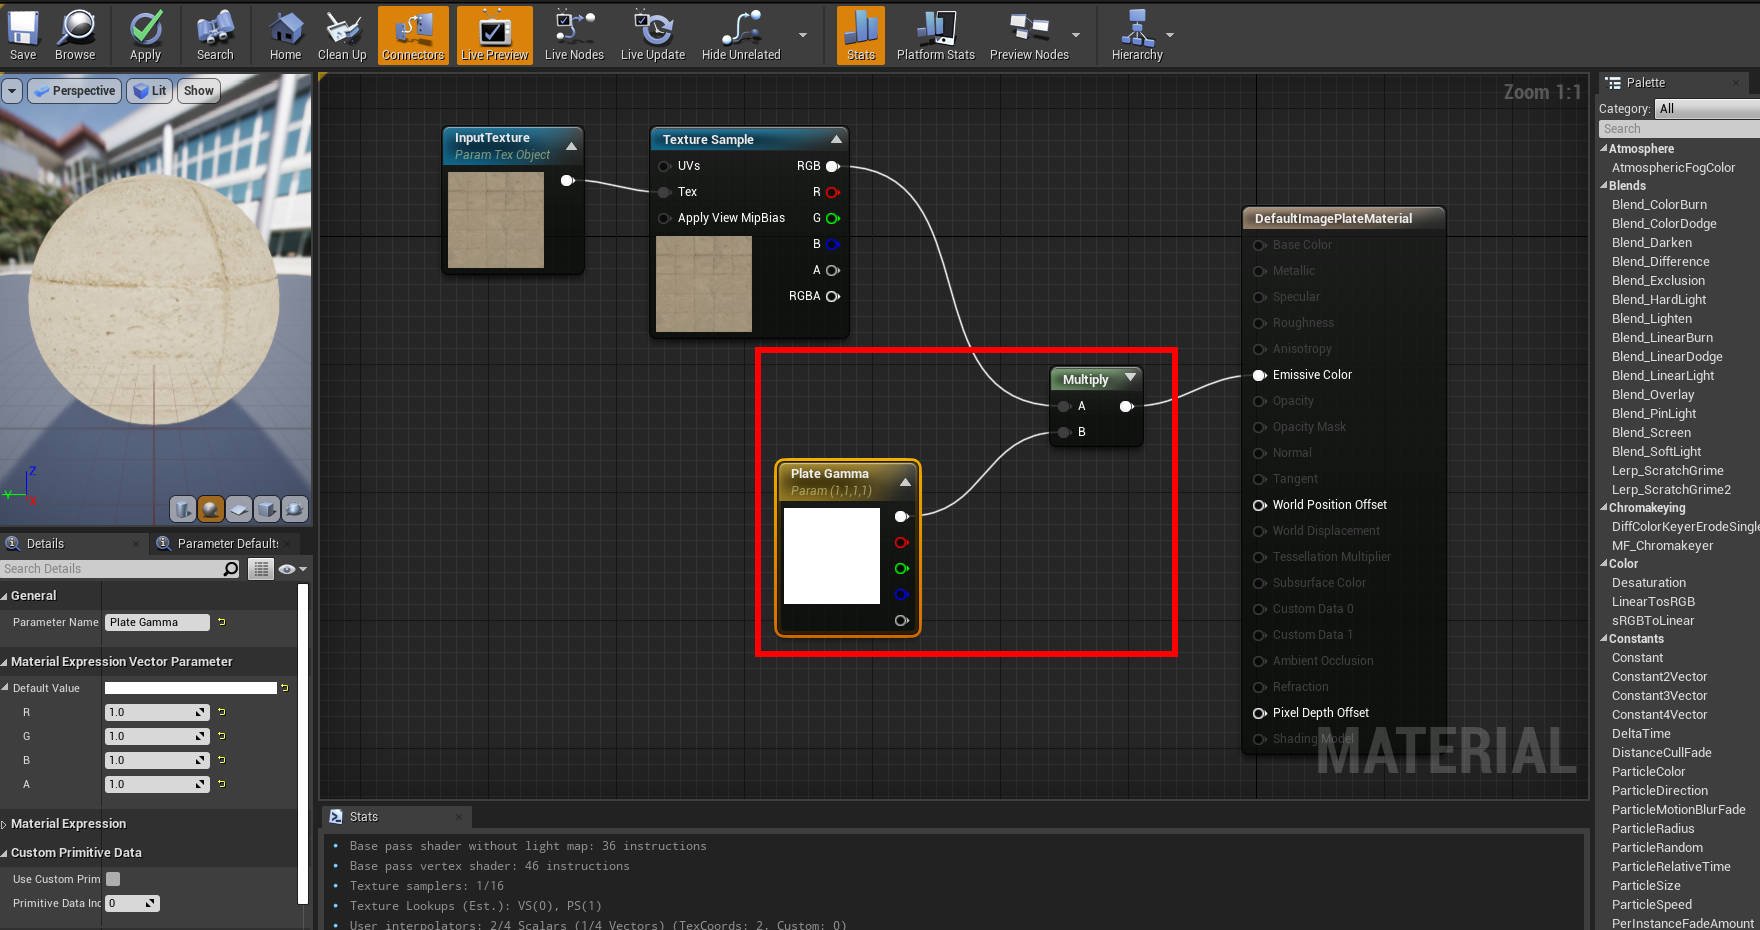
This is a pretty simplistic hack and gave me the solution without having to do anything complicated. Navigate to the material for the image plate, you can find it in the sequencer under your camera. Open up the material, and add a 3 Vector and Multiply node and pipe it in.
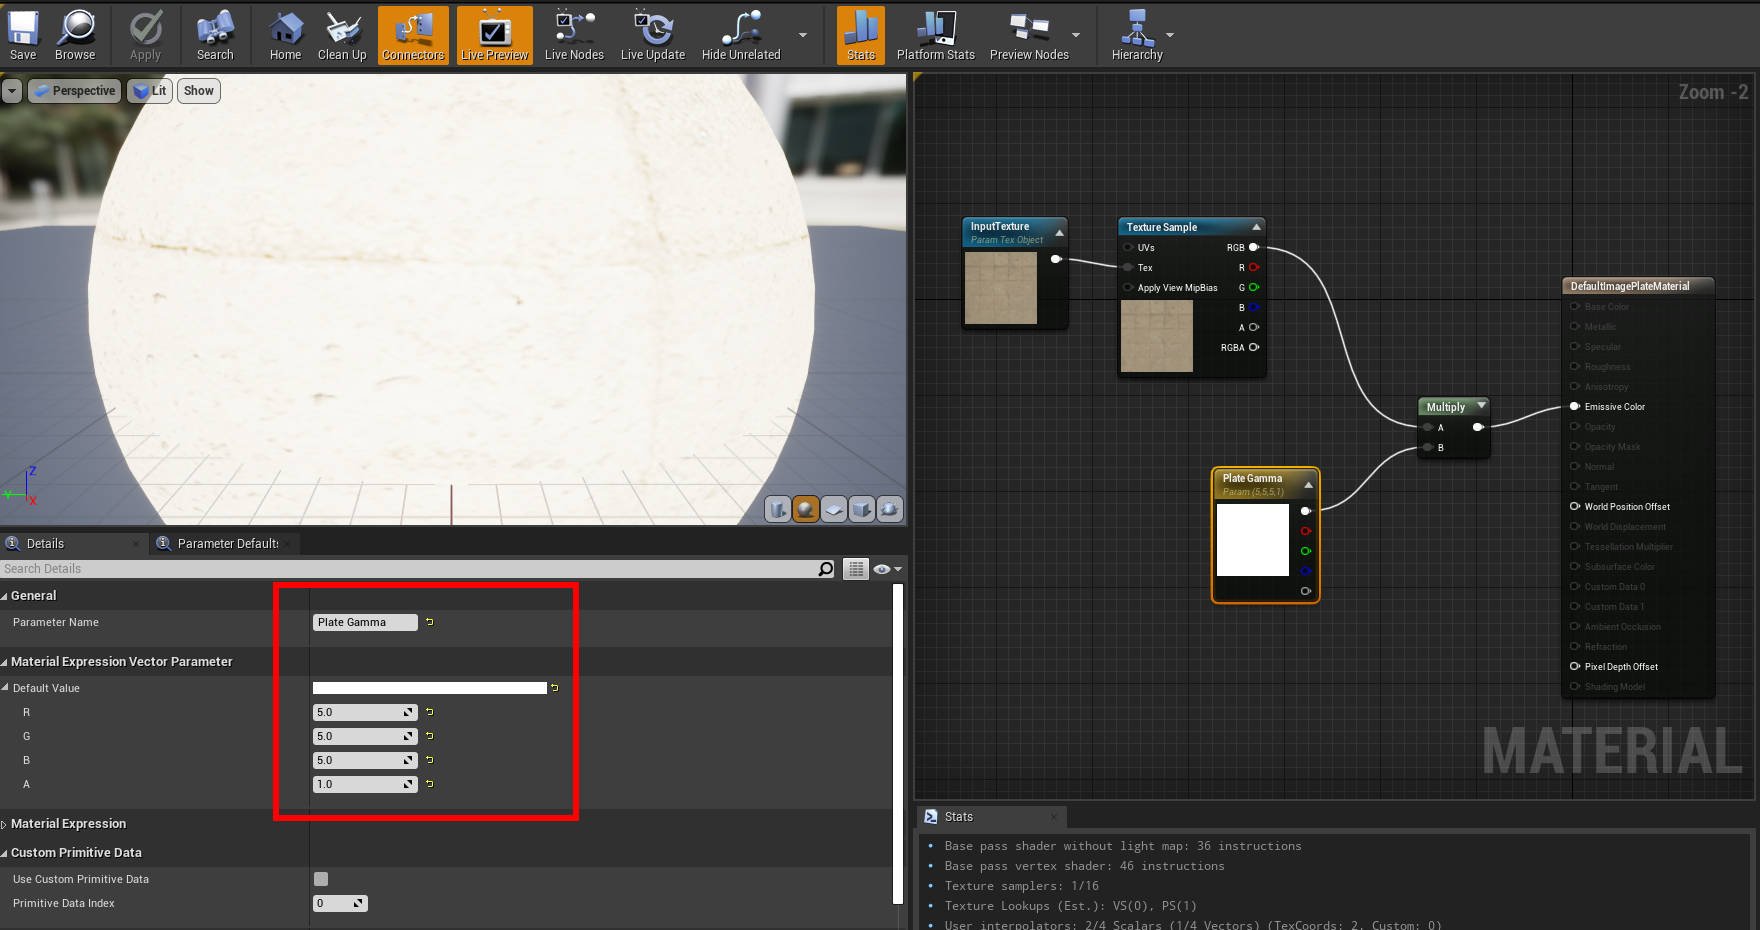
To increase the gamma of the image plate, you can simply increase the values in the RGB channels on the 3 vector node. 1.0 is default, normally 5.0 is as high as I go but adding a value of 2.2 starts to mimic the sRGB settings.
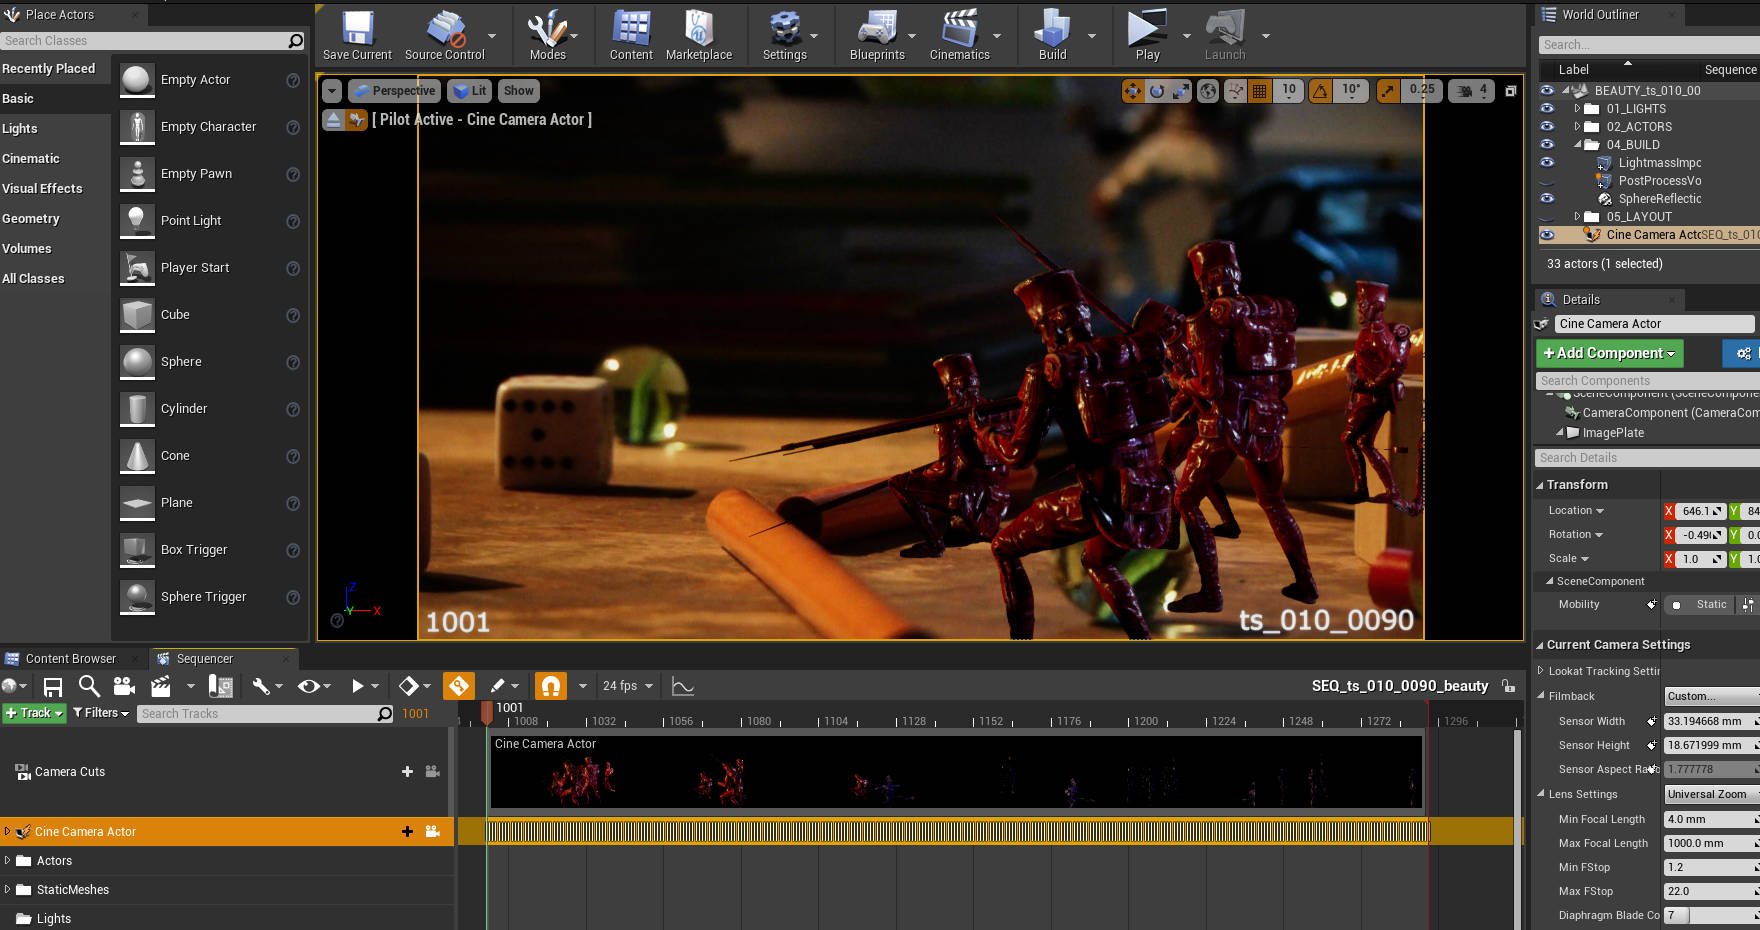
Here is the image plate with the gamma tweaked using the setup. You wouldn’t render it at this current level but it does lift the colours enough to make the plate much clearer while working. Remember to save the material after your tweaks and revert back to 1.0 if you are planning on rendering it along with your CG elements.