Finalling in Maya
Understanding Vellum and getting a simulation that added personality to the short was the goal. MtoA was the render of choice for this so bringing the geometry full circle to Maya allowed me to capitalise on my finalling knowledge from working with nCloth.
Using high contrast colours is a great way to spot intersections, if the purple colour starts to appear, it’s a good indication that the cloth has some penetration issues.


I often go through the shot and make a note of the frames that look particularly ugly and work to address those. Usually a fix to these frames fixes almost all of the cloth issues you are facing.
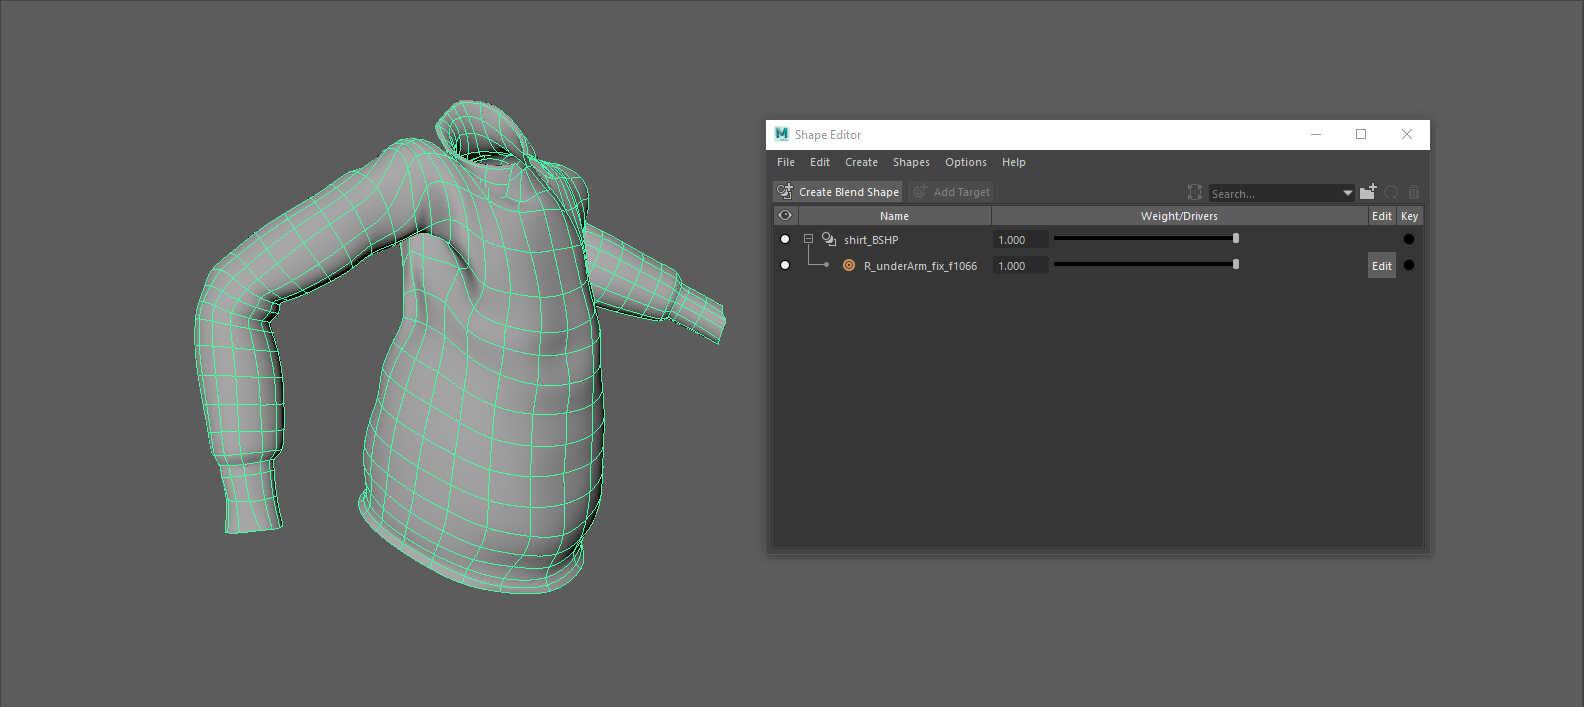
The shape editor in Maya functions like a big blendshape UI. First you create a blendshape node, I call it after the object name, here it’s shirt_BSHP. The _BSHP is part of my workflow from my nCloth setup. Then to start the finalling process we can make a target shape, I name this after the specific area I’m attempting a sculpt fix, here it’s R_underArm_fix_f1066, having the frame number just gives you a reference to the frame you started sculpting.
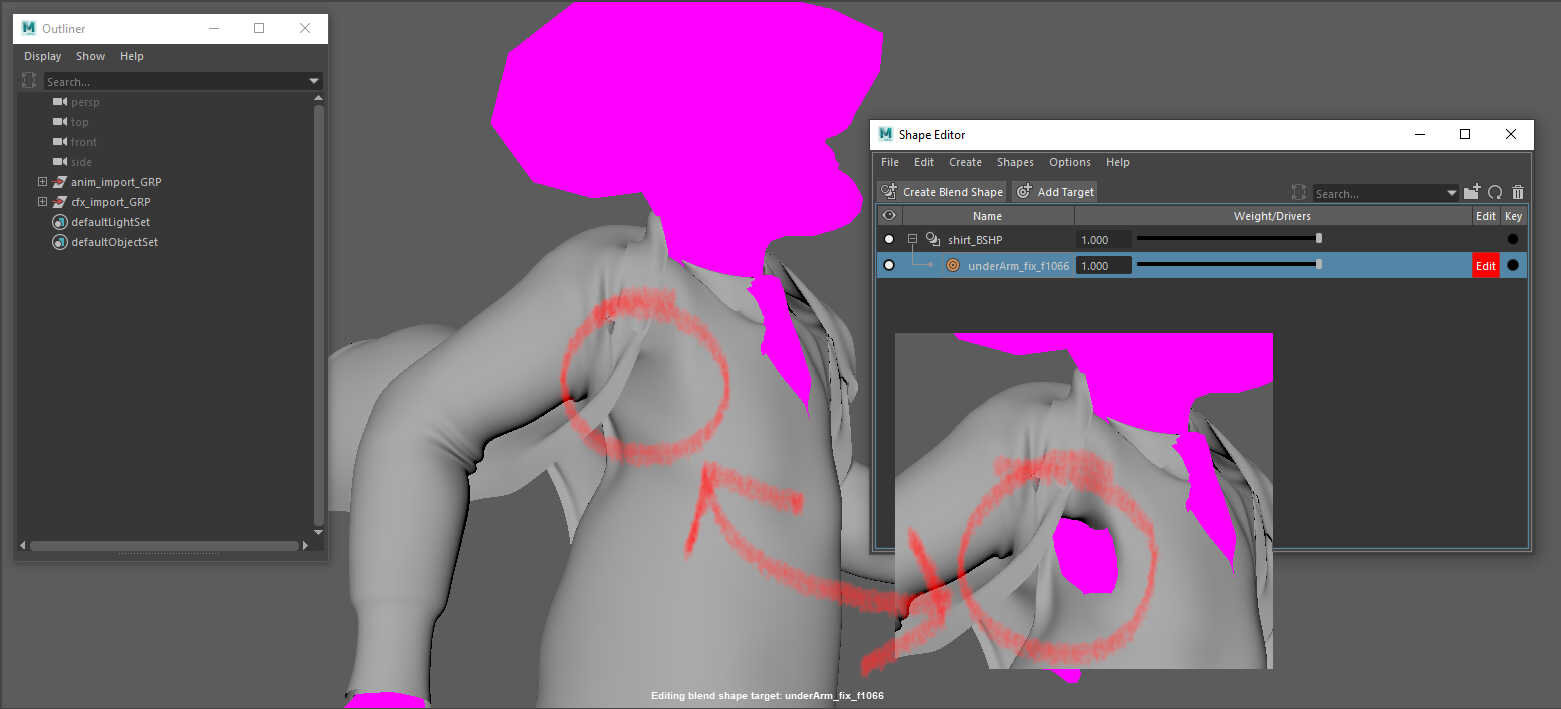
When using the shape editor you can quickly sculpt a fix using the sculpting tools, basically Mudbox inside of Maya. Once you have finished sculpting the new shape, click the red edit box. You can also animate from here, just like a regular blendshape.
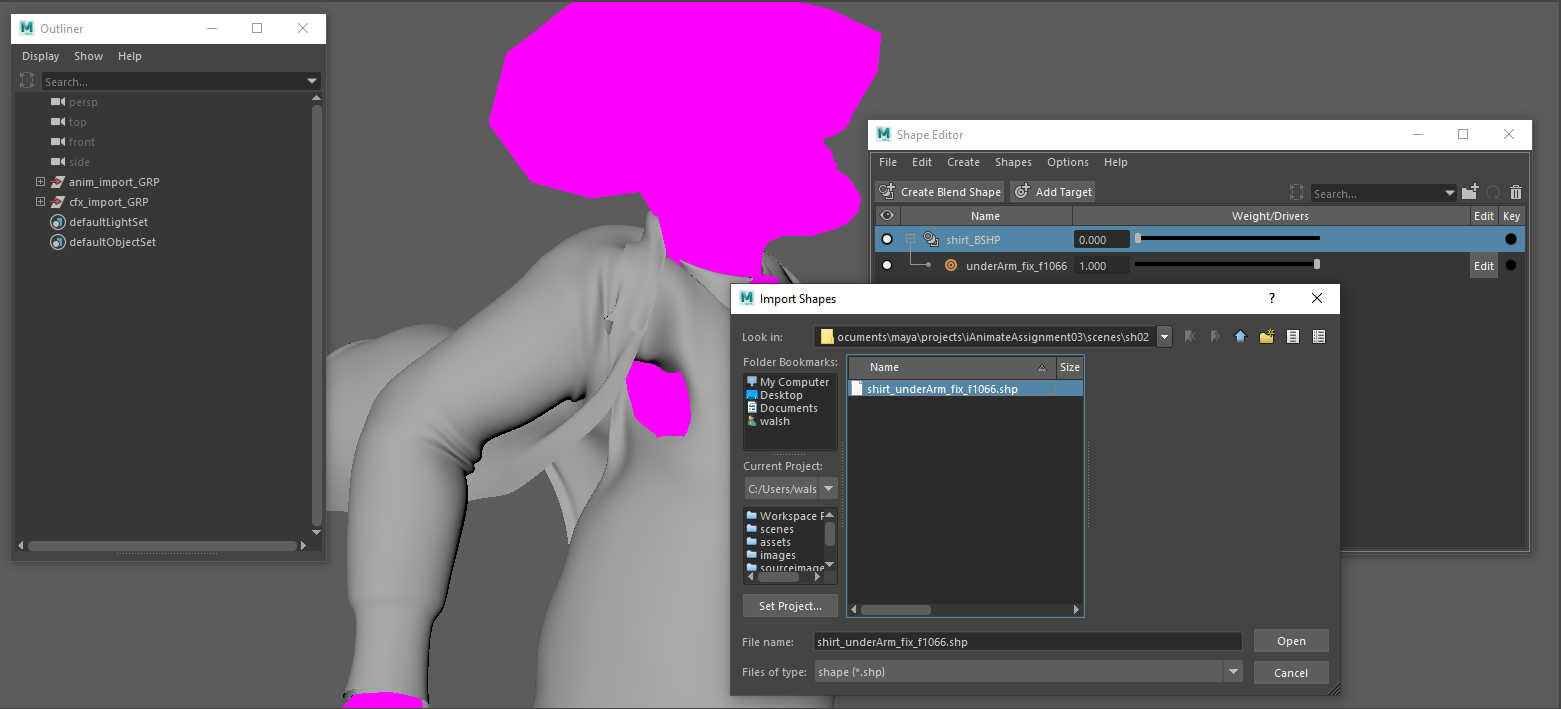
The shape editor has a very useful shape import and export function. As Indy appears in each shot and doing a very similar running action, I was able to use the sculpt fix from this shot in other shots. Also you can import and continue to sculpt - a little head start.