DCC Setup and Export
In a similar fashion to the setup in my nCloth workflow ramble, I customised the rig from iAnimate to suit my cloth workflow.
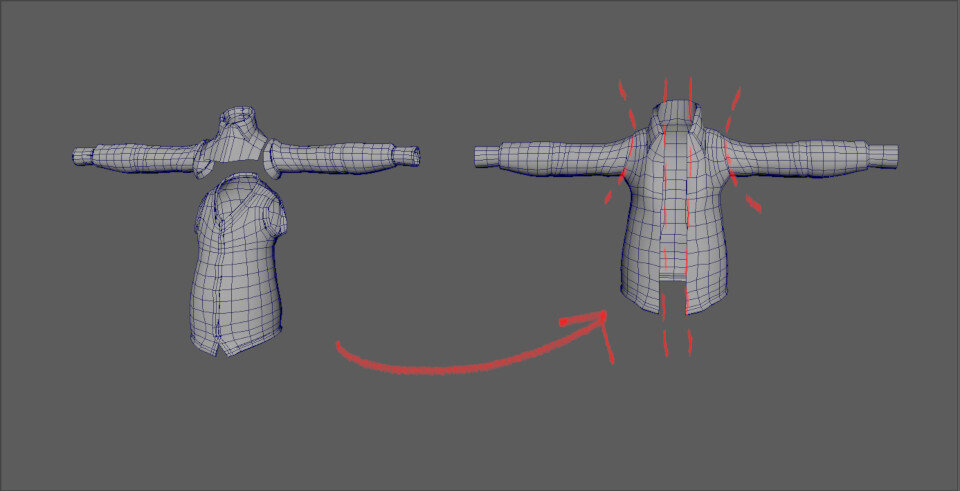
I used the existing geometry in the Albert rig to create the iconic leather jacket Indy is always wearing. I like to be efficient as possible, so I used the shirt and vest from the original and modified from there. The jacket only needed to flap around as Indy ran through the mineshaft.

Cache sets to were used to separate the specific exports for use in Houdini. This is a standard setup for my own workflow and you can simply export the _CFX and the _ANIM geometries as alembics. The _ANIM geometry were not used in Houdini as part of the simulation and were purely for use in playblack, it can really help to view renders with all the parts of the character visible.
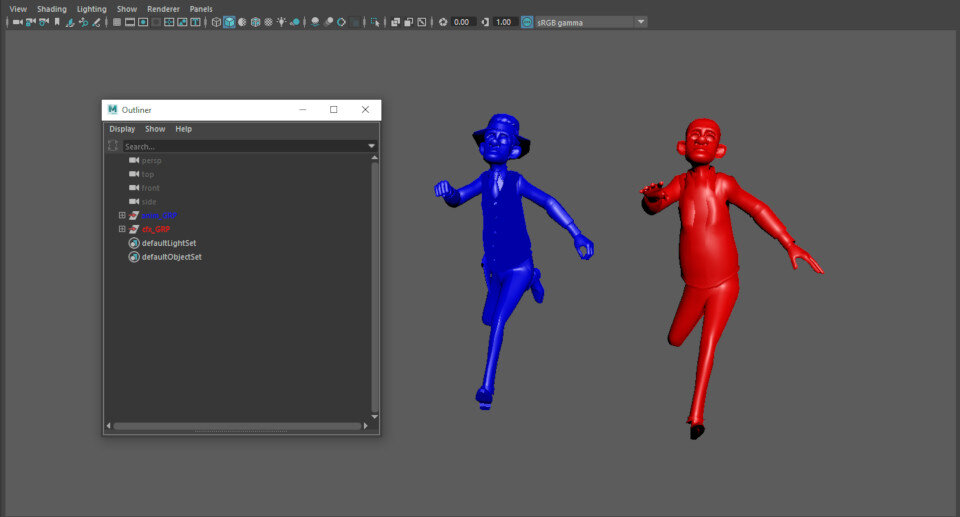
It’s always good to check your work and I have a simple Maya scene setup for this. I import the two exports from the animation scene and run a script to apply a couple of basic blinn shaders. Blue is the animation and Red the cfx, I can then quickly check either via scrubbing or a playblast that everything is good to be imported into Houdini. Outliner colours can be set to match the shaders also.