
I’m still developing my workflow and figuring out how best to set everything up that gives me the most flexibility when I’m working. I wanted to share how I approached creating the Unreal project for Red Smoke.

The main level, essentially an empty level and this acted as a container for all of my sub levels. I used the ML_ prefix to designate it and that would be used in the Unreal Reader node.
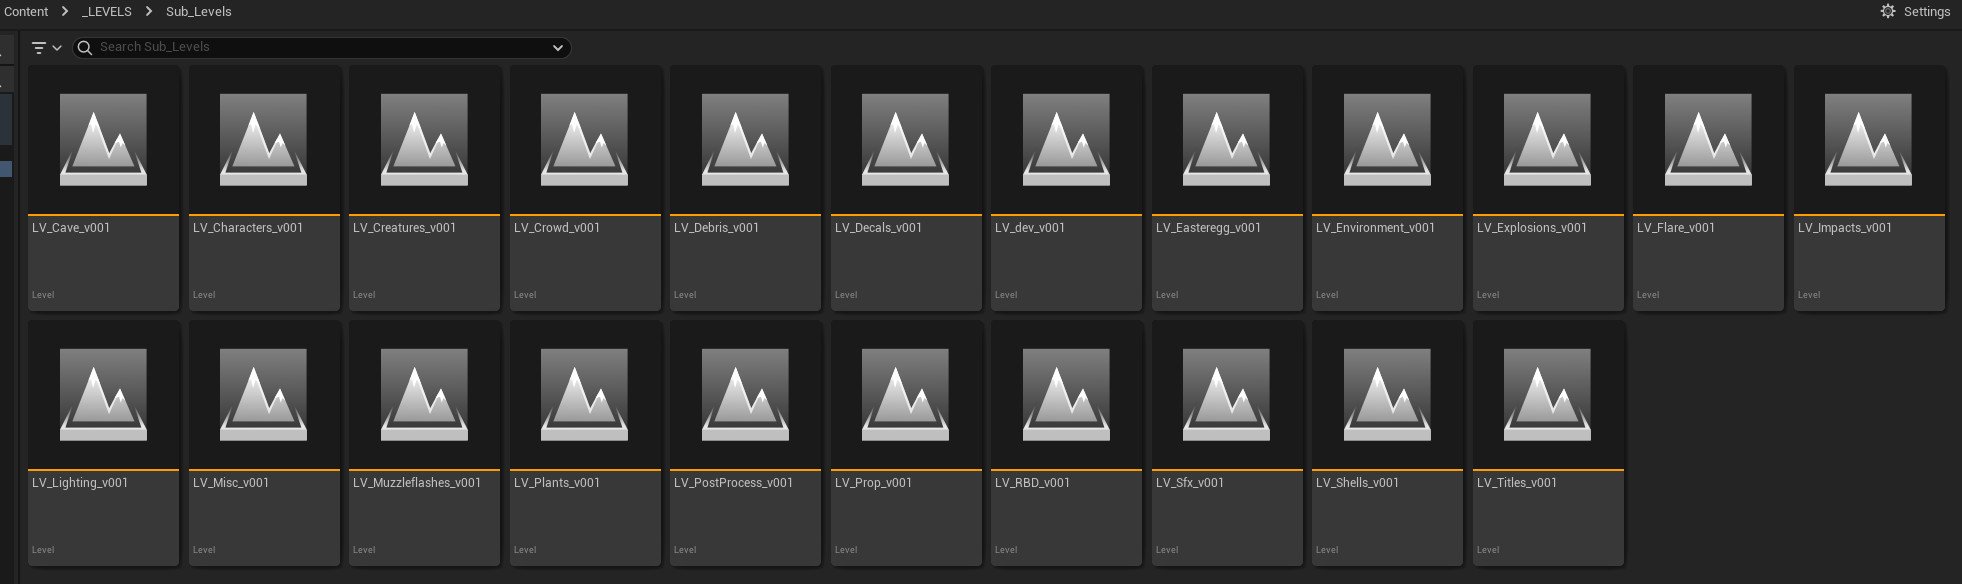
Each part was broken down into a sublevel and each component would have its own level, for example, LV_Characters_v001 contained only Nico-related assets. When importing assets I had to make sure I was adding them to the correct level. The setup was designed to be able to quickly hide parts when troubleshooting and it might prove useful when rendering for custom AOV’s.
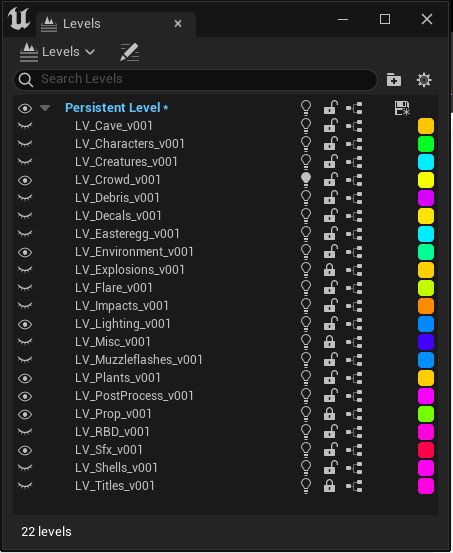

Here are all the levels nested under the Persistent Level or my ML. You can drag your sublevels over into this window. Make sure you right-click on the levels and set the Streaming Method to Always Loaded. You can force the visibility here by using the eye icon. When rendering this will be reverted to visible so be warned.

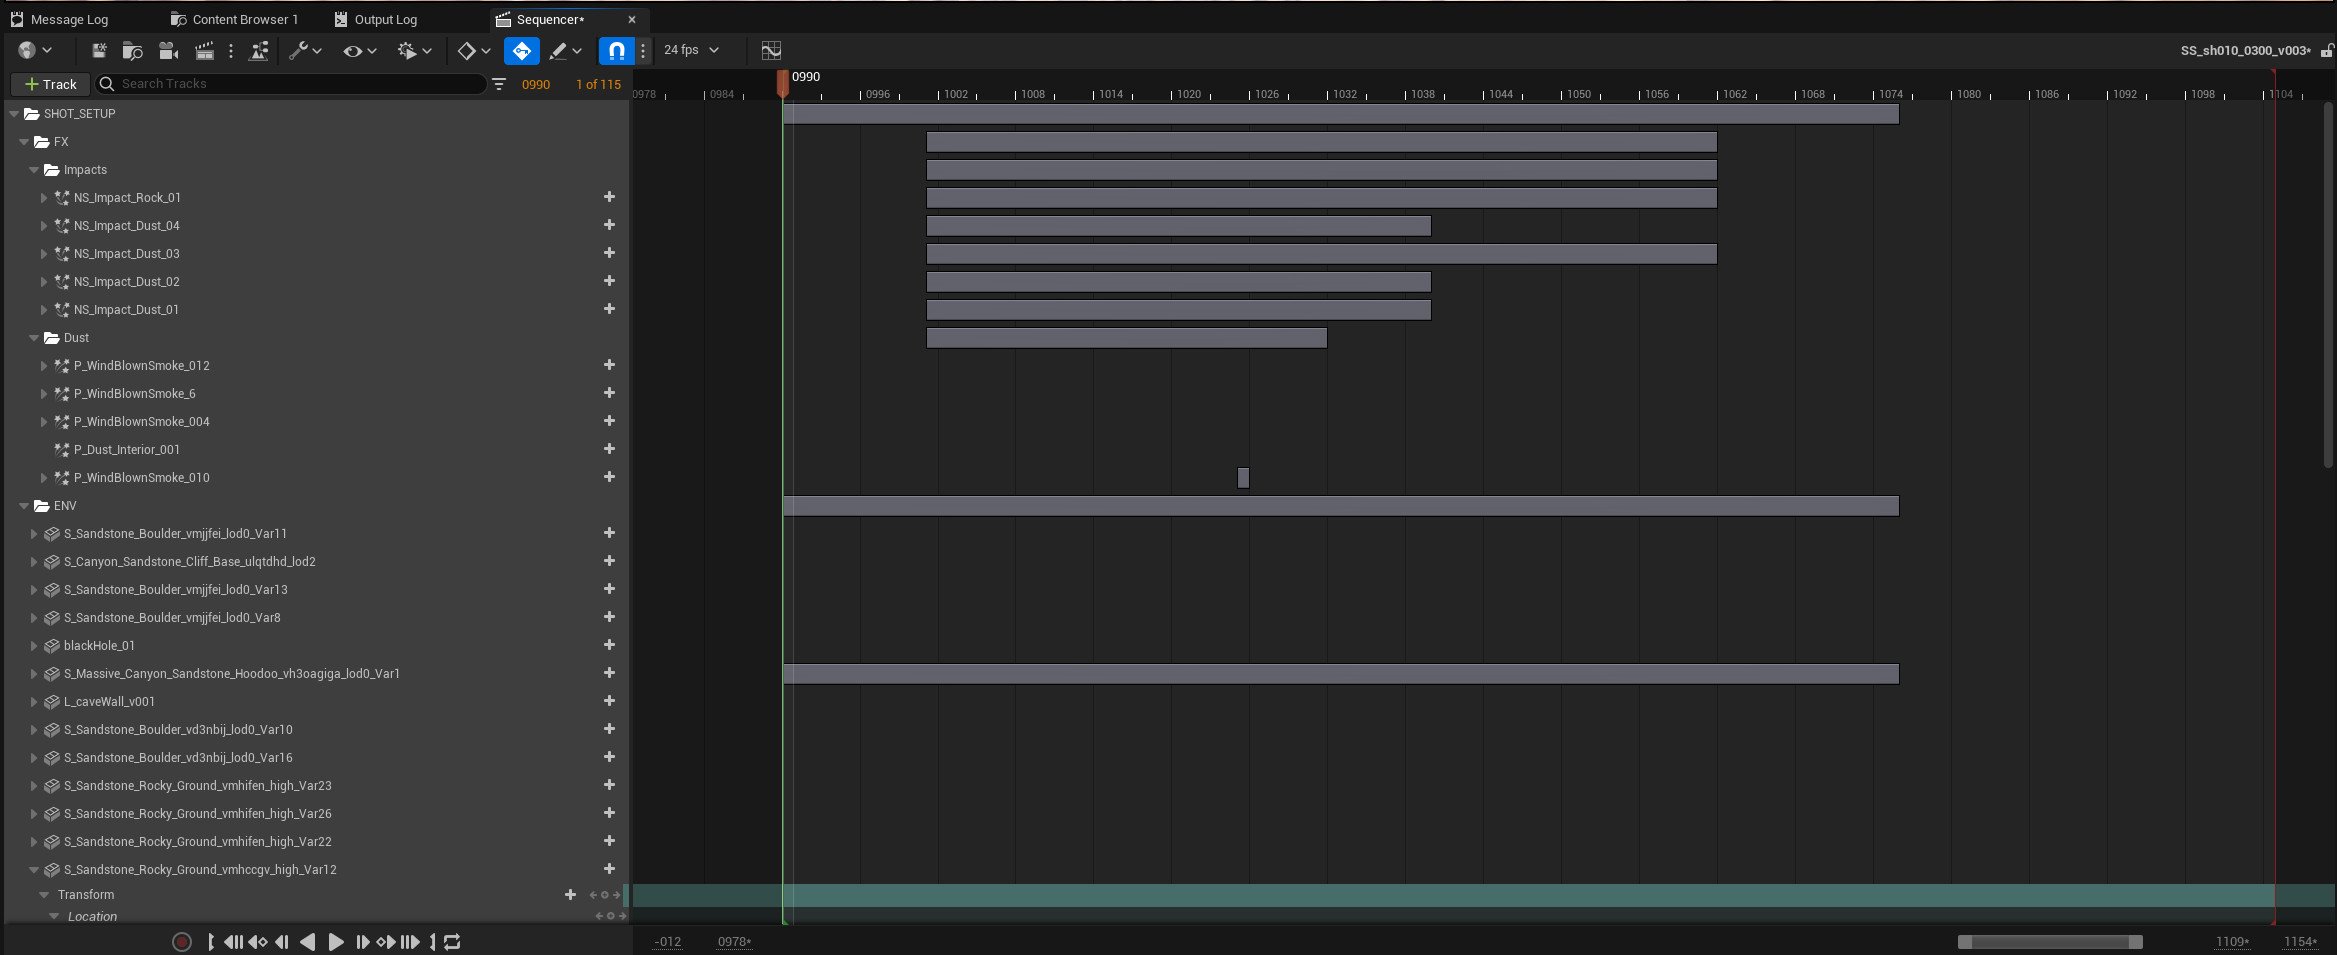
I used Level Visibility to control which levels would be seen in the sequencer and thus at render time. It was also a great way to remove aspects of the shots that weren’t needed. To set this up, simply add the Level Visibility track in the sequencer, change it to Hidden, and then drag the levels from the Levels panel to the main body of the track. I made all my level visibility tracks a subtle green colour, more for visual readability when jumping into the shots. If you hover over the track you can see which levels are currently hidden.

Each shot follows this main structure. The shot assets would be imported into a version folder and there would be a Level Sequence and two sublevels. One for the shot changes and the other would be the light setup. I designed this to try and mimic onset work. You typically have shots on a location which would be the LS_sh010_0300_v003 and that would contain all the main assets, such as Nico, the Bug, and the grenade. The subsequences, SS_sh010_0300_LGT_v003 and SS_sh010_0300_v003 would then be my custom shot-specific setups, be it moving the environment around or the lights. If you do it this way, make sure everything is added to your sequencer, if Possessable has a keyframe to lock it in place you run the risk of moving important pieces that will affect other shots. If your assets are Spawnable you wont have that issue.
For the shot setup, here I would add in my FX, which was the dust, impacts, or explosions, and position those. I would also drag in the ENV pieces and reposition them to better fit my composition. I liked doing it this way as I could have a bare-bones environment setup and then set-dress the shots by simply moving the pieces as if they were part of a set on a real film shoot.

For the light setup, here I would use my main default light setup and further tweak it. Sometimes the angle of the light wouldn’t work for a certain shot or the brightness would need to be increased, so having the lights in a sub-sequence gave me a nondestructive way to push the lighting and not have it disrupt other shot setups. I would also make a Hide folder and drop in the lights I wasn’t using, this made it easy to see which lights were being used in the shot.
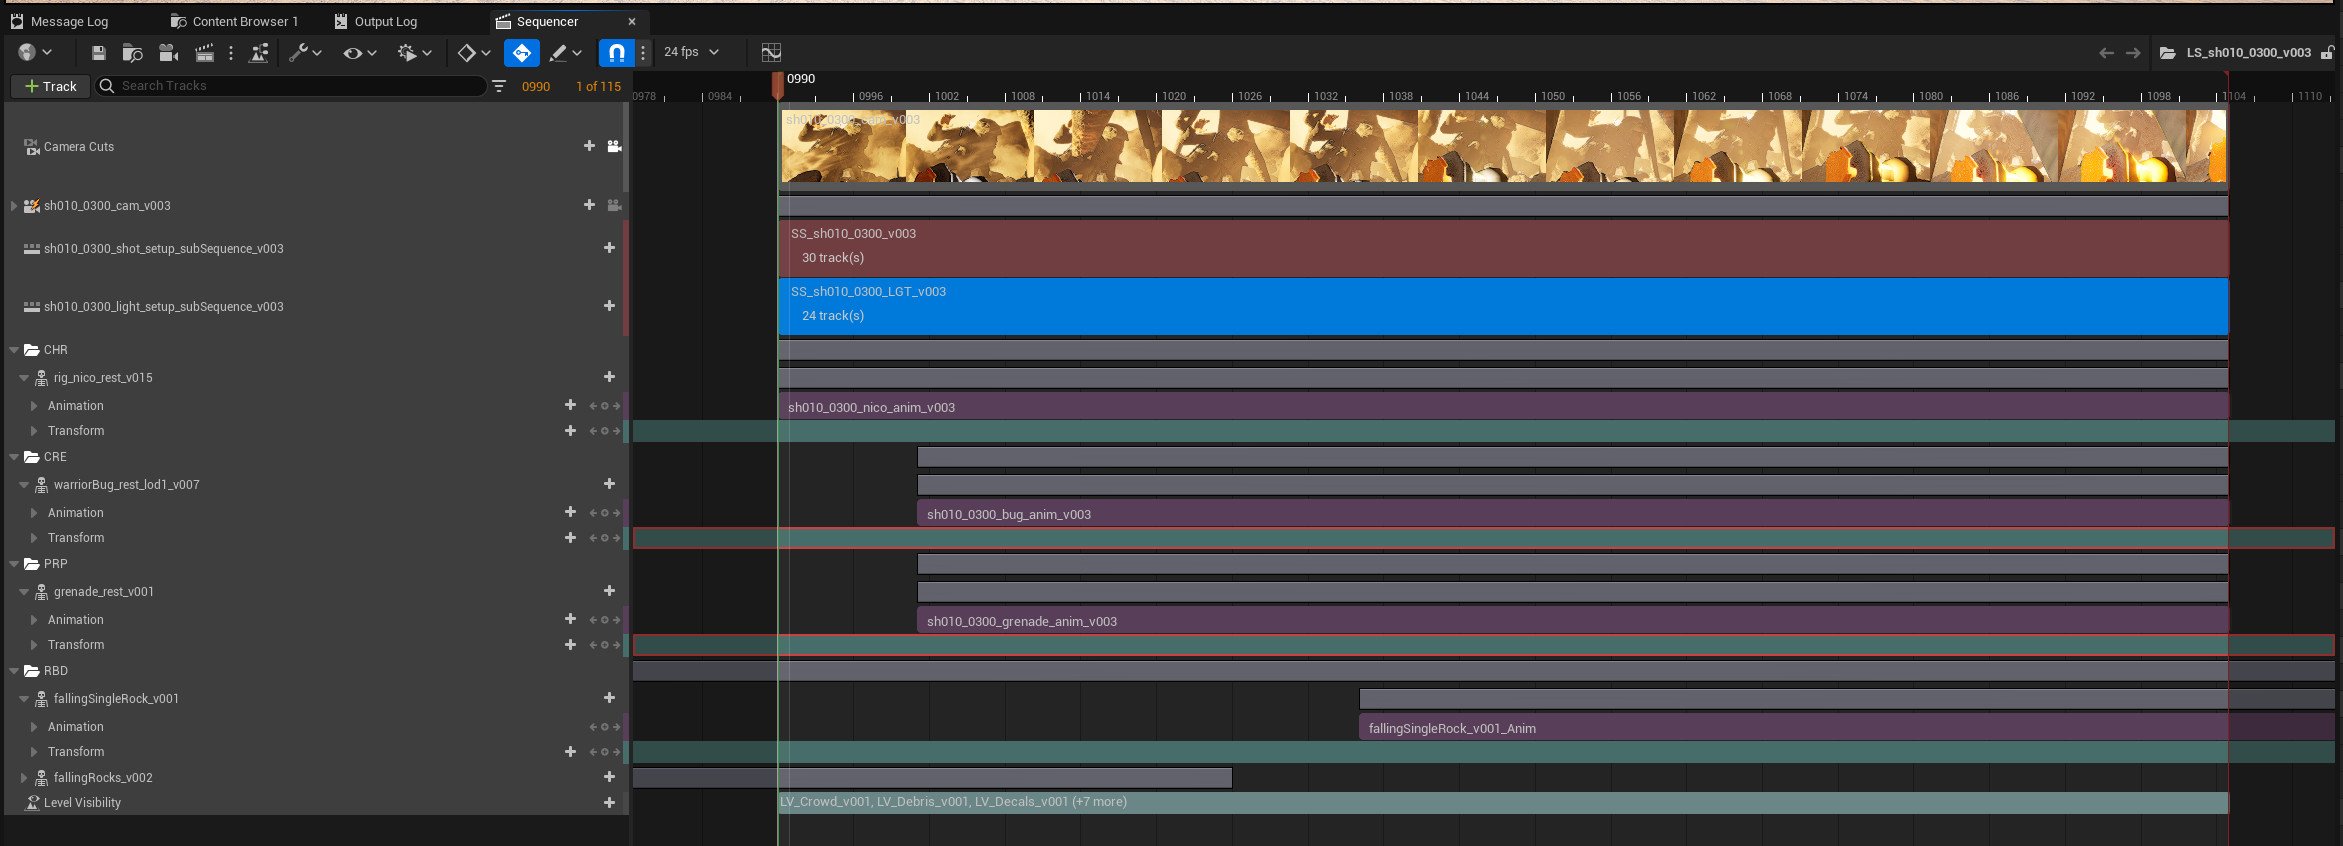
The final sequencer setup for LS_sh010_0300_v003. It follows on from the FBX wiki page and then I populate it with the assets, custom shot tweaks and then it’s ready for rendering. I used a custom Blue colour for the Light Sub Sequence so I could instantly see which sub-sequence was which. I tried to keep everything neat in here using the folders.

Unreal is pretty panel-heavy, I good idea is to customise your monitor real estate. This is my current setup, I like tearing off the render window and keeping all the sequencer work on the other monitor. This isn’t to say copy this but just an idea. Unreal on one monitor is okay but I found that I needed two when in unreal and be able to have access to all the needed information.
Monitor One UI Setup

Monitor Two UI Setup
To get the most out of the torn-off viewport, it’s best to set the camera to view the Camera Cut by clicking the camera icon, it’ll go white. Then in the viewport, in the options, check on Allow Cinematic Control and Game Mode. This will lock the camera to that viewport and having Game mode on, means won’t see any of the gizmos, dodads, or handles in the shot.

