Offline Editing
Unreal has a powerful editor within the software but I felt much more comfortable with a workflow similar to my standard VFX working day. Also as the rendering was all real-time, it was easy to export high quality images and bring them into the editor. Once you start using Unreal for your visualisation and film making you’ll find it hard to go back to traditional render practices.

Exporting the shots is fast and easy in Unreal but there are a few things to look at before hitting Capture Movie.
Image Output, I suggest outputting an Image Sequence at all times, Nuke Studio had issues with the .AVI renders
Resoultion, keep it to same aspect ratio as the shots and here I would often work at half or even quarter resolution to speed up the editing.
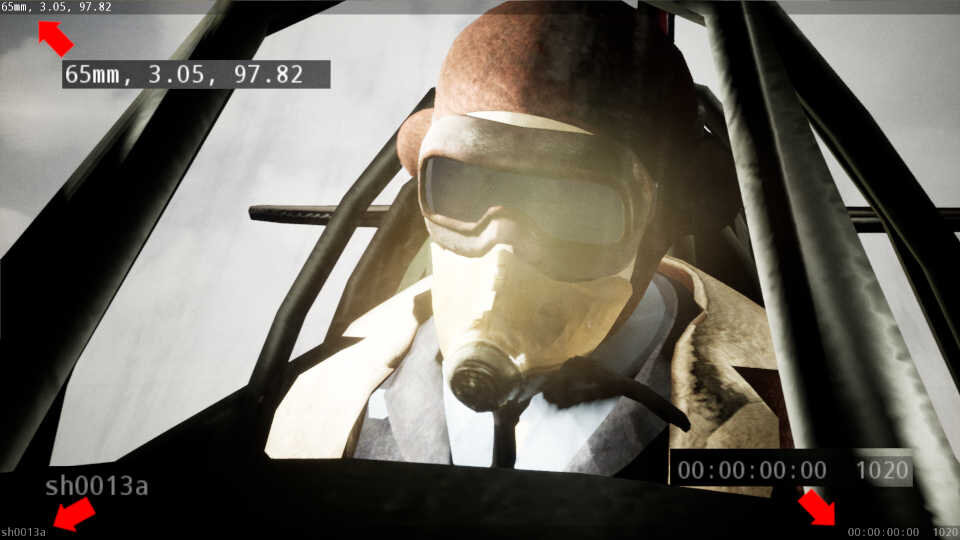
Burn Ins are incredibly handy when editing, you can quickly reference frame numbers and lens information. To clean up the export I often only wanted, Focal length, Shot Name and Timecode and removed the rest. This can be done by deleting the information in the text boxes.
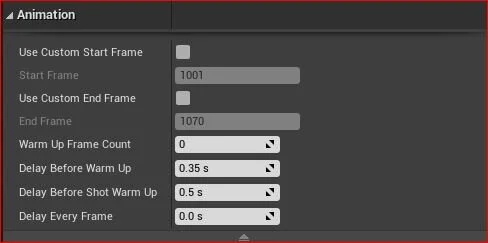
Something that caught me out was when exporting the shots for the first time, I would see a mismatch between the sequencer and the export. In the Animation section check the Delay settings, the values are 0.0 s at default so increase this. It’s essentially allowing the editor to warm up before committing to images to disk.
This is how the information looked once I modified the BurnIn settings in the export window. Just enough information and not bombard me with data I didn’t really need. This was especially useful when updating the google spread sheet.